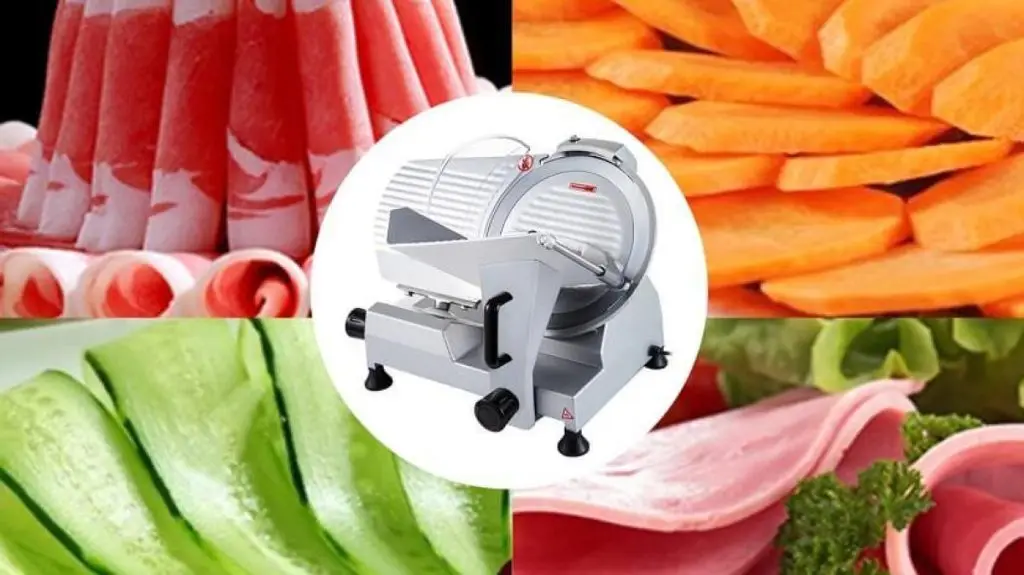
If you’re a meat lover and love to cook your meals yourself, then you must have heard about the VEVOR Meat Grinder. This amazing equipment can make your cooking experience a lot easier and save you a lot of time.
However, like any other equipment, you need to know how to operate it properly to get the best results. That’s why we have created this VEVOR Meat Grinder Manual to help you understand everything you need to know about this product. Our guide provides detailed instructions on how to use the grinder, clean it, and troubleshoot common issues.
Table of contents
Note:
If the minced meat is not discharged smoothly or in the form of paste; the causes and remedies could be:
- The screw cap is tightened too much thus, the cutting blade does not contact properly with the cutting plate; readjust it
- The cutting plate is blocked; clean it
- Cutting Blade edges is dull, grind or replace it.
Jamming
When the motor is locked, or when the motor continues to function, but no meat comes out of the cutting plate, due to jamming of bone or other materials that stop the motor, switch off.
- Do not switch on.
- Turn the switch to REVERSE to clear the jamming of bone or other materials. (If have)
Cleaning the VEVOR Meat Grinder
Disassembling
Make sure that the motor has stopped completely.
Disconnect that plug from the power outlet.
Screw cap sides are 1 planes, convenient for unscrewing. If the screw cap is too tight, please knock at the planes with a soft-handle. Then screw cap will be unscrewed easily.
Unscrew the locking knob and take out the head (with cutting plate; cutting blade and feed screw). Then, put the head mouth downward to take out the cutting plate, cutting blade, and feed screw.
Cleaning
Remove meat etc. Wash each part with warm soapy water.
- A bleaching solution containing chlorine will Discolor aluminum surfaces.
- Do not immerse motor housing in water, but only wipe it with a damp cloth.
- Thinners and benzenes will crack or change the color of the unit.
A little salad oil on ①-④after washing and drying will keep them lubricated.
Care is needed when handling the cutting blade during cleaning.
Don’t use a perforated disc with holes of ≥8 mm diameter or smallest with unless an additional protective hood is provided at the discharge outlet.
Technical Specifications
| TYPE | #12 | #22 |
| Productivity | 150kg/h | 250kg/h |
| Speed of blade | 193-225r/min | 193-225r/min |
| Dimensions/CTN | 50x29x36.5cm | 50x29x36.5cm |
| GW/N.W | 19.0kg | 22.0kg |
Cautions
● Unplug when assembling or disassembling the unit Close supervision is necessary when any appliance is used near children.
● When carrying the unit, be sure to hold the Motor Housing with both hands, not to hold only Hopper Piate. Be careful to carry the unit because it is very heavy.
● Never feed food with hand. Use Food Pusher.
● Do not grind hard foods such as bones and nuts.
● Do not grind ginger and other materials with hand fiber.
● To avoid jamming, do not force to operate the unit with excessive pressure.
● If other unit jams due to hard maternal lodged onto Feed Screw or Cutting Blade. Switch off immediately and clean the unit. (See “Jamming” on page “3”)
● Never try to undo the parts or to repair the unit by yourself. If the supply cord is damaged, it must be replaced by a special cord from your dealer or its service agent.
● The appliance shelf warn against misuse.
● The appliance is so positioned that the plug is accessible.
Before using
● Make sure that the voltage and frequency indicated on the bottom plate are the same as your Local supply, and that the external earthed wire is reliably connected.
● Wash all the parts(except those that do not touch food ① ②and ⑤)in warm soapy.
● Before plugging in, ensure the switch is off.
Parts identification
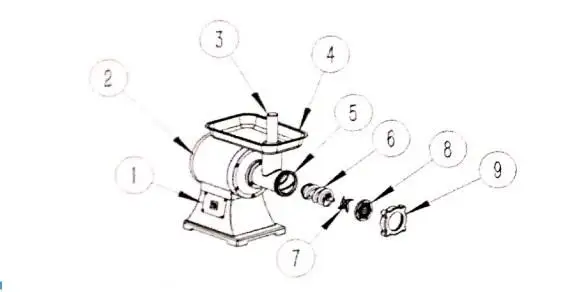
- Switch
- Motor Housing
- Food Pusher
- Hopper Plate
- T-tube
- Feed Screw
- Cutting Blade
- Cutting Plate
- Front Cap
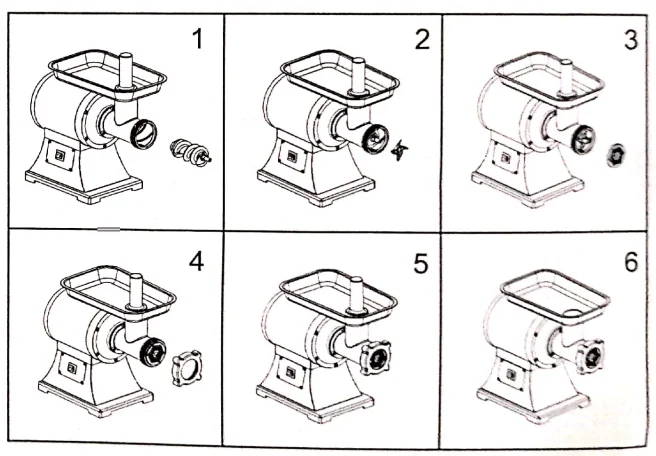
To mince meat (Assembling)
1. Place the feed-screw into the head. Login first, by turning it slightly until it is set into motor
2. Place the cutting blade onto the feed screw with the blade facing the front as illustrated. If it is not fitted properly, meat will not be ground.
3. Place desired cutting blade next to cutting blade gap. Align the pin to head.
4. Screw the cap into peace until tight.
- Do not over tighten.
Place the hopper plate on the head and fix it into Position. Locate the unit on a firm place.
- The air passage at the bottom and the side of the motor housing should be kept free and Not blocked.
(Mincing meat)
Cut all foods into pieces so that they fit Into chopper opening. Plug in, then switch an.
5. Feed foods into chopper plate.
- Use the food pusher. After use, switch off and unplug.
Conclusion
To sum up, the VEVOR Meat Grinder is a powerful and efficient appliance that can help you grind meat easily and quickly. With the help of the VEVOR Meat Grinder manual and PDF guide, you can learn how to use the grinder correctly and take care of it to ensure it lasts a long time. So, if you’re looking for a reliable meat grinder that can help you create delicious homemade meals, the VEVOR Meat Grinder is definitely worth considering.

