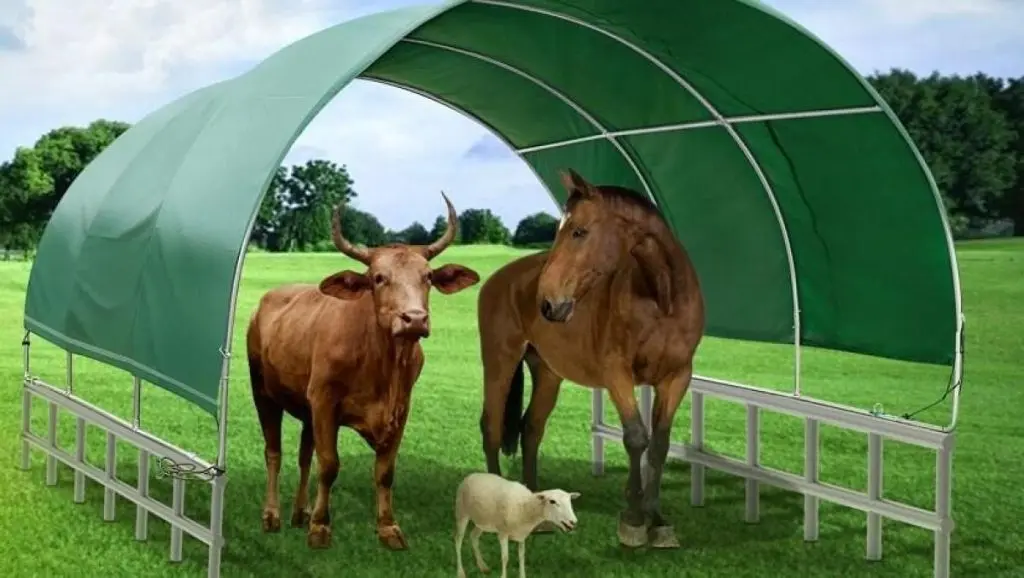
When you think about a chicken, do you ever picture an egg? From a fertilized egg to a cute little chick, the process is called incubation. So, another frequently asked question is, how long does it take to incubate chicken eggs? This process usually takes around 21 days. A fertilized egg has a high probability of becoming a live chicken in an incubator after the process is completed.
Ensuring the egg is kept in an optimum environment is the art of incubation. One way to simulate a mother hen’s natural care is to keep the eggs at a consistent temperature and turn them often. Although it may be difficult, with the right resources and strategy, it is possible to maintain this balance.
To achieve the desired result in egg incubation, you need a high-quality incubator. While there are several options in the market, we recommend the VEVOR egg incubator because of its outstanding quality. Its user-friendly design makes it perfect for any poultry farmer regardless of experience. The VEVOR incubator features a mechanical rotation and constant temperature management, ensuring the hatching process doesn’t require a lot of work.
Table of contents
Understanding the Incubation Process
A fine balancing act between science and nature characterizes the incubation process of chicken eggs. Here, technology mimics the nurturing touch of a mother hen to facilitate the birth of a new life. Anyone hoping to successfully hatch their own chicks must have a firm grasp of this complex process.
The Basics of Chicken Egg Incubation
The essence of incubation is contrasting the use of artificial and natural processes. Naturally, a broody hen will give the required warmth and turn the eggs with an innate sense of precision. Incubators artificially mimic the hen’s natural warmth and activity levels by keeping a controlled environment.
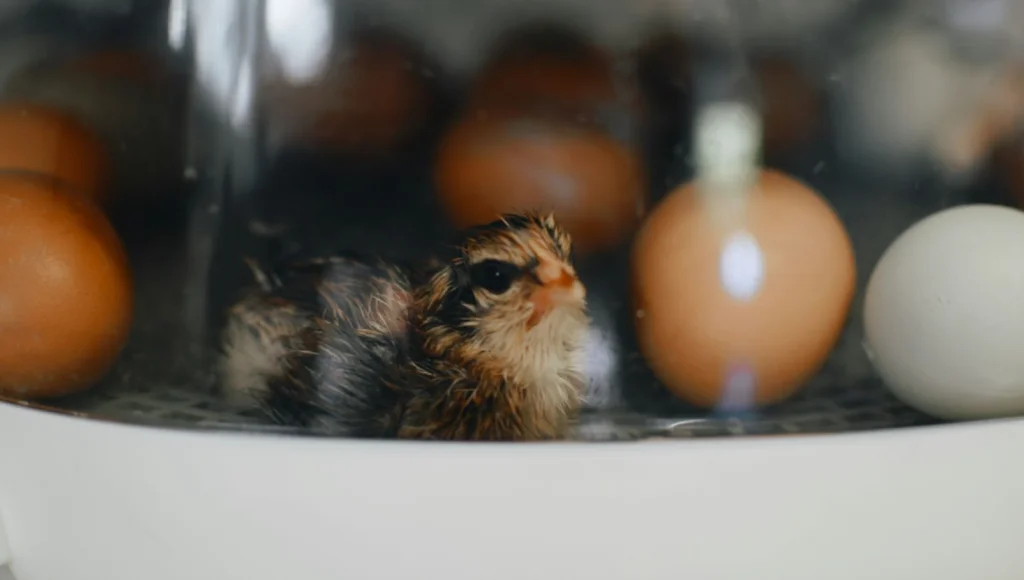
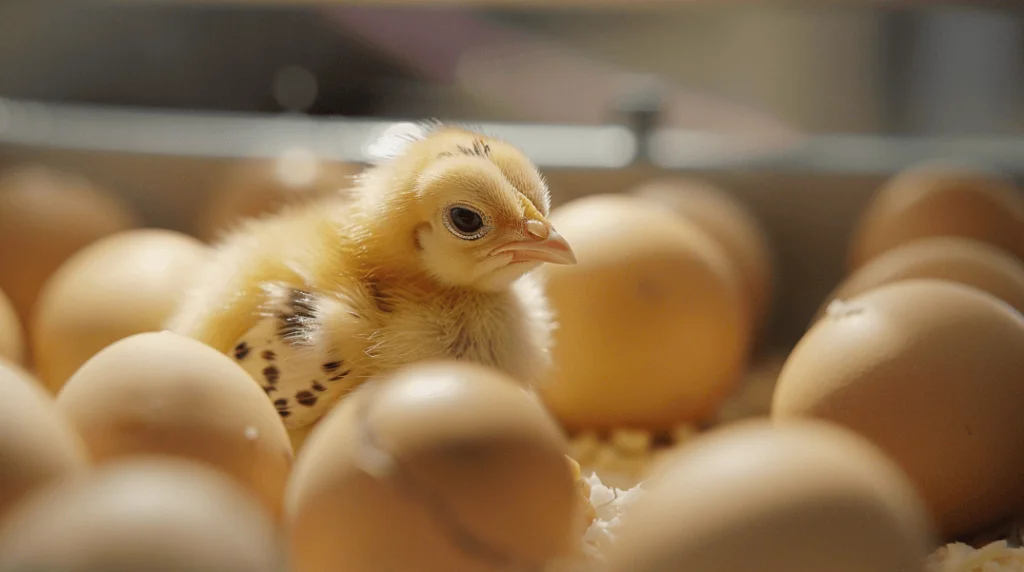
It usually takes 21 days for a chicken egg to go from being a fertilized egg to a fully formed, breathing chick. During this crucial time, the embryo reaches a new developmental milestone every day.
Key Factors Affecting Incubation
Temperature, humidity, and rotation are the three requirements for effective incubation. Chickens lay their eggs best in environments with temperatures between 99.5°F (37.5°C) and 101.5°F (38.611°C), relative humidity of about 55% for the first 18 days and 65–70% in the last days. You have to turn the eggs often to keep the embryo in its shell and to distribute the heat evenly.
Further inquiries usually prompted by the ongoing incubation process include: What is the best way to place eggs: on the side or straight up? What amount of time should pass between turns? Also, how about chilling at regular intervals? The standard practice for incubating eggs is to follow the same steps chickens take when laying their eggs, which typically involves frequent turning and exposure to cooling cycles.
Properly hatching chicken eggs requires knowledge of the incubation process. By regularly checking the temperature and humidity levels and flipping the eggs over, you can grow a clutch of healthy, self-sufficient chicks.
How Long Does it Take to Incubate Chicken Eggs?
Egg incubation is an interesting process that occurs over the course of 21 days. Every day is crucial because the embryo undergoes individual developmental changes that are essential for the hatching of a healthy chick.
The 21-Day Cycle Explained
The chicken egg incubation time is 21 days. It takes this long for a fertilized egg to grow into a baby chick that is ready to hatch.
- Week one: The embryo spends the first week in the egg sac, developing its support structure. About the third day, the heart begins to beat, and by the end of the week, the framework for the majority of the body’s organs and parts is laid.
- Week two: At the two-week mark, a chick’s distinctive shape starts to emerge in the embryo. At the fourteen-day mark, the embryo is able to move and react to noises, and its beak and feathers begin to unfold.
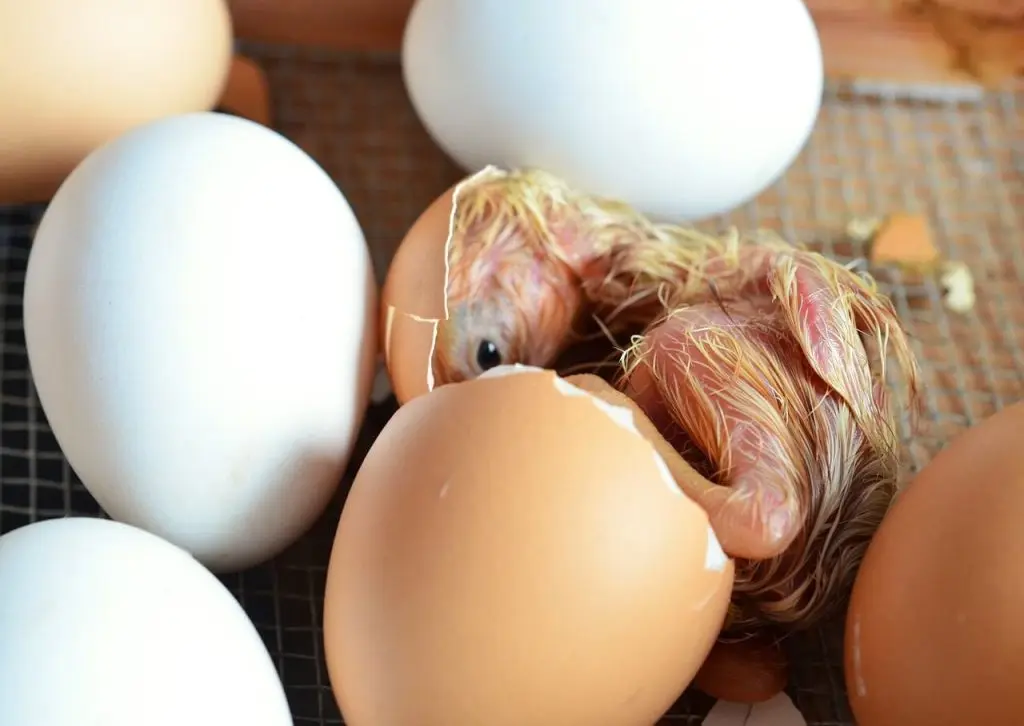
- Week three: When the embryo is in its last week of development, it expands at a rapid pace, eventually filling up the entire egg. Subsequently, the embryo’s body gets sustenance from the yolk sac. On day 18, also called “lockdown,” the chick is nearly ready to hatch since it has nearly fully developed. With its beak pointing towards the air cell at the blunt end of the egg, the chick aligns itself for hatching.
An effective hatch requires meticulous attention to detail and patience throughout the entire cycle. Temperatures between 99.5°F (37.5°C) and 101.5°F (38.611°C) are required, with humidity levels ranging from 55 to 70% during the first 18 days and 65 to 70% in the days leading up to hatching.
Variations and Exceptions
Not every egg follows the 21-day rule to the letter. There are a number of possible causes for why some eggs may hatch a day or two before or after the expected time. Incubation temperatures or humidity levels that are too high or too low could cause the eggs to hatch too soon.
Larger eggs, older breeder eggs, or eggs that were kept for an excessive amount of time prior to incubation could experience delay in hatching. As these variances show that keeping a careful eye on the incubation environment is crucial for achieving the optimum results.
Much of what happens during incubation depends on environmental variables as well. The incubation periods and the well-being of the growing chicks are quite susceptible to changes in humidity and temperature. Enough ventilation is also required in the incubator to maintain a consistent temperature and eliminate any surplus of gasses or moisture.
The VEVOR Egg Incubator: A Game Changer
To achieve a perfect incubation process, you must invest in a quality egg incubator. One of the best options in the current market is the VEVOR Egg Incubator. The incubator revolutionizes the way eggs hatch. It makes incubating eggs so much easier and faster, and it has completely changed the way poultry owners conduct the incubation process.
Unveiling the VEVOR Egg Incubator
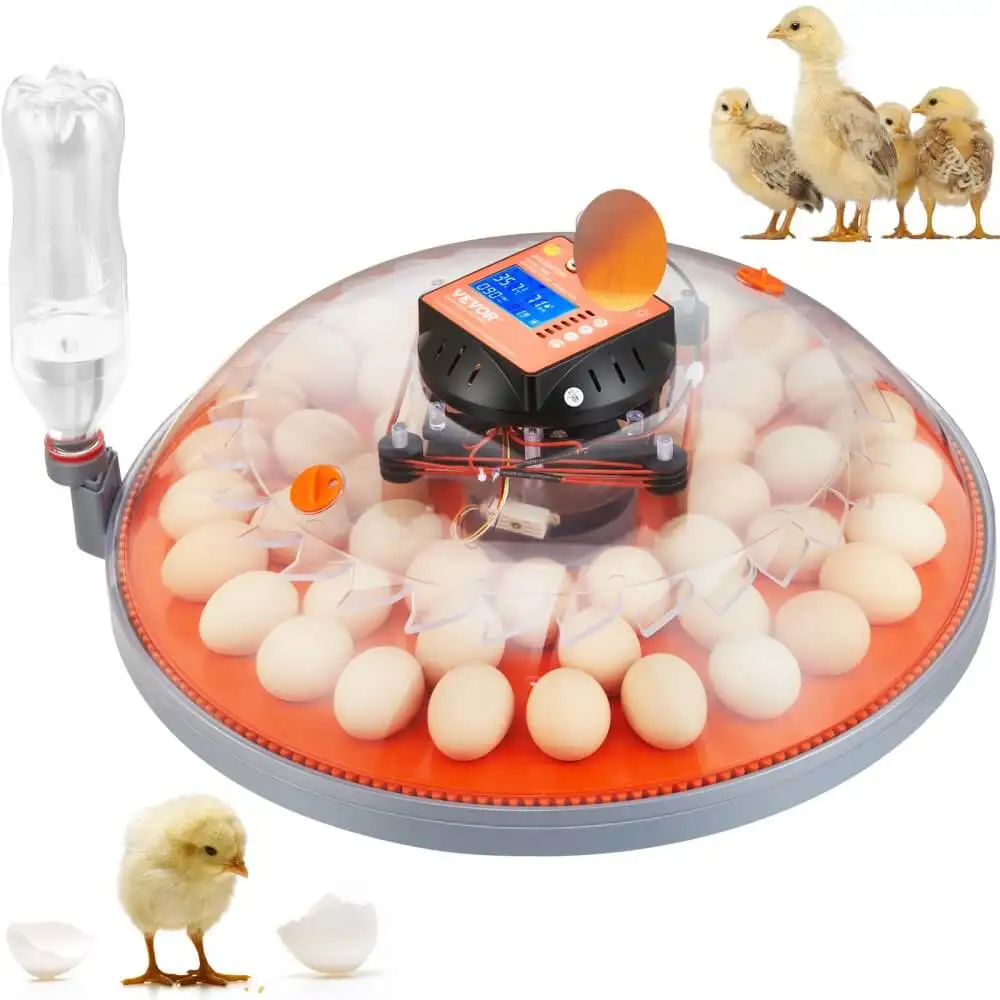
Numerous features make the VEVOR Egg Incubator stand out from the competition, helping it deliver the safe incubation of eggs. The tool contains a mechanism that circulates air in all directions to keep the temperature and humidity consistent. This is crucial for the development of embryos and increases the likelihood of a successful hatch.
When it comes to preserving the eggs in the ideal environment, the incubator features built-in sensors that monitor the humidity and temperature levels and make adjustments as necessary. You will not have to deal with the annoyance of continually adjusting the settings because of this.
Why Choose VEVOR for Your Incubation Needs
Unlike traditional methods of incubation, the VEVOR Egg Incubator rotates the eggs mechanically to ensure that they all receive uniform heat. Furthermore, it comes with an automatic water refill function that keeps the humidity just right, which aids with hatching by preventing cracked eggshells.
Its exceptionally high level of visibility is one of the incubator’s most appealing qualities. You can see the eggs incubating through the see-through ABS material without taking the lid off or messing with the setting. The built-in lights make it possible to observe the embryos’ development, which adds an educational element.
You can incubate eggs from quail, ducks, chickens, and even reptiles with the VEVOR Egg Incubator because it can accept a broad variety of eggs from diverse species. It is a reliable solution even in the case of a power outage because of its versatility and compatibility with numerous power sources.
Setting Up Your VEVOR Incubator: A Step-by-Step Guide
Setting up your VEVOR incubator is the first step towards a successful hatch. This section provides detailed instructions to ensure your incubator is perfectly prepared to support the development of your future chicks.
Preparing for Incubation
Your VEVOR incubator must be properly set up initially. You should start by locating a level, airy spot, free of drafts and direct sunlight, where the incubator can be set up.
Get it hooked up to a steady power source and adjust the humidity and temperature settings per the instructions from the manufacturer so it can incubate eggs to your exact specifications. Calibrate your incubator with a separate hygrometer and thermometer before you put your eggs inside to ensure an accurate outcome.
During Incubation
Keep a close eye on your incubator and make any necessary adjustments during the incubation process. The digital sensors built into the VEVOR incubator will let you monitor the humidity and temperature and make adjustments automatically as necessary.
Make sure the water tray is full at all times to maintain the ideal humidity levels for your eggs. In addition, turn on the automatic egg-turning function; this will mimic the natural turning a mother hen would do, which is critical for the embryos’ growth.
Troubleshooting Common Incubation Challenges
When it comes to incubating eggs, even the most careful preparations can encounter unexpected challenges. Understanding these issues and knowing how to address them can significantly improve your hatch success rates.
Addressing Incubation Issues
Several issues can arise during incubation. Here are some of them and how you can prevent them.
- Infertility or clear eggs: The fertilization process may not always succeed. This can be due to an insufficient male-to-female ratio or an inadequate insemination method. To fix this, make sure you’re inseminating at the right frequency and using the right technique, and adjust the ratio of males to females if necessary.
- Early embryo death: Genetic problems or extremely high or low temperatures could cause embryos to perish during incubation. You can prevent this problem by keeping the temperature steady and not breeding with certain types of animals.
- Death in the shell: This may happen due to subpar incubation conditions. Make sure the eggs are turned the right way, and examine and modify the humidity and temperature settings.
- Pipped eggs failing to hatch: Chicks that start to hatch but don’t make it out of the egg could be the result of too little humidity or oxygen. The final days of incubation require higher humidity and a well-ventilated incubator.
- Sticky chicks: Chicks can get attached to their shells in very humid environments or if the eggs are filthy. A clean incubator and properly adjusted humidity levels are essential to prevent this.
- Malformed chicks: Birth defects can result from faulty incubation temperatures or genetic flaws. Incorporate eggs sourced from wholesome animals and keep the temperature constant.
Maximizing Your Hatch Rate with VEVOR
Although there are a number of issues that can develop during incubation, using a quality product like the VEVOR Egg Incubator can help you achieve the highest possible hatch rate. The egg incubator has a ton of cool features that will deal with these problems effectively.
The incubator’s built-in sensors help maintain the ideal temperature and humidity levels, decreasing the likelihood of embryonic mortality and infertility. The automatic egg-turning mechanism also helps hatch pipped eggs and keeps eggs from dying in the shell by turning them at regular intervals.
Additionally, you can keep the incubator at the perfect temperature and avoid problems like sticky chicks with the VEVOR Egg Incubator’s built-in lights and high transparency, which let you see the eggs without opening the incubator.
In Summary
During the typical 21 days incubation period, a chicken egg develops into a chick that is prepared to hatch. A well-designed incubator that can maintain a consistent temperature and humidity level throughout the procedure will be invaluable.
For an effective and accurate result, we highly recommend the VEVOR Egg Incubator due to its exceptional accuracy, increased hatch rate, and user-friendliness. It is equipped with sensors for real-time monitoring, its 360° air circulation ensures even distribution of temperature and humidity, and the automatic features replenish water and turn the eggs.
Regardless of your need as a chicken farmer, the VEVOR Egg Incubator is a great investment. Become a part of the community of accomplished hatchers by visiting the VEVOR website to purchase their world-class incubator now!