Precision is key in interior decor, fun DIY projects, and construction. If you’re inexperienced in any form of construction work, it can be hard to know a surface is straight without a laser level. This tool will automatically improve how accurate your projects are and will help you save time that’d be otherwise spent gauging projects with the ordinary eye.
Time is money and if you’re intentional about saving time and getting the bag this year, it will do you good to learn how to use a laser level the right way. While learning how to use the tool is important, buying a laser from a reputable brand is also important if you want to achieve your project goals. Going by customer feedback and our personal experience, we recommend the VEVOR laser level as a reliable and precise tool for your projects.
In this guide, we’ll be showing you the ropes on the various aspects of laser levels—from understanding what they are to showing you a simple step-by-step process of using them effectively.
Table of contents
What is a Laser Level?
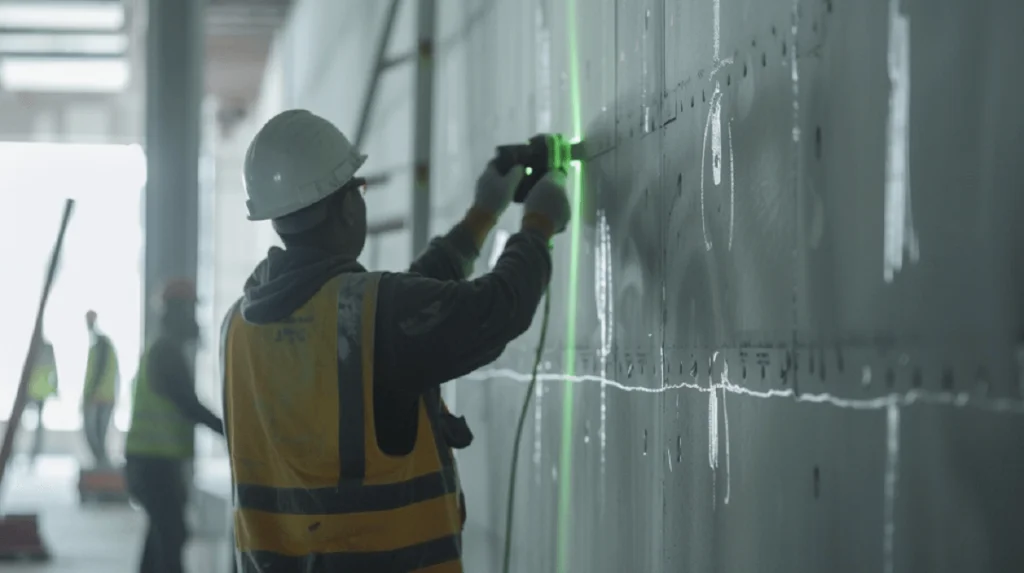
A laser level is a device commonly used by construction workers, surveyors, and engineers for accuracy in alignment. It does this by projecting a thin line of light (laser beam) onto surfaces, providing a reference line that shows the exact point for leveling, preventing errors from human guesswork and outdated traditional tools.
Understanding Laser Levels
Laser levels are currently some of the most essential and effective tools in the construction industry, and they come in various types and sizes, designed for unique tasks that require high levels of precision.
Types of Laser Levels
Laser levels come in various types, all with distinct functionalities. The most common types of laser levels are discussed below:
1. Line Laser Levels: These are the most common kinds, and as the name implies, the project beams in the form of straight lines on a wall or surface. They are perfect for simple or household tasks including arrangements of shelves, laying tiles, and the installation of cabinets in the kitchen. These lasers provide a clear reference line, which is highly visible and thus, are used widely for many indoor projects.
2. Dot Laser Levels: Unlike the line laser levels, these emit dots that offer pinpoint precision when it comes to creating reference lines for layout projects including plumbing and electrical fixtures. The high percentage accuracy of the dot laser levels makes them ideal for tasks that require extra detailing for alignment purposes.
3. Rotary Laser Levels: These are widely used today due to their 360-degree rotating laser beam that can give off either horizontal or vertical lines. If you’re working in an outdoor space, the rotating laser levels will be ideal, especially for building purposes like leveling foundations over a large area of space or land grading.
4. Combination Laser Levels: These combine the intricate features of both line and dot lasers. Due to their dual nature, they are highly versatile for a variety of tasks most especially those that require both lines and points for precision and efficiency.
Key Components of a Laser Level
Like every construction or DIY tool, laser levels have some components that ensure their functionality. In this section, we look at these key components.
Laser Diode
The laser diode is the core responsible for emitting beams of light in the form of lines or dots to ensure precision. It also determines how bright and visible the beams are which is important in leveling and alignment.
Leveling Mechanism
Laser levels are either a self-leveling or a manual leveling system. For a self-leveling laser, you only need to place it on a stable surface and let it automatically get results. The self-leveling system automatically adjusts the laser to the exact level without error, reducing the time required for set up. The manual leveling system needs the help of the user to manually adjust the beams to the required level. The leveling mechanism helps to ensure that the light beam is horizontal or vertical, a quality essential for accurate measurements.
Mounting System
The mounting system helps to position the equipment properly and prevent slip-ups that could cause irreversible damage. It also allows for flexibility and can easily be adjusted to the needed height or angle. There are different kinds of mounting systems which include, magnetic bases, a tripod stand, and mounts for walls.
Control Panel
The control panel consists of power buttons, selectors that switch between different modes for multimode laser beams (e.g., line, dot, rotary) as well as adjustment knobs for height and brightness adjustment.
Power Source
The power source is batteries which can be easily rechargeable, although some have to be disposed of after exhaustion. Others have to always be plugged into a source of electricity or outlet before being used.
Protective Casing
The casing helps to protect the interior key components from harsh weather, dust, and water, ensuring longevity. It’s usually made of durable material such as high-grade plastic or metal.
Why Choose a Laser Level?
Laser levels help with precision in measurements. This means you will reduce the time spent in fixing errors that come with using traditional equipment. They also ensure consistency with multiple projects which increases the quality of work done especially on a large-scale construction site. Laser levels are easy to use as they don’t require high technical knowledge, and they reduce setup time.
They are also super versatile, meaning you can use them for the simplest tasks like hanging a curtain rod, or more complex tasks like installing kitchen cabinets, shelves, and even large-scale outdoor construction projects. Combination laser levels are highly functional and adaptable with both line and dot laser features that can be used for projects that require both line and dot functionalities.
How to Use a Laser Level: Step-by-Step Guide

A quality laser level like the one from VEVOR can significantly enhance the quality of your projects in terms of efficiency and precision. It doesn’t matter whether you are handling a low-skill DIY construction or more advanced professional tasks. In this guide, we’ll walk you through how to use laser levels effectively.
Preparing Your Laser Level
Before using a laser level, it’s important to take precautions first, making sure things are in the right order to prevent errors in measurements or unwanted interruptions while working. Below is a checklist you can cross off while you prepare.
1. Battery Assessment: Read the manufacturer’s instructions to see the kind of battery you need. It can either be rechargeable batteries in which case would come with a charger or a disposable battery which you’d have to replace in case it goes bad. Please note that the lower the battery power, the less visible and weaker the laser lines which can reduce accuracy in measurements.
2. Visual Inspection: Carefully inspect for wear and tear on the lens and also observe the brightness of the laser beam.
3. Calibration: For manual models, the bubble vial is used to check if the laser beam is precise and level. For automatic or self-leveling models, there are indicators that state the calibration status of the device.
Setting Up the Laser Level
Once you have the tool in place, some of the questions that will come to mind are, ‘‘how do I set up the laser?’’, “how do I use a laser level?”, or in the case where you have a self-leveling device, you probably want to know how to use a self-leveling laser. The good news is we have all the answers in this section. If you follow the steps below, you’ll be able to make accurate lines regardless of your expertise.
- Choose a Stable Surface: The device should come with mounting materials like a tripod which is also adjustable from floor to ceiling level. Make sure it’s placed on a flat ground. If you don’t have a tripod, find a stable surface for use.
- Mount the Laser Level: After finding a secure space for your device, it’s time to mount it. On the tripod, fasten the straps or bolts to ensure the device doesn’t fall off. You can adjust the height as you wish. If you’re placing it directly on a flat surface, be sure to use the device’s leveling mechanism to ensure accurate results.
- Positioning: If the laser isn’t projecting where you want it, adjust the angle. If you’re installing a wall, keep the device at the height you need it to be. If you can’t quite see the laser beam, you can adjust the lighting conditions of the working area or use special laser enhancement glasses.
Aligning the Laser Level
Proper alignment is what determines accuracy and ultimately the success of the project you’re working on. In case you’ve been wondering how to use laser level on walls and other surfaces, you will get some helpful guides here. To align the laser level, do the following.
- Switch on the laser level and wait for the light beam to stabilize. In automatic models, it takes only a few seconds.
- For line lasers, check for straightness and see if the tool is at the right height. For dot lasers, ensure the dots are accurately aligned with the reference points.
- Use the in-built bubble vials to fine-tune the laser beam until it is perfectly horizontal or vertical. Automatic models might not need any fine tuning and you can make use of the knobs if you need to make small adjustments.
- After you’re sure the beam is properly aligned, use the locking mechanism to prevent any disruptions while you work.
- If you’re installing tiles, for instance, use a marker to trace the line on the surface.
By following these simple steps, you’re well on your way to ensuring that you make the most out of this tool, increasing precision and confidence in your work.
Using the Laser Level for Various Projects
As mentioned, laser levels are used for different projects across the construction, woodworking, and home decor industries. In this section of the article, you find out more about how to use the laser to achieve accuracy and precision across various projects.
How to Use a Laser Level for Grading
In many projects involving landscaping, building, and construction, having a level ground at specific angles of elevation of slope is important and lays the groundwork for stunning structures. Knowing how to use a laser level for grading can make all the difference between a wobbly and an even landscape when handling this project.
To set up and use the laser level for grading, the following steps should be followed:
- Attach the laser level to a tripod that has been firmly fixed on the ground.
- Switch on the device and allow it to create level lines on your intended surface. If you’re using a self-level machine, it is important to check the calibration using the manufacturer’s instructions to guarantee precision.
- Find a grade rod and adjust its laser receiver to identify the beam. Mark that as the reference point.
- Select different points in the area you’re grading and at each point, use the rod to find the desired angle or elevation for a level slope.
How to Use a Laser Level for Framing
When framing is done right on a surface, it reveals its aesthetic appeal. The perfect framing is also important for structural integrity. Using a laser level for framing will help in ensuring that walls and other structures are effectively straight and level. Follow these steps to ensure straight and accurate framing.
- When using a laser level on a wall, attach it to a wall mount and align it to reveal a straight beam.
- If you’re using a tripod, secure it at a height where it can emit a beam across the framing region.
- Turn on the laser level, allow it to level automatically, or adjust it using the knobs.
- Inspect the laser beam to ensure its level by comparing it to a vertical or horizontal surface.
- Project the beam against the wall and mark a reference point for framing using a marker.
- Align framing components with the line you marked and constantly recheck to avoid room for errors.
Tips and Tricks for Using a Laser Level
To get the best out of your laser level, you must be aware of the best ways to use it for optimal performance. This section contains valuable tips and tricks that will help you in getting the best results when using the laser.
Common Mistakes to Avoid
Sure, a laser level is designed to enhance precision and accuracy in your projects, but some common mistakes can sabotage the tool’s effectiveness. Please, avoid the following mistakes.
1. Unstable or incorrect setup
Solution: Check for a level surface and strap the device tightly to the mounting system.
2. Ignoring calibration
Solution: Regular inspection
3. Poor visibility in bright conditions
Solution: Laser enhancement goggles
4. Wrong receiver height
Solution: Use adjustment knobs
Enhancing Accuracy with Accessories
Investing in certain accessories can greatly enhance the functionality of your laser level. Here are some cool accessories to consider buying.
- A sturdy tripod with adjustable heights.
- Wall mounts.
- Laser detectors for outdoor projects or long distances where visibility might be an issue.
- Laser glasses for bright conditions.
Maintenance and Care of Your Laser Level
If you care about getting the best out of your construction tools, including laser levels, you must be committed to an effective maintenance and cleaning routine. Proper maintenance elongates the lifespan of your laser level and saves you money.
Regular Maintenance Tips
Consider these tips to properly care for your tool.
- Regularly clean the exterior and the lens, using a soft, lint-free cloth.
- Store the laser level in a protective casing to prevent dust, moisture, and impact damage.
- Remove disposable batteries if you will not be using the device for a while
Troubleshooting Common Issues
Like every other machine, you may experience issues with your laser level occasionally. Here are some common problems and the required solutions:
- Laser Beam Fades: Check the battery percentage and replace or recharge when due. Also, check that the lens is clean and free from dust.
- Inaccurate Readings: Verify the stability of the surface it is placed on and recalibrate from time to time.
- Device Not Powering On: Check if the batteries are correctly inserted and inspect for any visible signs of damage.
- Visibility Issues: Use laser glasses or verify that the environment is suitable. Please, avoid extra bright conditions.
VEVOR Laser Level: Why It Stands Out
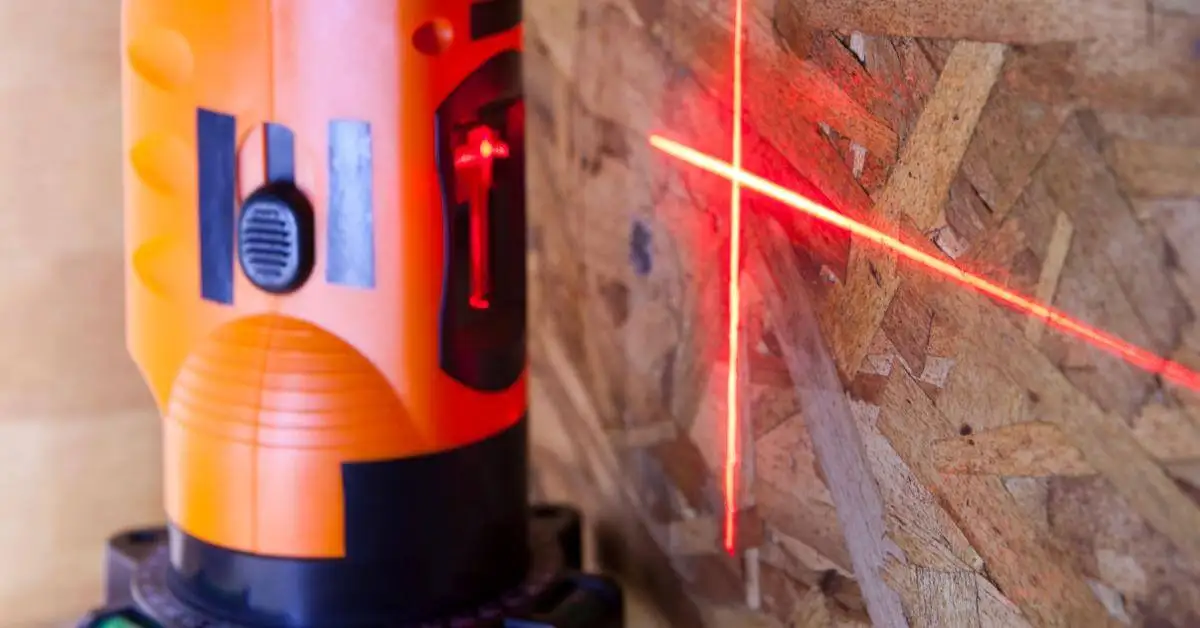
There are several laser levels out there that can help you in getting precise measurements for your diverse projects. In the midst of these options, the VEVOR Laser Level stands out for us, and we recommend it to our readers.
The VEVOR model is a tested, trusted, and top-tier tool that stands out in terms of performance. The tool provides precise measurement and meets the needs of seasoned professionals and beginner DIY enthusiasts. VEVOR as a brand is known for its high-quality products, and this laser doesn’t disappoint as well. It offers top-notch precision, durability, reliability, and value for money.
Key Features of VEVOR Laser Level
The VEVOR Laser Level has the following desirable features.
- A composite casing designed to withstand high-impact and stressful working conditions
- An IP54 rating that protects against water and dust.
- A laser beam with a super accuracy of ±1/9 inch at 33 feet, ensuring precision and reproducibility.
- A rechargeable long-lasting 3.7V battery (up to 8 hours)
- A Type-C charging port for the battery.
- The magnetic mount is for easy setup.
Customer Reviews and Testimonials
Past and current users have generally rated the VEVOR Laser Level highly. In short, the tool gets the job done efficiently. Many users have mentioned the brand’s rare dedication to quality (precision and accuracy), durability, and value for money as important considerations in why they love the laser.
Many users also appreciate the long battery life which makes the device reliable for extended use. The overall positive feedback from satisfied customers emphasizes the reputation of VEVOR as a dependable brand in the manufacturing and selling of efficient tools.
Frequently Asked Questions
Perhaps, you still have some questions regarding laser levels that have not been covered above. This section covers a selection of frequent questions we have received from readers and users of laser levels in the past.
How Do I Use a Laser Level?
Using a laser level is pretty straightforward. To learn how to use a laser level without a tripod, position it on a stable, flat surface. You don’t have to do this if you have a tripod. Next, you manually use the bubble vials to get a laser beam. Switch the device on and allow it to self-level. Once it’s stable, adjust it to the appropriate height and angle. Mark the projected laser lines to be used as a reference for cutting, or installing materials.
How to Use a Laser Level for Grading?
For grading, set up the device on a tripod at the desired height. Turn it on and wait till it self-levels. Place a grade rod at the starting reference point and look out for the laser’s reading on the rod. Move the rod to various points in the grading area and compare the readings. It should be consistent to ensure a level ground or slope. Adjust the based on the differences in readings to achieve a level grade.
How to Use a Laser Level to Level Ground?
To level ground with a laser level you’d have to set up the device on a tripod in the center of the working area. Turn on, allow to self-level, and place a measuring stick on the ground at different points. From the laser’s beam, determine the high and low spots. You can adjust the ground by adding or removing soil for an even level on the ground, with guidance from the laser beam.
Conclusion
With the right guide on how to use a laser level correctly, construction and DIY projects will be a walk in the park. Wasting time and going back and forth on your DIY or professional projects will be a thing of the past by investing in this powerful tool.
However, it is important to invest in a reliable tool from a trusted brand for an effective outcome. We recommend the VEVOR Laser Level for all your projects. The tool is effective in getting precise measurements and correct alignments. It’s versatile for use in various projects, and it’s also affordable. With pro features, like a high-impact casing, IP54 rating, long battery life, and magnetic mount, you have everything you need in one device.
Visit the VEVOR website today or check out their laser levels from their merchant partners to invest in a tool that guarantees precision and accurate alignment.

