Winterizing your pool is an important stage in pool care because it protects it from the harsh winter weather and ensures that it is ready to use when the pool season resumes.
Winterizing an in-ground or above-ground pool is comparable, but there are several important distinctions to consider. In this article, we’ll walk you through the step-by-step process of winterizing both types of pools, allowing you to relax knowing your pool will be safe and sound until next year. We will also tell you how to maintain a backyard pool in the winter!
Table of contents
- Why Is It Important to Winterize Your Pool ?
- When Should You Winterize Your Pool ?
- What Tools and Materials Do You Need to Winterize a Pool ?
- Step-by-Step Guide to Winterizing an In-Ground Pool
- 5. Step-by-Step Guide to Winterizing an Above-Ground Pool
- Common Mistakes to Avoid During Winterization
- Reopening Your Pool in Spring: Preparing for the New Season
Why Is It Important to Winterize Your Pool?
Protecting Your Pool from Winter Damage
Minimize the damage that cold weather does by winterizing your pool. Water in a frozen pool expands and damages pipes, pumps, and other equipment besides cracking and leaking the design of your pool. Properly done, it will save you money on repairs plus being ready to swim in the spring when the pool opens.
Maintaining Water Quality During the Off-Season
Winterizing also ensures that the quality of water is good while it is out of use. Pool maintenance carelessness will leave the pool teeming with algae blooms and other unwanted pollutants, turning it considerably more complicated to get ready for swimming as the warmth sets in.
You can do this by adding the right chemicals and maintaining water chemistry, and you’ll certainly have a smoother opening come spring.
When Should You Winterize Your Pool?
The Ideal Timing
Winterization is the preparation of a pool that occurs in anticipation of winter when the temperature is no longer staying above 65°F over a period of days; this is the best time to start. This is likely to happen late in the summer or early in the fall, depending on where you live.
If you cover your pool too early, it will certainly promote algae growth. Opening it up so late that the temperature in the water drops too low most surely means you will have freezing damage to your pool and related equipment.
Regional Factors to Consider
The exact time to winterize your pool may differ based on your location and local weather conditions. For example, a person who lives in a colder location might be able to delay closing his or her pool for the winter. A person who lives in an especially cold climate needs to winterize the pool as soon as the first frost hits the area.
What Tools and Materials Do You Need to Winterize a Pool?
Essential Equipment
To properly winterize your pool, you’ll need a few key tools and supplies, including:
- Pool brush
- Skimmer net
- Pool Vacuum
- Air compressor or shop vac (for clearing plumbing lines)
- Expansion plugs
Chemicals for Pool Maintenance
To get your pool ready for the winter, you’ll also need a range of pool chemicals in addition to the necessary equipment, including:
- pH increaser or decreaser
- Alkalinity increaser
- Pool shock
- Algaecide
- Antifreeze (if necessary)
These chemicals help balance the water chemistry and prevent issues like algae growth during the off-season.
Pool Covers
The pool cover is one of the most crucial parts of winterizing your pool. One of the greatest choices is VEVOR’s Pool Safety Cover, which is designed to provide your pool with durable and effective winter protection.
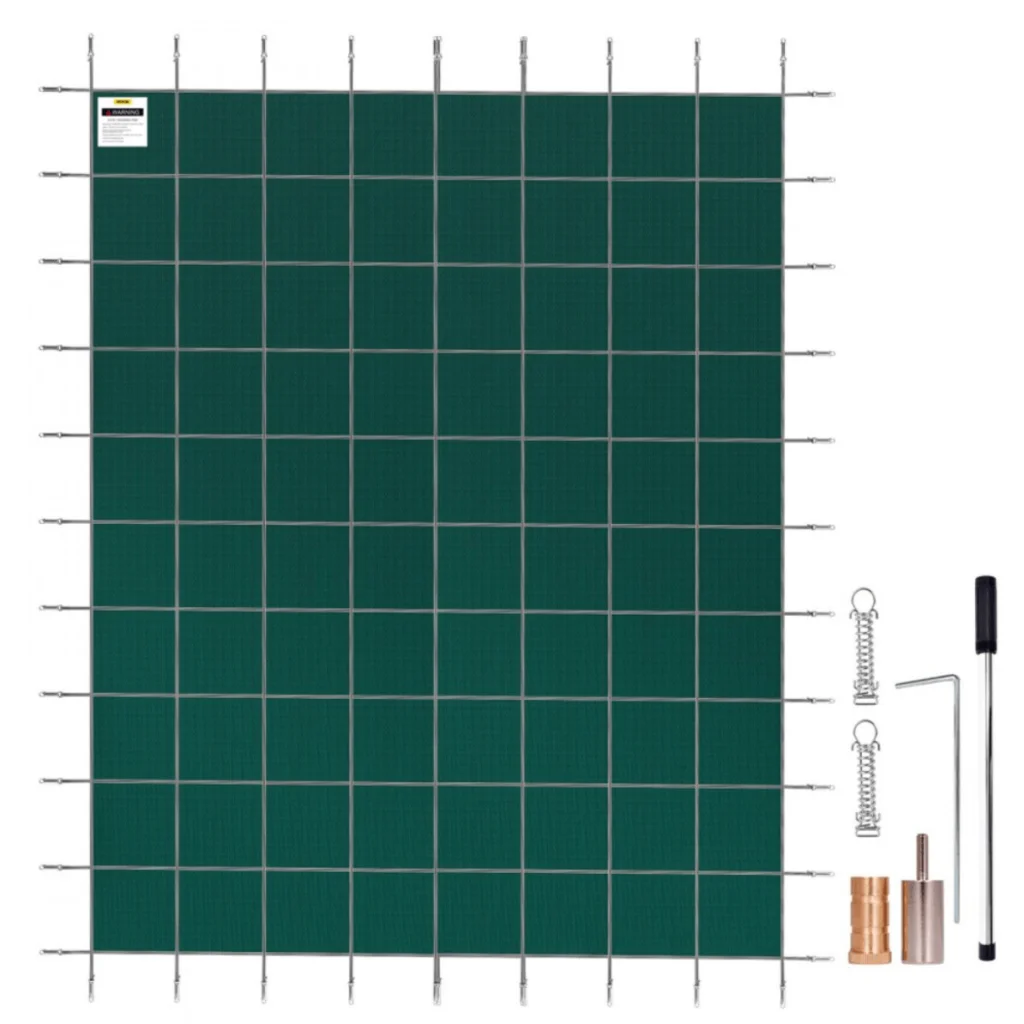
The cover uses a high-density mesh fabric that protects the pool from snow and debris as well as sunlight, partially blocking the view. It also utilizes strong springs and anchors to keep it firmly attached.
Recommended For Your Project
Step-by-Step Guide to Winterizing an In-Ground Pool
Step 1: Clean and Prepare Your Pool
First, clean your pool well. Use a pool brush to scrub the entire inner walls and bottom of the pool; use a skimmer net to clean up floating leaves, debris, etc; finally, use a vacuum to remove all remaining silt and filth from the pool surface.
Step 2: Test and Balance Water Chemistry
The next crucial thing to do is to check and regulate the water chemistry that is in your pool. That is setting the pH, alkalinity, and calcium hardness levels to the normal ranges as per the guidelines. Keeping the correct chemical balance will be very useful in preventing corrosion, scaling, and other problems when the pool is not in use.
Step 3: Shock and Treat the Water
After testing and adjusting the chemicals in the swimming pool, it is now time for the final steps. Both the shock treatment and the addition of the algaecide are essential tasks that should be carried out at the end of the swimming pool maintenance activities to ensure that the pool stays clean during the winter season.
Step 4: Lower the Water Level
In case you are using a mesh cover or a solid cover without the skimmer extender, the water level should be lowered around 6-12 inches below the skimmer. This will help you avoid situations where the water freezes and expands, which can lead to either the pool’s structure or the equipment getting damaged.
Step 5: Drain and Protect Pool Equipment
First, you have to drain and protect your pool gear. This gear contains the pump, filter, and heater and is very crucial, so don’t miss it. By undoing the hoses, draining off the little water remaining, and blowing through the lines with compressed air or shop vacs, you can save your equipment from the awful damage caused by the deposition of water.
Leaving the lines devoid of water is equally important as they need to flow over with the liquid mentioned above in order to avoid any damage due to high temperatures. Finally, you should introduce the proprietary antifreeze substances to the plumbing system of your pool to protect against the negative effects of frozen water on your water regime during its hibernation, in particular, and all over swimming units, like skimmers, for instance.
Step 6: Cover the Pool
The final step is to cover the pool. If you utilize a safety cover, it is necessary to buckle it firmly to the swimming pool deck by means of the anchors and straps. In case of an above-ground pool, you might use an air pillow to better hold the cover and not let it sag under the pressure of snow and ice.
5. Step-by-Step Guide to Winterizing an Above-Ground Pool
Step 1: Clean and Balance Water Chemistry
Similar to cleaning an in-ground pool, the task is similar when cleaning a winterizing above-ground pool. It needs a vacuum, skimmer net, and pool brush to remove dirt, debris, and algae. To guarantee appropriate water balance, next assess the water quality and make the necessary adjustments.
Step 2: Lower the Water Level
One of the most important pieces of advice given to the owners of winterizing above-ground pools is that when it is time to pack for winter. They should bring the level of the water to just below the openings of the skimmers. This is a ritual that will prevent a lot of headaches and damage for expensive equipment that would normally cost them a fortune.
Step 3: Disconnect and Store Equipment
It is important that you swiftly drain your pool to prepare it for winter. One of the most important steps in this process is to make sure that you disconnect all pumps, filters, and other pool equipment. To do so, carefully unscrew any lines connecting the hoses and pull the hoses free, disconnect the pump, remove the filters, and ensure that all other removable equipment are stored loosely in a dry place preferably inside like a shed, or a garage where they are shielded from the winter’s freezing harm such as beneath a layer of insulating material like an old blanket or a tarpaulin.
Step 4: Use an Air Pillow
An inflatable pillow is a must-have when you cover an above-ground pool for the winter. The pillow creates a distance between the water and the pool cover which is what the ice will do at the thermally expanding outwards stage with the pump not being able to react and the pool walls remaining unharmed.
Step 5: Secure the Pool Cover
Lastly, attach your pool cover and use the included anchors or straps to secure it firmly. VEVOR’s Pool Safety Cover is a great option for above-ground pools since it is made to offer strong, long-lasting protection all winter long.
Common Mistakes to Avoid During Winterization

Mistake 1: Ignoring Water Chemistry
Some of the most frequent pool-related mistakes during the period of cold weather consist of neglecting proper water chemical balancing. In situations where pH, alkalinity, or calcium hardness values diverge from the authorized limits, problems like corrosion, scaling, and algae proliferation can arise.
Mistake 2: Inadequate Draining of Equipment
Many people mistakenly overlook or ignore the importance of properly draining the pool equipment, including the pump, filter, and plumbing lines. If water accumulates in these components and it is not properly drained, it is subjected to freezing and expansion during the winter season, and this may cause them to crack or to become porous leading to expensive repairs.
This can be easily prevented by following a standard pool winterization procedure just at the end of swimming seasons.
Mistake 3: Using an Inappropriate Pool Cover
When dealing with your pool as the weather gets cooler, there are very important factors that you should not overlook. Remember, it is the cover that you put on your pool that will keep it intact in the long run.
A good pool cover specifically designed for winter is not only a warranty of easy access to your pool once winter ends, but also the possibility to use your pool for an impressively long span of time. With minimal to no issues at all. However, you may already be aware that not every swimming pool cover is made the same.
Reopening Your Pool in Spring: Preparing for the New Season
With the arrival of the first few warm days, pool owners start to focus on how to winterize a swimming pool to use. Having a pool is one of the most enjoyable ways to spend time during the hot spring or summer months. As a pool owner, now is the best time to take a leisurely walk around the pool and inspect it for likely points of failure.
There exists a standard order of procedures that should be followed in a queue manner as elaborated in order to successfully get the pool set for swimming again and avoid any damage in the future.
As for the uppermost pool cover, it should be taken off after which it needs to be properly cleaned. Then skim, vacuum, or brush if there is any visible dirt or debris on the pool bottom or surface that may need to be removed. In addition, if the cover has been used to protect the pool from ice and snow throughout winter, it should be cleaned properly and removed to be safely stored.
Conclusion
Learning how do you winterize a pool is a crucial part of keeping it healthy and long-lasting. You may shield your pool from the severe winter weather and guarantee a seamless reopening in the spring by following the instructions in this guide.
Remember, using a high-quality pool cover like VEVOR’s Pool Safety Cover may improve your pool’s protection during the off-season and simplify the winterization procedure. Your pool will be ready to offer years of summer enjoyment with proper maintenance and preparation.

