| Cost | Difficulty | Duration of the Project |
|---|---|---|
| $1000-1500 | 7 out of 10 | 1 Day |
Tired of scraping ice from your garage? Do you hate your old garage with no storage? With incredible low-budget garage makeover ideas, turn your garage into a portable and structured area by saving space. Now let your worries fall behind of running the car in the morning due to the ice. However, this amazing space will have enough room to store your home items you don’t have room for.
If you never considered remodeling your garage, then think about it. Many homeowners don’t realize the importance of garage makeover DIY as it is the last area of the home. Garage remodeling costs thousands of dollars, but it’s worthwhile as you’ll have enough room to park your car and make a storage space to store many things. This is the guide if you’re looking for a low-budget garage makeover.
So, let’s transform your garage from a craphouse to a penthouse without wasting further.
Part 1: How to DIY a Garage Makeover on a Low Budget
Who doesn’t like the garage makeover on a budget? Of course, nobody. So, you’ll need to remove the old shelves and replace them with VEVOR Shelves.
We bet you don’t need a pro to do a cheap garage makeover, as you can do it yourself easily. Use cheap wood pallets and old-school brooms for cleaning to not break the bank. Use paint rather than expensive tiles or granite to make a floor look good.
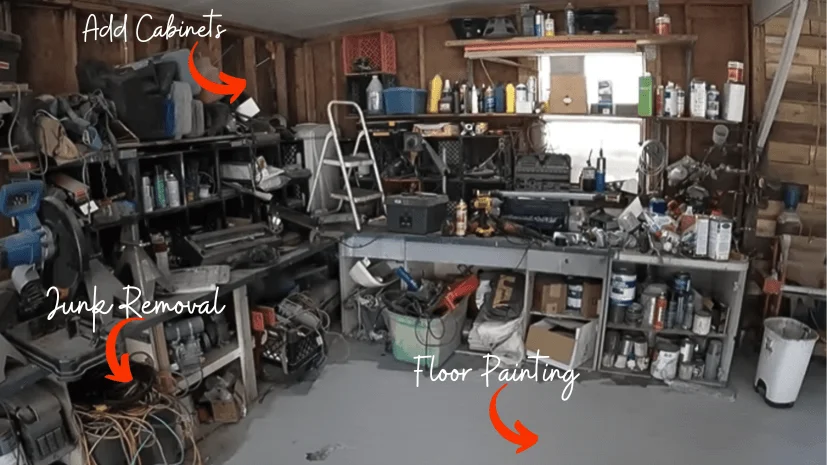
You must cover the area with water leakage, like windows with wood pallets. Use ready-to-use storage cabinets, wall-mounted shelves, and pegboards for storing essential items. So, there’ll be no need to build new cabinets. Definitely, this garage makeover idea on a budget is intended for individuals who want a quick fix without frittering away their salary or savings. For simple low-budget garage remodeling, consider the following:
● Garage Insulation
● Use HVAC System
● Install Modular Cabinets, Wall Mounted Racks, and Floating Shelves
● Install a mechanic seating to cause a mess
● Place your car essential like washer and dryer into a hidden place
Take a look at the step-by-step guide and consider your dying experience.
Part 2: Clearing the Junk Before You Remodel Your Garage
Get rid of those items that you don’t need anymore. Firstly, organize the half area, transform your important stuff, and allow your garage junky side to hold it. Then, move the useful items from one place to another and fix them at their build spot.
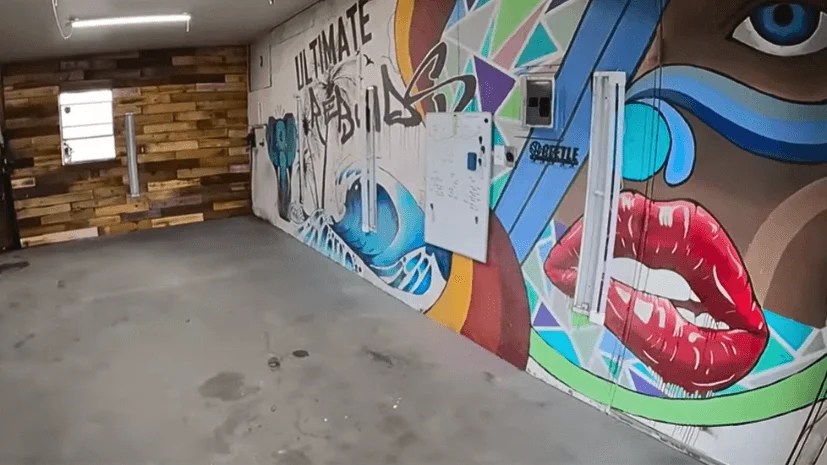
Often, a garage is also a space to store things related to gym and lawn equipment, except a car. Remove those items you don’t need anymore, and nicely cover the windows with wood pallets and your favorite paint color. Try to remove old shelves and cabinets with a new one. Keep those items that are necessary and throw away all the other items. It is a great opportunity to earn money by selling these unused items, so don’t let it slip away.
Junk Removal Process From Garage:
● Divide the garage into two parts
● Organize the items by moving them from one side to another
● Throw away the unused items
● Clean the Floor
Part 3: Floor Preparing
After cleaning the floor with a broom and leaf blower, the next step is to paint your floor. That’s going to be the hardest decision. But what to do when you want to save extra bucks while doing cheap garage renovation? So, without taking a professional’s help, do this yourself. Also, use the power washer without using tiles or something else. If you don’t know how to do that, hit up to any tutorials available on the internet.
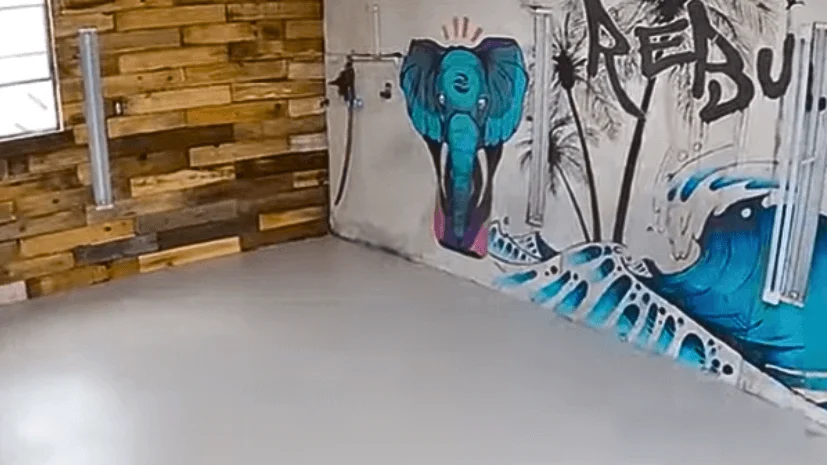
However, money is the only thing that forces many people to renovate their garages by themselves. But the prices depend on your area location.
● Pro Chip Coating Coating between $10-$12
● Solid Proxy Cost $5-$6/ sq foot.
● DIY kits range from $350-$1000 for 300 to 600 square feet
● Calling a professional means that your garage will last for years. But painting the floor by yourself is the cost-effective way to do so.
Guidelines for Garage Floor Painting:
● Do it yourself if you’re making a temporary garage makeover on a budget.
● Research the best company for quality kits, pressure water, and paints.
Part 4: Low-Budget Garage Makeover DIY: Make A Storage Space
After painting and cleaning the floor, you must work on your storage space. Of course, you’ll take out the unnecessary items, but what do you do for left-out essential items you can’t throw away? Yes, you’ll build the storage space like cabinets and shelves and consider adding pegboards to hang out small items.
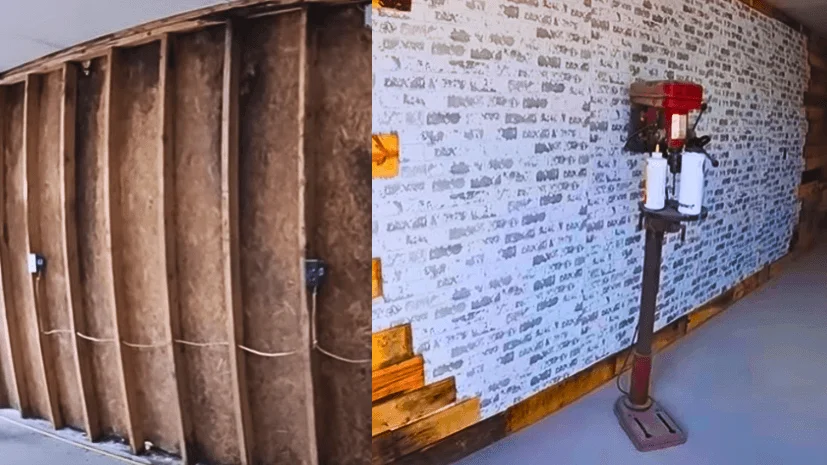
The exciting thing is that you don’t need a pro for this work, as you can order these cabinets and shelves from any reliable online store like VEVOR. You just need to remove the old and defective cabinets and do cheap paneling against that wall. So, it’ll hide behind the paneling and place cabinets and a work table in front of it. The usage of pegboard will turn out to be a helping hand for storage.
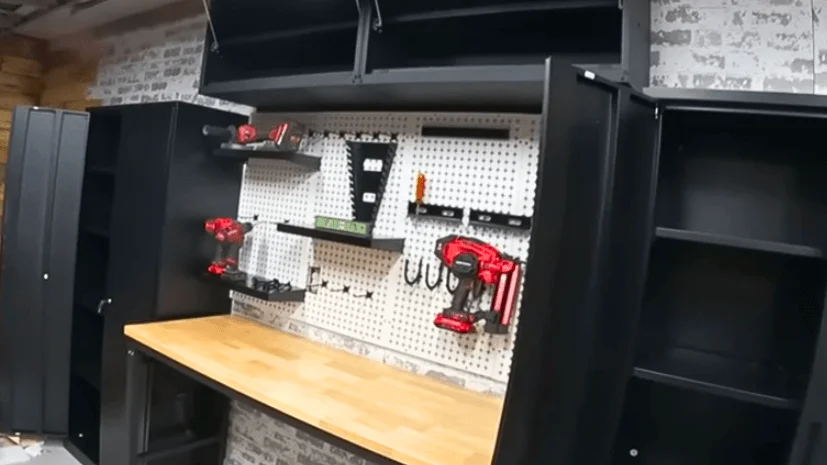
Guidelines For Storage:
● Use Vertical Shelves For Storing
● Use Cheap Panneling to hide the already built-in old shelves
● Don’t build the shelf as it’s time-consuming; just buy cabinets online
● Add pegboards for additional storage space
Part 5: Hide Ugly Mark With Wall Painting
The wall is the area that’s sometimes going to be neglected. We think professionals can do better in this job. But why not allow ourselves to do that? It’ll be a cost-cutting solution for every garage owner wanting a cheap garage makeover.
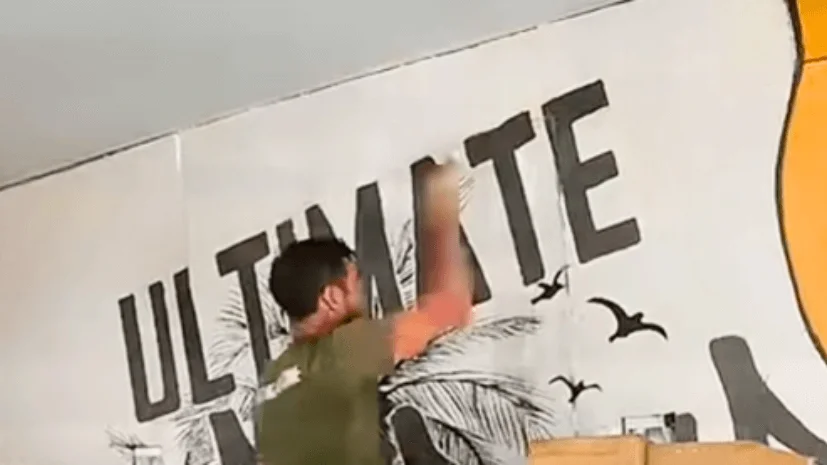
Cover the ugly area with the paint. You don’t need to cover the whole wall as it’ll become expensive paint on the selected area only with the bad marks. Furthermore, doing the whole repainting will damage your items with paint, so don’t do that.
Guidelines:
● To save your money, do it yourself.
● Use Cheap Paint.
● Don’t cover the whole wall with the paint if there’s no problem with the previous wall paint.
Part 6: Steps To Completing The Cheap Garage Makeover
Last but not least, after completing all the steps, let’s put back your stuff, but this time in your new cabinets, and rejoice in your easy garage renovations. Remove the dust from ceilings; open the garage doors for better insulation.
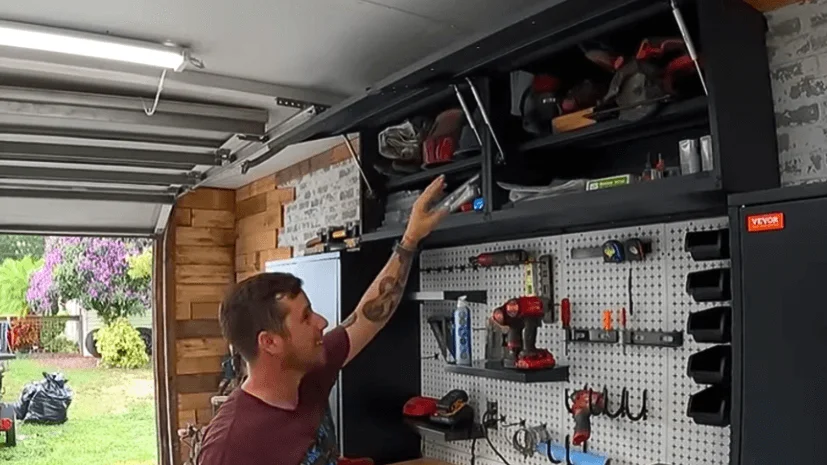
Just think how easy it’ll be to park your car and store the stuff simultaneously. Life just got a whole lot smoother.
Guidelines to Remember For Garage Makeover Completion:
● Clean the ceilings
● Open the doors for ventilation
● To prevent mess, save your items in Cabinets
Part 7: Considerations When Renovating Your Garage
Here’s what you must think about when remodeling the garage, which many homeowners neglect. Ensure your space meets all the building codes because you can’t do garage remodeling otherwise. However, if it meets the codes, ensure it is safe to do the remodeling or if it requires more work before starting the remodeling process. Building codes are made for homeowner benefits to prevent them from any trouble.
Before remodeling a garage, consider the following steps:
● Garage Door Opening: Your garage opening door should be 6 inches high, depending on the driveway slope.
● Ventilation: Natural ventilation should be provided through doors and windows that occupy at least 4% of the floor area or mechanical systems.
● Finish Ceiling Height: From finish floor to finish ceiling, 7’6″ is recommended.
● Smoke Detectors: Provide the building’s carbon monoxide and smoke detectors per the code.
● Electrical Work: In habitable living spaces, electrical outlets should be installed so that no distance along the wall is greater than six feet from the outlet.
● Usage of Heater or Burning Furnace: If any gas furnace or water heater is in the garage, you can’t convert your garage into a bedroom. You’ll need to separate the bedroom from the water heater and fuel-burning furnace by walls with combustion air openings.
● Floor Plan: The floor plan must indicate the location of walls, size, and location of windows, doors, electric outlets, plumbing fixtures, and smoke detectors.
● Front Door: The plan building elevation should indicate the front door’s appearance after the conversion completion.
Tip: To prevent any future inconvenience, provide the building plan for how your garage DIY makeover will look that indicates the existing and proposed building footprint and driveway.
Part 8: Tools and Materials You’ll Need For Garage Makeover On a Budget
However, you need tools and materials to create a masterpiece before starting any project.
Tools:
● Broom
● Leaf Blower
● Paint Brush
Materials:
● Wood Paneling
● Wooden Sheets
● Floor Paint
● Wall Paint
● Pegboard
● Retractable Extension Cord Reel
Part 9: FAQs About Low-Budget DIY Garage Makeover
1-How to make your garage more functional?
To keep your garage simple and functional, consider adding an overhead garage door, a proper lightning system, vertical storage, and wall and floor paint.
2- How can I make my old garage look better?
Build a retaining wall, install a new roof, replace rotted and old wood with new ones, build epoxy floors, and don’t forget to add a proper insulation process.
3- How much does it cost to renovate a small garage?
The estimated cost to renovate a small garage is approximately $6000-$20,000, but read our guide if you’re looking for a budget-friendly garage renovation.
4- Is renovating a garage worth it?
Yes, It is worth it because a new and renovated garage will provide you with a ton of storage and flex spaces.
Conclusion
Count on this article whenever you’re looking to remodel a garage. Hopefully, these DIY garage makeover ideas will help turn your messy garage space into a neat as a new pin. However, if you’re doing a remodel, consider the building codes, make a plan, and get it done. Make sure your garage has enough storage space.
Having more storage space will allow you to store more stuff; try to install cabinets and shelves. From time to time, go through the unused stuff.
No more going to the store as you’ve VEVOR back to provide all the items at your doorsteps to remodel your garage on a budget. Just browse, order, and get a discount

