Offering a fresh supply of eggs and healthy chicken meat, keeping your chickens can be very rewarding. But the mere thought of plucking your chickens by hand might send shivers down your spine. Chicken plucking by hand can also be fun, but it gets messier, and you just do not want to get your hands dirty—you do not want to be a chicken plucker.
Well, worry not. Gone are the days when a chicken plucker was a person who got paid to de-feather chickens. Today, there are mechanical chicken plucker machines that pluck chickens in seconds without making a mess.
If you are wondering how a chicken plucker works, stick around as we discuss how this almost magical process happens. This article delves into the inner workings of chicken pluckers, explores different types of chicken pluckers and how to operate one, and guides you through the selection process to find the perfect plucking partner for your poultry pursuits.
But before discussing how a chicken plucker works, let’s discuss what is a chicken plucker.
Table of contents
What is a Chicken Plucker?
In the early twentieth century, a chicken plucker used to be the person who removed feathers off the slaughtered chickens and got paid for it. Today, the human chicken plucker has been replaced by mechanical machines that whir away the feathers of a chicken with their rubber fingers, leaving behind a smooth, ready-to-cook bird in a matter of minutes. That’s the magic of a chicken plucker!
These handy devices come in various types, but they all share a common goal: to efficiently remove feathers using a combination of speed, friction, and sometimes water. They’re like miniature feather tornadoes, preparing your poultry for the oven without hand cramping manual plucking.
Now that you know what a chicken plucker is, let’s explore their different types.
Types of Chicken Pluckers
There are different types of chicken pluckers, each offering a unique set of benefits.
Dry Pluckers
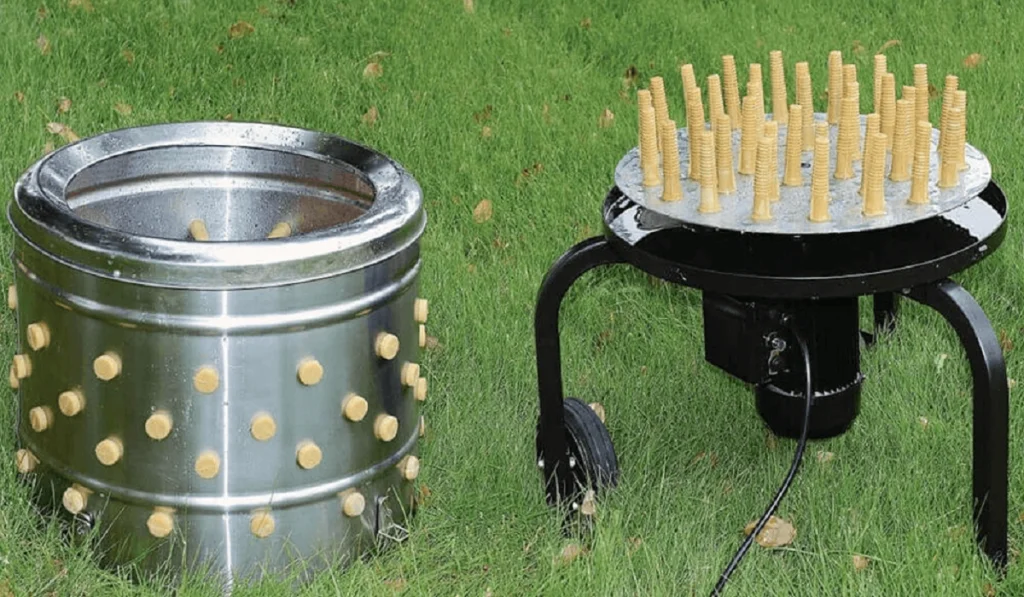
A dry plucker is a machine designed to remove feathers from poultry without scalding them, resulting in better meat quality. It typically consists of a set of rotating discs or plates that grip and remove the feathers with a drop of water. They tend to be less messy than their wet counterparts but might require a final touch-up for stubborn feathers.
Wet Pluckers
These machines incorporate water into the process, creating a slippery canvas for the rubber fingers to glide across. For these plucking machines, you have to scald the chickens before putting them into the plucker’s plucking chamber. This can improve their efficiency and leave behind a cleaner bird but at the cost of potential mess and higher water usage. Consider a wet plucker if you’re dealing with high volumes of poultry or want a more thorough and quicker plucking. These are fast and efficient but also tend to be a bit expensive.
Chicken Plucker Drill Attachment
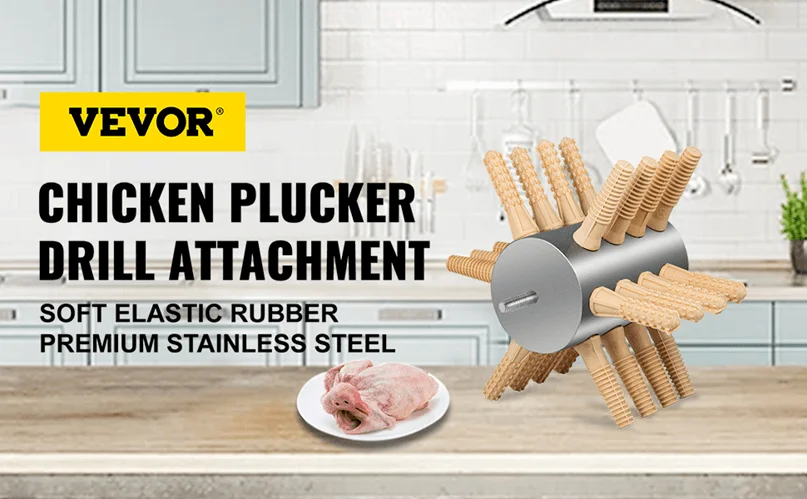
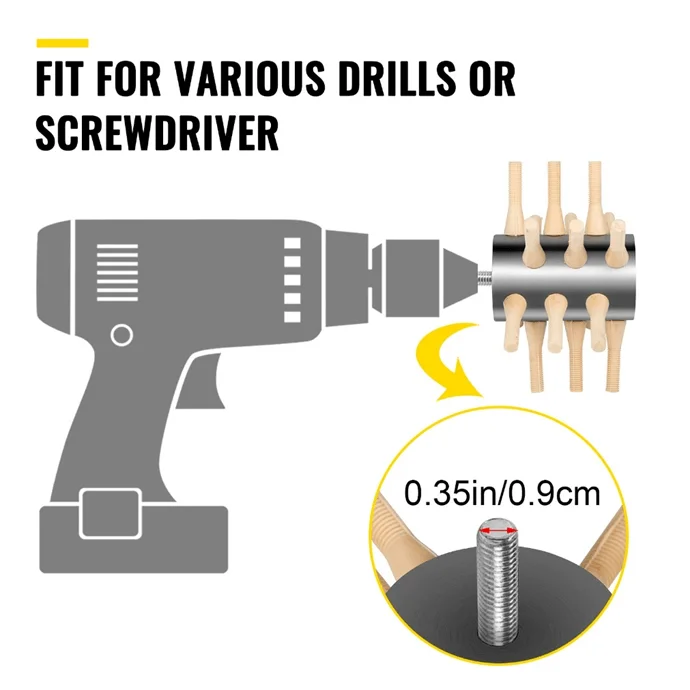
If you’re on a budget or have limited space, chicken plucker drill attachments make a perfect, cost-effective, and compact alternative to chicken plucker machines. Simply add the attachment to your drill, and it is all set to whirr your slaughtered chickens naked. They might not be as effective as the chicken plucker machines, but they get the job done with a little effort and make a perfect portable solution for occasional poultry processing.
How Does a Chicken Plucker Work?
The fundamental principle behind chicken pluckers relies on the delicate dance of rotational motion, water, and friction (similar to the tug of an ancient plucking technique) that rubber fingers apply against the chicken. The following are key components and principles that contribute to the functionality of a chicken plucker:
Rubber Fingers
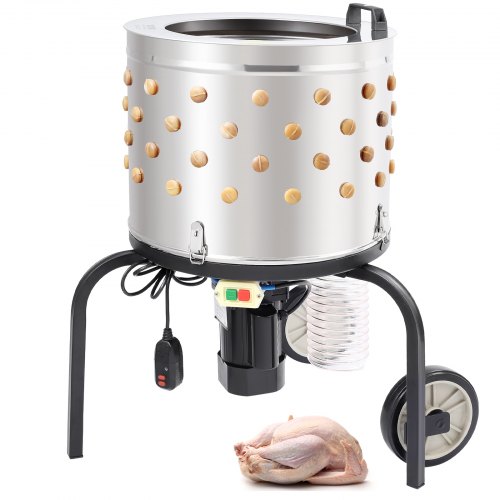
Rubber fingers are protruding and pointed rubber attachments that are strategically arranged inside the chicken plucker machines and onto the head of the plucker drill attachment. These flexible plucking fingers are the ones doing the actual de-feathering. It is these fingers that come in direct contact with the carcass of the chicken. As these flexible fingers rub against the chicken during rotation, they pluck out feathers.
The Rotational Motion
Now, picture these fingers attached to a spinning drum or cone, depending on the plucker type. This rotational motion creates a gentle but persistent tug as the rubber fingers brush against the chicken’s body. Each revolution loosens another batch of feathers, gradually stripping the bird naked.
Water
For wet pluckers, water plays a significant role. A controlled spray mist keeps the feathers and rubber fingers slick, reducing friction and further aiding the plucking process. This can be advantageous for tougher feathers or larger birds, but remember, it comes at the cost of mess and increased water usage. Also, hot water is used for scalding the chicken. Scalding loosens up the feather follicles, making plucking easier.
Motor Power
Whether it’s a hand-cranked drill attachment or a dedicated electric motor, some form of power source drives the rotation. Different motor powers offer different levels of plucking intensity and cater to varied needs.
Step-by-Step Guide on How Chicken Pluckers Operate
Now that you have understood how different components of a chicken plucker work together to effectively strip poultry bare, ready for cooking, let’s discuss how to pluck a chicken with a plucker.
Prepping for Plucking
Before plucking, you need to prep the chicken, plucker, and workstation.
- Chicken Prep: Before throwing the chicken into the plucking chamber, make sure that the chicken has completely cooled down after slaughtering. This helps loosen the feathers and makes the plucking process smoother. For efficient plucking, you may also want to scald the chicken in hot water.
- Plucker Prep: Familiarize yourself with your specific plucker model. Check for any signs of wear or damage, and ensure all components are properly assembled. Plug in the plucker and do a test run before putting the chicken into the plucking chamber.
- Workspace Prep: Choose a clean, well-ventilated area with ample space for maneuvering the plucker and disposing of feathers.
- Gathering Supplies: Make sure that you have gathered all the supplies that you will need during the plucking process.
Plucking the Feathers
- Positioning the Chicken: Different pluckers have different methods for positioning the bird. Follow the manufacturer’s instructions to ensure proper positioning and prevent injury to both you and the chicken.
- Turn On the Plucker: Activate the plucker and start with a lower power setting if you’re a beginner. Gradually increase as you gain confidence.
- Feather Frenzy: Let the plucking magic begin! Observe the process closely, ensuring the rubber fingers are making contact with the bird’s body and de-feathering it without damaging its skin. Don’t hesitate to pause and adjust the bird’s position if needed.
- Winging It: For some pluckers, especially dry models, you might need to gently guide the chicken’s wings and legs to ensure thorough feather removal. Remember, always prioritize safety and avoid forceful movements.
- Final Touches: Once most feathers are gone, and your chicken is bare naked, consider turning off the plucker, taking out the chicken, and pulling out any remaining stubborn feathers.
- Clean Up: Once you have processed the whole batch of chickens, dispose of the feathers responsibly and clean the plucker thoroughly according to the manufacturer’s instructions.
How to Choose an Efficient Chicken Plucker?
Now that you have learned that plucking chickens with a plucker is easy-peasy, you might be looking for a plucker—an efficient plucker. To help you choose the best chicken plucker that will best meet your plucking needs, we have listed a few factors for you to consider before making the purchase.
- Capacity: Consider your poultry needs. Do you pluck a few chickens for your family or a flock for your farm? Choose a plucker with a capacity that matches your volume, avoiding overloading for optimal efficiency.
- Power Source: Decide on your power source. Electric pluckers offer consistent power, while hand-cranked models provide portability but require more physical effort. Consider your workspace and available electricity when making your choice.
- Plucking Style: Choose a plucker that matches your style. Dry pluckers are compact and portable, while wet pluckers offer improved efficiency but require water access. Chicken plucker drill attachments might require a bit extra effort and still be less efficient than rotatory wet chicken plucker machines.
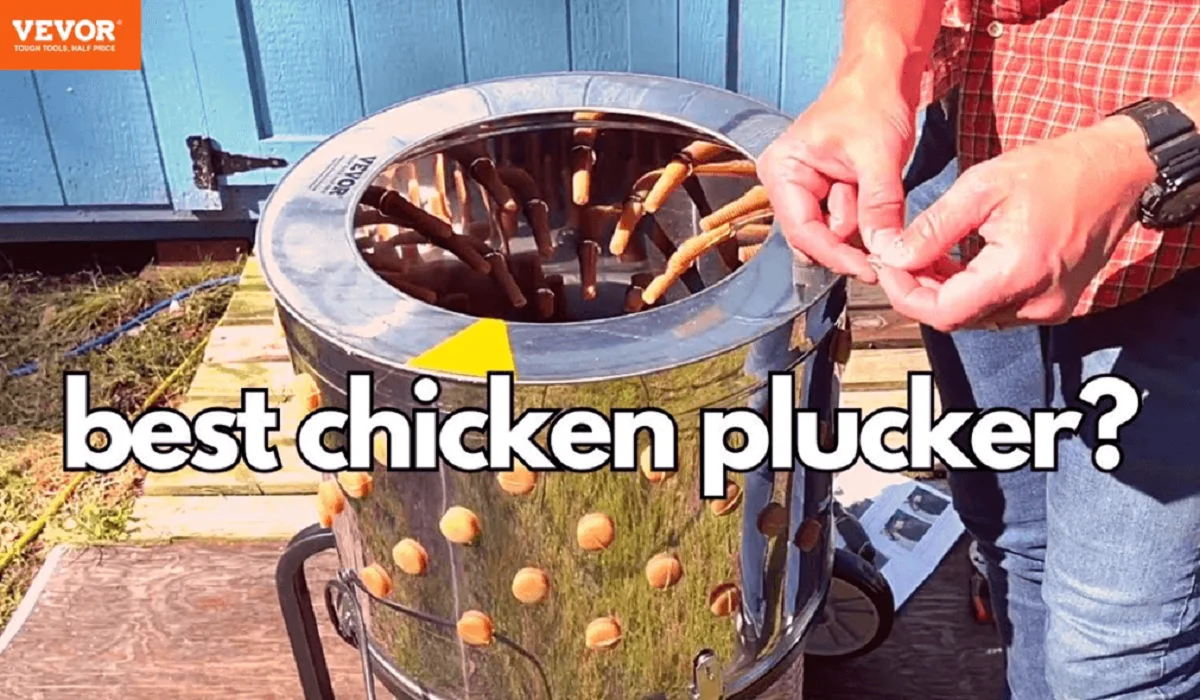
- Durability: Invest in a plucker built to last. Look for sturdy materials like stainless steel and consider the ease of cleaning and replacing parts. VEVOR chicken pluckers are built with stainless steel, ensuring an extended lifespan.
Considering these factors, VEVOR Chicken Plucker 2.0 will tend to pop up as the perfect plucker. It can pluck 6 chickens in under one minute, making it a perfect option for medium and large-scale plucking needs. It features a 550W motor and has 108 soft but sturdy rubber fingers strategically arranged to ensure efficient plucking.
If you are tight on budget and space and have already got a drill machine, you can check out the VEVOR Chicken Plucker Drill Attachment. It is also manufactured with stainless steel for durability and has 18 rubber fingers. It is perfect for plucking small chickens, quail, pigeons, doves, pheasants, and other poultry.
Conclusion
Chicken pluckers are efficient tools that help transform once-daunting and messy plucking chores into seamless and clean operations. In this article, we have learned what a chicken plucker is, how a chicken plucker works, and how you can pluck a chicken with it.
Consider the factors discussed at the end, and choose a chicken plucker that best suits your plucking needs and style. For optimum results for an extended period, make sure that you get your plucker from a reputable brand such as VEVOR, which is known for its tools’ toughness and high affordability.
Happy plucking!





 Arabic
 Danish
 Dutch
Dutch English
 Finnish
 French
 German
 Hungarian
 Italian
 Norwegian
 Portuguese
 Romanian
 Russian
 Slovak
 Spanish
 Swedish