Although being a chicken owner can be exciting, it comes with plenty of responsibilities, including cleaning the chicken coop the right way for overall well-being.
Neglecting coop hygiene puts your chickens at risk of infection and other diseases. The last thing you want is to transmit viruses and bacteria to the rest of your flock and, in some cases, even yourself. Also, who wants a dirty backyard that reeks and upsets neighbors?
So, what is the best way to clean your chicken coop? And how often do you clean the chicken coop? This guide covers everything you need to know about keeping your chicken coop spick and span.
Let’s get started!
Table of contents
- The Foundation of a Spotless Coop
- The Science of Coop Hygiene
- Pro Tips on Coop Maintenance
- Establishing a Cleaning Routine: Step-by-Step Guide
- Step 1: Gather Your Cleaning Supplies
- Step 2: Remove Loose Debris
- Step 3: Scoop and Dispose of Bedding
- Step 4: Scrub and Disinfect Surfaces
- Step 5: Clean and Refill Feeders and Waterers
- Step 6: Check and Replace Bedding
- Step 7: Inspect Coop Structure
- Step 8: Enhance Ventilation
- Step 9: Maintain a Cleaning Schedule
- Troubleshooting Common Cleaning Challenges
- Longevity and Durability: VEVOR’s Commitment to Coop Quality
- Bottom line
The Foundation of a Spotless Coop
No doubt all chicken coops get dirty, but they aren’t always spotless. However, like all animals, your poultry deserves a clean living environment to thrive. Here is the foundation of a spotless coop:
Regular Cleaning Routine
To maintain a clean coop, establish a regular cleaning routine. This includes daily tasks like removing droppings, refreshing bedding, and cleaning water and food containers. Regular cleaning of chicken coop prevents the buildup of harmful bacteria and parasites, promoting a healthier environment for your chickens.
Smart Design for Easy Maintenance
Incorporating thoughtful design elements is key to ensuring that the maintenance of a spotless coop is both simple and hassle-free. Features like removable trays, sliding doors or VEVOR automatic chicken coop door, and easy-access nesting boxes are carefully integrated to enhance the efficiency of the cleaning process.
Ventilation and Light
Adequate ventilation and natural light are crucial for a clean coop. After all, proper airflow helps reduce moisture, preventing the growth of mold and mildew. Additionally, sunlight has natural disinfectant properties, helping to keep the coop dry and free from pathogens.
Choosing the Right Bedding
Selecting the right bedding material is essential for easy cleaning of chicken coop. VEVOR’s range of coop solutions includes bedding options that are not only comfortable for your chickens but also make cleaning a breeze. Proper bedding absorbs moisture and odors, making the coop a more pleasant space for both you and your feathered friends.
VEVOR’s Coop Solutions
VEVOR understands the importance of a clean and well-maintained chicken coop. For instance, VEVOR’s metal coops are designed with user-friendly features, allowing you to spend less time on cleaning tasks and more time enjoying your flock. These solutions are crafted to enhance the overall coop experience, focusing on efficiency and functionality.
The Science of Coop Hygiene
Chickens, like any animals, may harbor pathogens such as Salmonella, E. Coli, and Listeria if their living environment is not kept in optimal hygienic conditions. Proper hygiene serves as the first line of defense to safeguard the health of your flock. Here are some scientifically-backed ways to keep your chickens content and healthy.
Cleaning Frequency
The frequency of cleaning chicken coop varies based on factors like coop size, the number of chickens, and the chosen litter method. There is no specific time period that can answer your question about how often to clean chicken coop. But remember, if you can smell the coop, it’s likely time for a cleanup to prevent ammonia buildup, which can be harmful to both chickens and humans.
For owners of structures such as the VEVOR large metal coop, employing a deep litter method proves highly effective for cleaning purposes. This method facilitates the accumulation and decomposition of bedding over time, presenting a sustainable approach to coop maintenance. However, it’s essential to note that this method may not be as suitable for smaller coops.
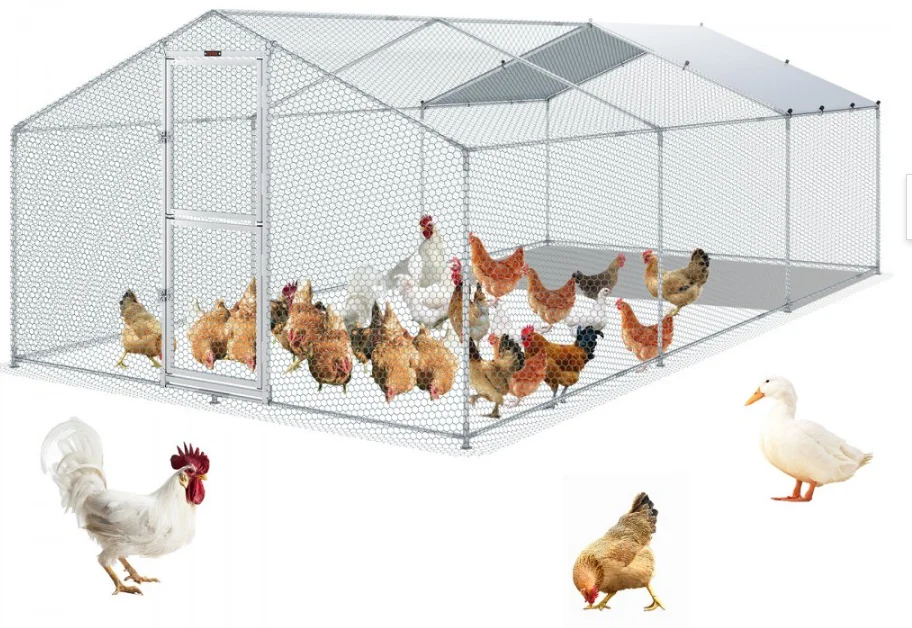
Regardless of coop type or chicken quantity, a recommended schedule involves a quick weekly cleaning followed by a thorough monthly cleaning.
Choosing the Right Cleaner
Have you ever wondered how to sanitize a chicken coop? If yes, then a cleaner can make or break your game. Selecting an appropriate cleaner is crucial for effective disinfection. While some commercial cleaners use natural enzymes or beneficial bacteria, a simple at-home solution can be created by diluting equal parts vinegar and water. Isn’t it amazing for a quick cleaning?
However, try to avoid using bleach, as it reacts with ammonia in feces, releasing toxic fumes.
Proper Attire for Cleaning
Cleaning a chicken coop is a hands-on and, at times, dirty job. Dressing appropriately is the best thing one can do to minimize exposure to germs and bacteria. Wear clothes you don’t mind getting dirty, dusty, and grimy, along with gloves to protect against potential contaminants like Salmonella.
A face mask is necessary to shield your lungs from dust and fumes. Consider using rubber boots or dedicated shoes at the time of cleaning your chicken coop to prevent tracking contaminants into your living space.
Pro Tips on Coop Maintenance
Here are some pro tips on coop maintenance:
Inspect Regularly
Conduct regular inspections to identify potential issues early on. Check for signs of wear and tear, damaged equipment, or areas that may need immediate attention. Early detection allows for timely repairs, preventing larger problems down the line.
Strategic Placement of Feeders and Waterers
Consider the strategic placement of feeders and waterers to minimize spillage and waste. This not only keeps the coop cleaner but also ensures your chickens have access to fresh food and water without unnecessary mess.
Utilize Proper Ventilation
Adequate ventilation is crucial for coop hygiene. Ensure that your coop has proper ventilation to reduce moisture buildup, which can lead to the growth of harmful bacteria and odors. You won’t believe it, but VEVOR’s chicken coops have a smart design to enhance airflow.
Implement Rotational Grazing
If your setup allows, implement rotational grazing for your chickens. This involves moving the coop to different areas, allowing the ground to recover and minimizing the concentration of waste in one spot. It’s an eco-friendly approach that promotes a cleaner environment.
Establish a Pest Control Routine
Regularly check and implement pest control measures. Pests not only pose a threat to your chickens but can also compromise the cleanliness of the coop.
Educate Yourself on Chicken Health
Stay informed about common chicken health issues and symptoms. A proactive approach to chicken health care can prevent the spread of diseases and reduce the risk of hygiene-related issues.
Recommended For Your Project
Establishing a Cleaning Routine: Step-by-Step Guide
Follow this comprehensive step-by-step guide to create a practical and efficient cleaning of chicken coop routine that not only promotes cleanliness but also simplifies the process.
Step 1: Gather Your Cleaning Supplies
Before you begin, gather all the necessary cleaning supplies. This may include a:
- Sturdy broom
- Rake
- Shovel
- Bucket
- Mild detergent or vinegar solution
- Scrub brushes
- Appropriate personal protective equipment such as gloves and a face mask.
Step 2: Remove Loose Debris
Start the cleaning of chicken coop by removing loose debris such as feathers, straw, and any uneaten food. Use a broom or rake to sweep away dirt and cobwebs from corners and crevices.
Step 3: Scoop and Dispose of Bedding
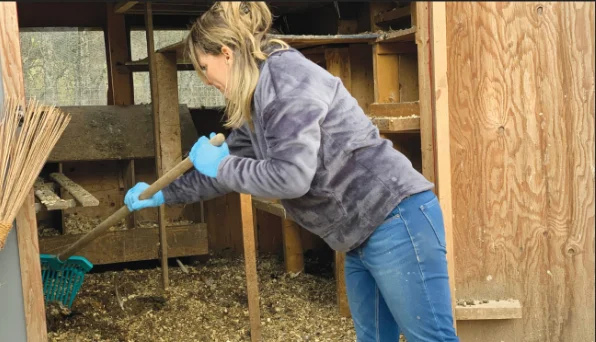
If you use a deep litter method, scoop out the top layer of bedding, including droppings. Dispose of this material in a designated compost or waste area. If your coop features removable trays, this step becomes even more convenient.
VEVOR Design Tip: VEVOR coops often come with removable trays, simplifying the process of removing bedding and waste. Take advantage of this design element to make your routine faster and more efficient.
Step 4: Scrub and Disinfect Surfaces
Using a mild detergent or a vinegar-water solution, scrub all surfaces inside the coop. Pay special attention to roosting bars, nesting boxes, and any areas with visible droppings. This step is crucial in chicken coop cleaning for preventing the buildup of harmful bacteria.
Step 5: Clean and Refill Feeders and Waterers
Empty and clean feeders and waterers regularly to ensure your chickens have access to fresh and uncontaminated food and water. This helps in maintaining the health of your flock.
Step 6: Check and Replace Bedding
Inspect the remaining bedding for moisture and odor. Replace any wet or soiled bedding with fresh, dry material. Adequate bedding is crucial for maintaining a comfortable and sanitary environment for your chickens.
Step 7: Inspect Coop Structure
Easy to clean chicken coop interior is no less than a blessing. Take a few moments to inspect the structural integrity of your coop. Check for any signs of damage, loose hardware, or areas that may need repairs. Addressing these issues promptly contributes to the longevity of your coop.
Step 8: Enhance Ventilation
Ensure that ventilation openings are clear and functioning properly. Good airflow is essential for preventing the buildup of moisture and ammonia. If your coop design allows, open windows or vents to facilitate natural ventilation.
Step 9: Maintain a Cleaning Schedule
Establish a regular cleaning schedule based on the size of your coop, the number of chickens, and your preferred litter method. A combination of quick weekly cleanings and thorough monthly cleanings, as well as semi-annual deep cleanings, is generally effective.
By following this step-by-step guide and incorporating these effective chicken coop cleaning routines, you can ensure a clean and healthy environment for your chickens. VEVOR’s coop design elements, such as removable trays and smart ventilation, further enhance the efficiency of your cleaning routine, making poultry care a seamless and enjoyable experience.
Troubleshooting Common Cleaning Challenges
Chicken coop cleaning can sometimes pose challenges, but with the right solutions and preventive measures, maintaining a pristine environment for your chickens becomes more manageable.
Here are some common challenges and easy clean chicken coop tricks to manage it:
Persistent Odors
Issue: Lingering odors despite regular cleaning.
Solution: Most of the chicken owners are worried about how to keep the chicken coop safe from smelling. Here’s the solution – Increase ventilation, consider using odor-neutralizing additives in bedding, and ensure proper waste disposal.
Stubborn Stains
Issue: Difficult-to-remove stains on coop surfaces.
Solution: Pre-soak stained areas with vinegar and water solution before scrubbing, or consider using eco-friendly stain removers.
Mold and Mildew Growth
Issue: Damp conditions leading to mold and mildew.
Solution: Improve ventilation, address leaks promptly, and opt for moisture-resistant bedding. Regularly inspect and clean areas prone to moisture accumulation.
Insect Infestations
Issue: Presence of pests like mites or lice.
Solution: Implement regular pest control measures, consider natural deterrents, and inspect and clean nesting areas thoroughly.
Longevity and Durability: VEVOR’s Commitment to Coop Quality
Ensuring that your chicken coop stands the test of time requires a commitment to longevity and durability. VEVOR’s coop designs are crafted with these principles in mind.
Sturdy Construction

VEVOR coops are built with robust and durable materials, providing a solid foundation that withstands the challenges of weather and use.
Smart Design Elements
Thoughtful features, such as reinforced corners and secure locking mechanisms, contribute to the overall structural integrity of VEVOR coops.
Removable Components
VEVOR’s coop designs often include removable trays, making waste removal and thorough cleaning of a chicken coop a simple and efficient process.
Weather-Resistant Materials
The use of weather-resistant materials in VEVOR coops ensures that the coop remains in top condition, requiring minimal maintenance to combat the effects of rain, snow, and other environmental factors.
Resistance to Wear and Tear
VEVOR’s choice of materials not only enhances durability but also resists wear and tear. This means less frequent repairs and a cleaner, more comfortable living space for your chickens.
Sustainability
The sustainability of VEVOR coops contributes to their long lifespan. The materials are chosen not only for their durability but also for their eco-friendly qualities, aligning with a commitment to both the longevity of the coop and environmental responsibility.
Bottom line
That’s all you need to know if you ever thought about how to keep a chicken coop clean. Maintaining a clean chicken coop is paramount for both poultry health and a pleasant environment. VEVOR’s ultimate guide emphasizes the significance of regular chicken coop cleaning to prevent issues like odor, mold, and pests. With a commitment to durability and thoughtful design, VEVOR provides top-notch coop care solutions. Ensure your flock thrives in a clean and comfortable space by following our comprehensive cleaning routine and troubleshooting tips.
Trust VEVOR for coop accessories that simplify maintenance. Elevate your coop care with VEVOR – where cleanliness meets quality. Take the first step; explore VEVOR’s coop solutions today for a happier, healthier flock!


