If you or a loved one have a birthday coming up, then one of the best things to get is an ice cream cake. With that being said, when you purchase an ice cream cake, you really don’t know what ingredients are inside of it, and moreover, it probably won’t taste that good.
The simple fact is that store-bought desserts like ice cream cakes often don’t taste that great because they don’t have the highest quality ingredients, and whoever made them probably didn’t put that much effort into it. Furthermore, making your own ice cream and ice cream cake at home can be very cost-effective, not to mention fun and rewarding as well.
Therefore, today we’re going to provide you with a step-by-step guide on how to make an ice cream cake, including the use of the revolutionary VEVOR Ice Cream Maker.
Table of contents
Why Make Your Own Ice Cream Cake?
So, something you’re probably wondering is why you would make your own ice cream cake when you can just go to the store, save yourself the hassle, and buy one that is ready to go. Well, the reality is that when you buy an ice cream cake from the store, there are only so many flavors to choose from, usually chocolate and vanilla.
The selection just isn’t there, and if you’re making a cake for someone who would like something a bit special or unique, you just won’t be able to find it in a store. However, if you make your own ice cream cake at home, you’ll be able to customize the flavors any way you see fit. This allows you to create an ice cream cake that everybody is going to love.
Speaking of ingredients, when you make your own ice cream and ice cream cake, you determine exactly which ingredients go into your cake and which do not, therefore allowing you to be safe and healthy. Those store-bought are full of chemicals that you just don’t want to be putting into your body.
With all of that said, keep in mind that making your own ice cream cake at home can also be much more cost-effective than buying one from a store. It might seem like a big investment to purchase an ice cream maker, but the reality is that it will pay for itself after just a few uses.
How to Make Ice Cream Cake: Step-by-Step
Now that we’ve talked about why you would possibly want to make your own ice cream cake at home, it’s time to actually make it. As you’re about to see, the process of making an ice cream cake is somewhat lengthy, but it’s not overly difficult. As long as you follow the steps listed below, making your own ice cream cake at home is easy.

Step 1: Get an Ice Cream Maker
OK, so if you are going to make your own ice cream cake, it serves to reason that you need an ice cream maker. Of course, there are plenty of different ice cream makers out there, but they’re not all built the same. If you want a durable, reliable, and fast-acting ice cream maker that produces great results every time, then this particular model from the VEVOR brand name is the way to go.
It features a large capacity bowl so you can make a whole lot of ice cream at once, therefore allowing you to make a large cake, not to mention that it features a powerful freezing element and motor.
Step 2: Choose the Flavor and Gather Ingredients
With your ice cream maker purchased and set up, the next step in the process of making your own ice cream cake at home is to choose the flavors that you want to use to make your cake.
Of course, you have the classics such as strawberry, chocolate, vanilla, and others. However, as we mentioned above, the beauty of making your own ice cream cake at home is that you have so many options. You can add any ingredients that you see fit.
Now, many people make ice cream cakes with two or even three different flavors, so for the purposes of this article, we’re going to be making vanilla ice cream and chocolate ice cream. This means that you’re going to need sugar, heavy cream, milk, vanilla extract, and cocoa powder, along with any other additional flavors you see fit.
At this point, you’ll also need to gather a box of cake mix, or make your own cake at home, something that we aren’t going to cover today. You’ll also need to get whipped cream frosting or buttercream, as well as a platter or cake board, and some parchment paper and plastic wrap.
Step 3: Bake the Cakes
When making an ice cream cake, you need two layers of cake. Therefore, the next step in the process of making your own ice cream cake at home is to bake the layers of cake. Now, you can of course use your own homemade cake recipe, which will be much better than using a boxed cake mix.
However, if you’re short on time, a boxed cake mix will do just fine. Just remember, if you want the highest quality ice cream cake possible, you will want to make your own cake. Either way, follow the recipe as instructed and make your cake. Make sure that you make two layers that are separate from each other, one for the bottom and one for the top.
Once you’ve baked your cakes, let them cool, and then freeze them. Remember, this is an ice cream cake, so the layers of cake themselves should also be cold, or else when they touch the ice cream, the ice cream is going to melt.
Step 4: Make the Ice Cream Bases
The next step here is to make the bases for your chocolate and vanilla ice cream. To make ice cream, you’re going to mix three-quarter cups of sugar, a cup of whole milk, and two cups of heavy cream. Make sure to stir everything thoroughly until the sugar is totally dissolved.
Now, if you want to make this process easier on yourself, double those ingredients, and then split the batch in half. With the batch split in half, you can then add the cocoa powder to half the batch and the vanilla extract to the other.
Once again, mix everything thoroughly. With the ice cream base made, you need to cool it. Put it in the refrigerator for around two hours so that it’s cold enough to freeze once you put it in the ice cream maker.
Step 5: Churn the Ice Cream
Using your trusty VEVOR ice cream maker, now it’s time to churn the ice cream. You’ll need to do this in two separate steps because you’re making two different types of ice cream. Take your ice cream base and put it inside the mixing chamber in the ice cream maker.
Turn the ice cream maker on and let it run according to the manufacturer’s instructions, this should take about 30 minutes. Once the ice cream is done mixing, you can remove it and place it in the freezer.
Recommended For Your Project
Step 6: Assemble the Ice Cream Cake
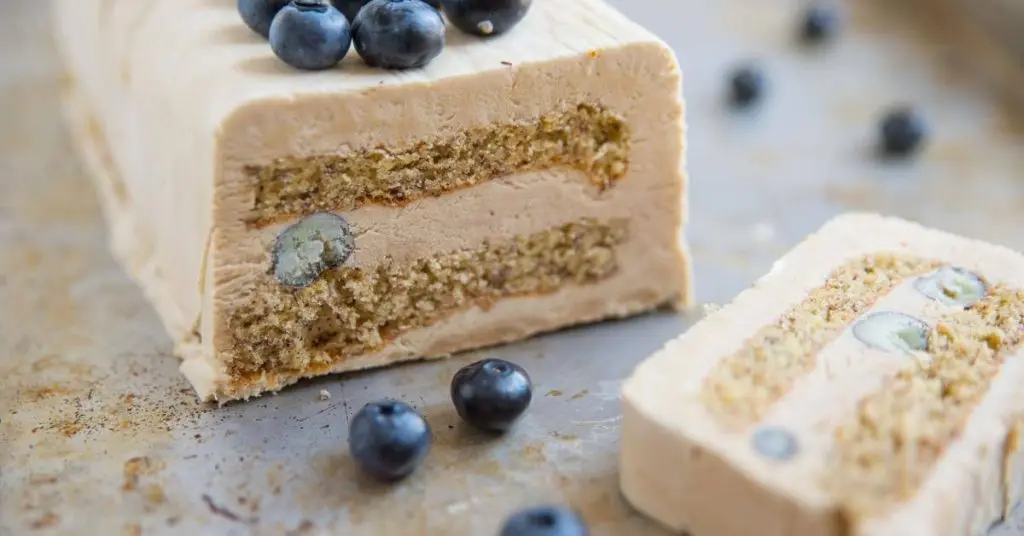
The final step here is to assemble the cake. First, put a layer of the cake on a platter. Take one type of ice cream and then place it on top of the cake. Use a spatula to spread it around evenly. You’re now going to put the second layer of cake on top of that ice cream, and then layer your second layer of ice cream on top of that.
Make sure that everything is aligned, press it down, and then freeze the cake for around 2 hours. At this point, you can now frost the cake. Use your whipped cream or buttercream frosting to coat the outside of the cake using a spatula. If you see fit, now you can also decorate it.

Using VEVOR Ice Cream Maker
The VEVOR Ice Cream Maker really is a great tool for making ice cream, and this is true for many different reasons. First and foremost, it features a large capacity bowl. This means that you should be able to make more than enough ice cream at once to feed several people, or in this case, to bake a large ice cream cake.
Another reason why you might want to consider this particular ice cream maker is due to its very powerful freezing elements and motor. These combined two very quickly freeze the ice cream mixture. Furthermore, it also comes with several features that create a very smooth and airy texture, something that’s always great when you’re eating ice cream.
In terms of actually using the VEVOR ice cream maker, it’s not hard at all. The view or ice cream maker features a simple top section where you pour the ice cream mix into. You then close the lid, choose your setting, and turn the ice cream maker on. It really doesn’t get much easier than that!
The particular model that we’re talking about here is small and countertop-friendly as well, so you don’t need to worry about taking up too much space. Although it’s not the largest of units in the world, it still has more than enough capacity to make a substantial amount of ice cream. Furthermore, the outside is made out of high-quality stainless steel, so you don’t have to worry about physical damage or rusting. Overall, it’s definitely one of the best ice cream makers in the world.
FAQs
Here are some of your most frequently asked questions about making an ice cream cake at home.
How long will a homemade ice cream cake last?
If properly stored in the freezer, a homemade ice cream cake should last for around two weeks.
What are the best flavors to make a homemade ice cream cake with?
The best flavor to make a homemade ice cream cake with is any flavor you see fit. That said, common flavors include chocolate, vanilla, and strawberry.
Should I bake my own cake?
Although using a store-bought cake mixture is much faster and easier, if you want the highest quality ice cream cake possible, you’ll want to bake your own cake mix.
Is making an ice cream cake hard?
No, making an ice cream cake is not very difficult. As long as you have the right kind of ice cream maker, it should be fast and easy.
Final Thoughts on How to Make Ice Cream at Home
The bottom line here is that making your own ice cream cake at home comes with several big benefits, including that it’s much healthier than the store bought option, cheaper than a store-bought option, and better tasting too. There’s really no reason why you shouldn’t make your own homemade ice cream cake. Of course, you’ll need to get yourself an ice cream maker, with this particular model from VEVOR being a fan favorite across the board!


