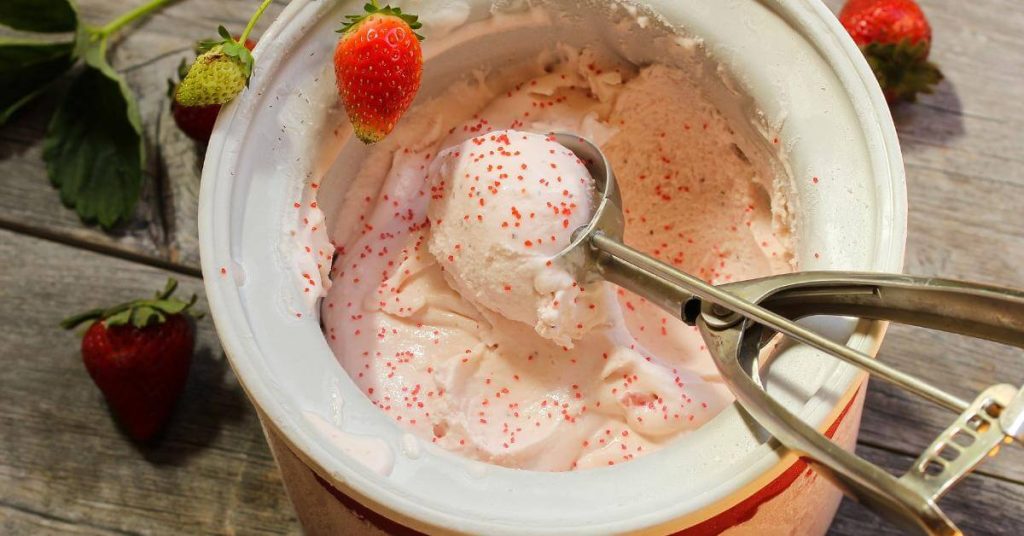
If you’re someone who really enjoys ice cream, then something you might want to try doing is making your own ice cream at home. The simple fact of the matter is that making your own ice cream at home is much better than buying store bought ice cream.
This is true for a variety of reasons, all of which we will discuss below. However, what we’re really here to do today is to provide you with an in-depth guide on how to make ice cream at home.
We’re going to provide you with all of the information you need to make your own ice cream at home, including a step by step guide on how to make regular ice cream and soft serve ice cream.
We’ll also take a closer look at a very nice ice cream maker from VEVOR, one that will make the homemade ice cream making process much easier. Let’s get to it and find out how to make ice cream at home.
Table of contents
Benefits of Homemade Ice Cream
The simple fact is that making your own ice cream has many different benefits, from tasting better to having healthier ingredients. There are many reasons why you should try making your own ice cream at home, including the following.
Better Taste
Although some store bought ice cream might taste okay, the simple reality is that many options just aren’t anywhere close to what they’re cracked up to be. If you make your own ice cream with fresh ingredients and you avoid preservatives and artificial flavors, you can create a much better tasting ice cream than anything you could buy at a store.
Generally speaking, the result when you make your own ice cream is a more authentic and richer flavor that you just won’t find in store bought ice cream. Even better is that you can customize exactly how creamy, sweet, and flavorful you want your ice cream to be.
Healthier Ingredients
Speaking of the ingredients, another bonus that you get from making your own ice cream at home is that you know exactly what ingredients are in your ice cream. When you make ice cream at home, you control exactly which ingredients you put in there and which ones you do not.
This means that you can use locally sourced ingredients, fresh ingredients, and you can avoid artificial sweeteners, additives, and unhealthy ingredients. Even better is the fact that you can easily create ice cream that meets your dietary restrictions, such as if you are lactose intolerant.
Cost Effective
The next benefit of making your own ice cream at home is the simple fact that it is more cost effective. When you purchase premium ice cream from the store, you can pay a whole lot of money.
Yes, purchasing your own ice cream maker is quite an investment, but over the long run, it will pay off. When it comes down to it, sugar, milk, and cream are all relatively inexpensive, which means that you end up saving money when compared to buying your ice cream at the store.
You Get to be Creative
The other benefit of making your own ice cream at home is that you get to be creative with it. You can mix in any flavors you want, create flavor combinations, mix in various ingredients, and put toppings on top as well. You can even add nuts and fresh fruit, cookies, candy, and more. When it comes down to it, the world is your oyster.
Recommended For Your Project
How to Make Homemade Ice Cream: Step-by-Step
Right now, we want to provide you with a step by step tutorial on how to make your own homemade ice cream. As you’re about to see, it’s really not all that difficult and doesn’t take that many steps.
Step 1: Get an Ice Cream Maker
The first step in the process of making your own ice cream at home is to get yourself an ice cream maker. Further below it in this article, we will take a look at one of the best screen makers in the world, a model that comes to us from the VEVOR brand name. Whatever the case, you’re going to need an ice cream maker if you plan on making your own ice cream at home.
Step 2: Gather the Ingredients
Next on the list of steps to take when making your own ice cream at home is to gather all of your ingredients. Although exact ratios can differ depending on what you’re making, you’re going to need sugar, whole milk, heavy cream, and whatever flavors you plan on making your ice cream tasting like. This could include vanilla extract, cocoa powder, fruit purees, or anything else of the sort.
Step 3: Create the Ice Cream Base
The next step in the process of making your own homemade ice cream at home is to prepare the base. Take a mixing bowl and combine roughly three quarter cups of sugar, one cup of whole milk, and two cups of heavy cream.
You’ll want to stir everything very thoroughly until the sugar is 100% dissolved and the mixture is homogeneous. At this point, you can add flavoring such as vanilla extract and cocoa powder, and whatever else you see fit.
Step 4: Cool the Mixture
The next step in making your own homemade ice cream is to chill the mixture. You want to cover the mixture with an air-tight cover of sorts and then place it in the refrigerator for around two hours.
It needs to be thoroughly chilled. If the mixture is not chilled before you put it in the ice cream maker, it might not totally freeze, and the texture will likely not be ideal either.
Step 5: Use the Ice Cream Maker
The next part in the process of making your own homemade ice cream at home is to get your ice cream maker. You’re now going to pour the mixture that has been chilled in the refrigerator into the ice cream maker.
You’ll want to follow all of the manufacturer’s instructions according to your ice cream maker in terms of churning. It should take no more than 30 minutes for your ice cream to churn. Ice cream freezes, it will expand and thicken. At this point, during about the last five minutes of churning, you can also add any additional toppings or add-ins as you see fit.
Step 6: Freeze the Ice Cream
Your ice cream mixture is now complete. The only step left is to place it in the freezer. Although it will be cold out of the ice cream maker, it won’t be 100% frozen, which is why you do want to put it in the freezer for around 2 hours before consuming it.
How to Make Soft Serve Ice Cream at Home: Step-by-Step
Now that we know how to make regular ice cream at home, let’s take a look at how to make soft serve ice cream, a much softer and creamier version of ice cream that many people enjoy during the summer time.
Step 1: Gather Your Equipment and Ingredients
Once again, to make thoughts of ice cream, just like with making regular ice cream at home, you’re going to need an ice cream maker. Again, we recommend choosing a model from VEVOR, as these are very reliable and produce great results.
At this point, you’ll also need to gather all of your ingredients, including whole milk, sugar, heavy cream, corn syrup, and some kind of stabilizer. A stabilizer could be a commercial stabilizer or gelatin.
Step 2: Make the Ice Cream Base
The next step in the process of making your own soft serve ice cream at home is to prepare the ice cream base. Here, you’re going to need a saucepan, because the mixture needs to be heated up. Combine 2 tablespoons of corn syrup, 1 cup of heavy cream, half a cup of sugar, and one cup of whole milk.
Over medium heat, heat up the mixture and stir constantly until all of the sugar is 100% incorporated. You’ll then solve 1 teaspoon of gelatin in cold water, and add it into the mixture. This has been done, you need to transfer it into the refrigerator for two hours.
Once again, just like with making regular ice cream, the mixture needs to be chilled before you can put it in the ice cream maker.
Step 3: Churn Your Ice Cream
Using your nifty ice cream maker, now it’s time to turn the ice cream. Again, you’ll want to follow the manufacturer’s instructions according to your specific machine. Take the mixture that you have chilled in the refrigerator and place it in the ice cream churning machine.
Keep in mind that soft serve machines usually turn at relatively fast rates and at higher temperatures, which allows for that soft and smooth texture. Although you can store leftovers, soft-serve ice cream is best served right away.
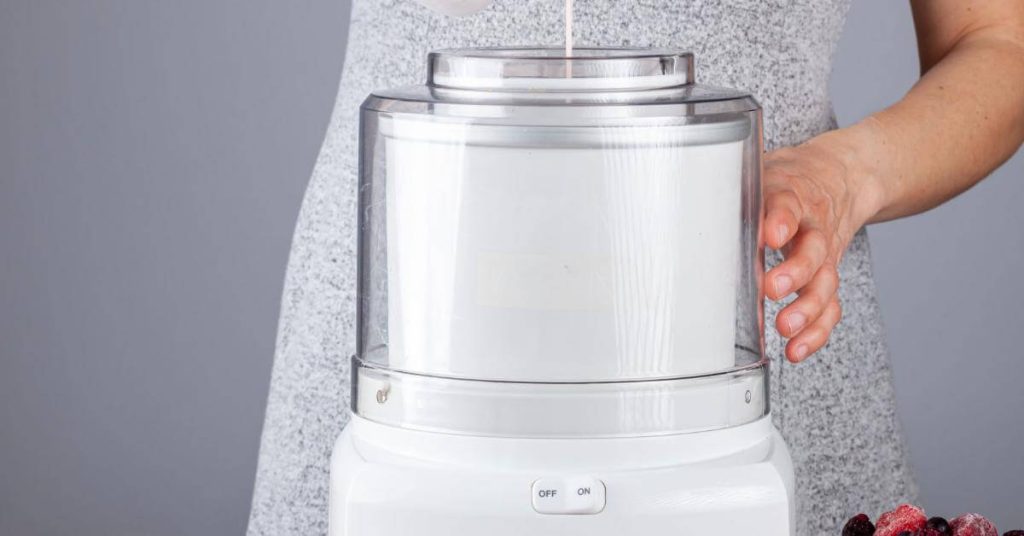
Making Ice Cream with the VEVOR Ice Cream Maker
If you’re looking for a fantastic ice cream maker, this one from VEVOR makes for a rather perfect option. It’s got enough space to make a whole lot of ice cream, yet it’s not so large that you can’t easily fit it in your home. Using this ice cream maker is as simple as anything else.
Once you’ve created your ice cream base, all you need to do is put the mixture inside of the VEVOR ice cream maker and let it churn. What’s really beneficial about this ice cream maker is the fact that it features a large bowl along with the powerful motor.
This means that you can turn large batches of ice cream in a very limited amount of time. Overall, this ice cream maker features technology combined with other great features and benefits that allow for fast and easy homemade ice cream.
FAQs
How long can I keep homemade ice cream?
Homemade ice cream will stay good in the freezer for up to two or three weeks. However, if you want it to taste as good as possible, you should eat it within the first week.
Do I have to use dairy when making my own homemade ice cream?
No, you don’t need to use dairy. There are plenty of plant-based milk products and creamers out there that make for just as good ice cream as regular milk.
Do I need an ice cream maker at home to make ice cream?
Although technically speaking it is possible to make your own ice cream with a method that does not involve any churning, this is difficult and doesn’t produce great results. If you want the best possible ice cream, then you really do need an ice cream maker.
Final Thoughts on How to Make Ice Cream at Home
The bottom line here is that making your own ice cream at home is about as easy as it gets, which is especially the case if you have the right equipment, by which we mean the VEVOR Ice Cream Maker.
This is an absolutely fantastic machine that is able to turn out large quantities of ice cream in very short amounts of time, all without costing you a fortune or requiring a whole lot of maintenance.Remember, when it comes down to it, homemade ice cream tastes better, it’s healthier, and it is more cost effective as well. So come on get to it and try making your own ice cream with VEVOR.