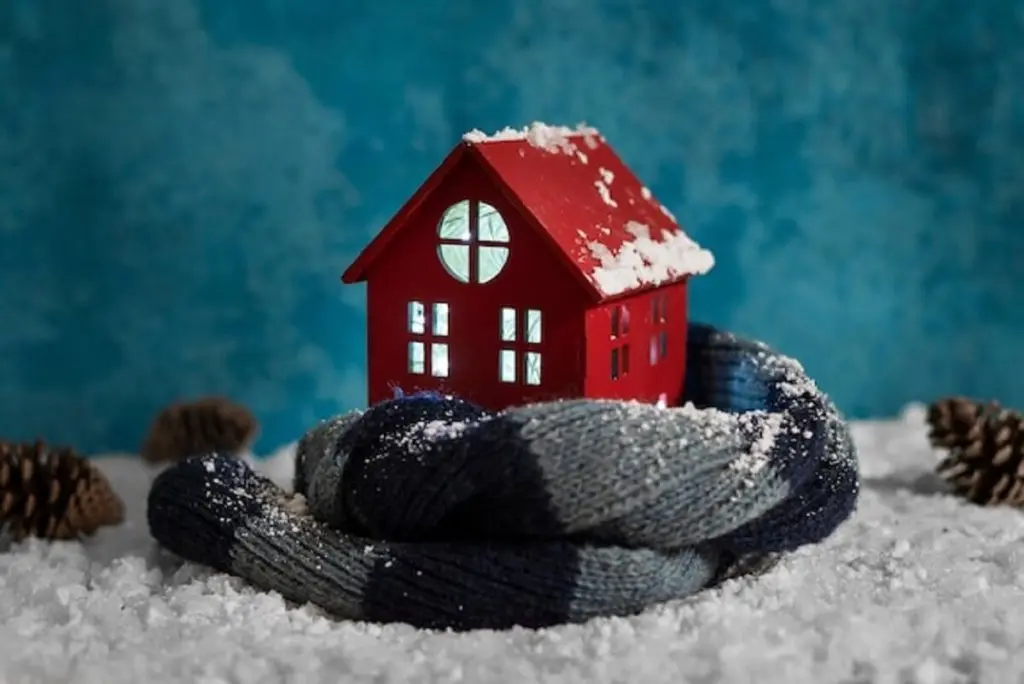
Preparations are needed for the house to face winter. Destruction of houses will be prevented, and energy bills can be kept under control. The preparation of the house for winter can be easily done with the right tools and good plan.
When doing the job, the proper tools, such as a strong telescoping ladder like that of the VEVOR 10.5ft model that could carry up to 375 pounds, make all jobs easy.
This guide will take you through the essential procedures to get your house winter-ready. It will prepare you for freezing conditions and prevent costly repairs.
The best time of winterizing a house is in early autumn, often in mid-September or early October. This strategic timing provides several advantages:
- Weather conditions are still favorable for outdoor work
- Contractors and service professionals have greater availability
- Materials and supplies are fully stocked and often on sale
- You have adequate time to address unexpected issues
- Early preparation prevents rushing and overlooking important details
- Professional services can be scheduled before peak season price increases
- Any necessary repairs can be completed before winter weather arrives
Table of contents
Inspect and Maintain Your Roof and Gutters

The essentials involve learning several about how to winterize a house, mainly concerning the roof system. Learning a proper inspection and maintenance routine prevents costly winter damage and keeps your abode well-protected.
Why Roof and Gutter Maintenance Is Critical
Without routine maintenance, you run the danger of having to pay for costly repairs due to ice dams, water damage, or structural problems that might arise from improper water drainage.
Look out for broken, frayed, curled, or missing shingles as you inspect your roof. The VEVOR Telescoping Ladder-a feat in itself, with a 375-pound capacity and easy, one-button retract is a safe task, to say the least, made very easy.
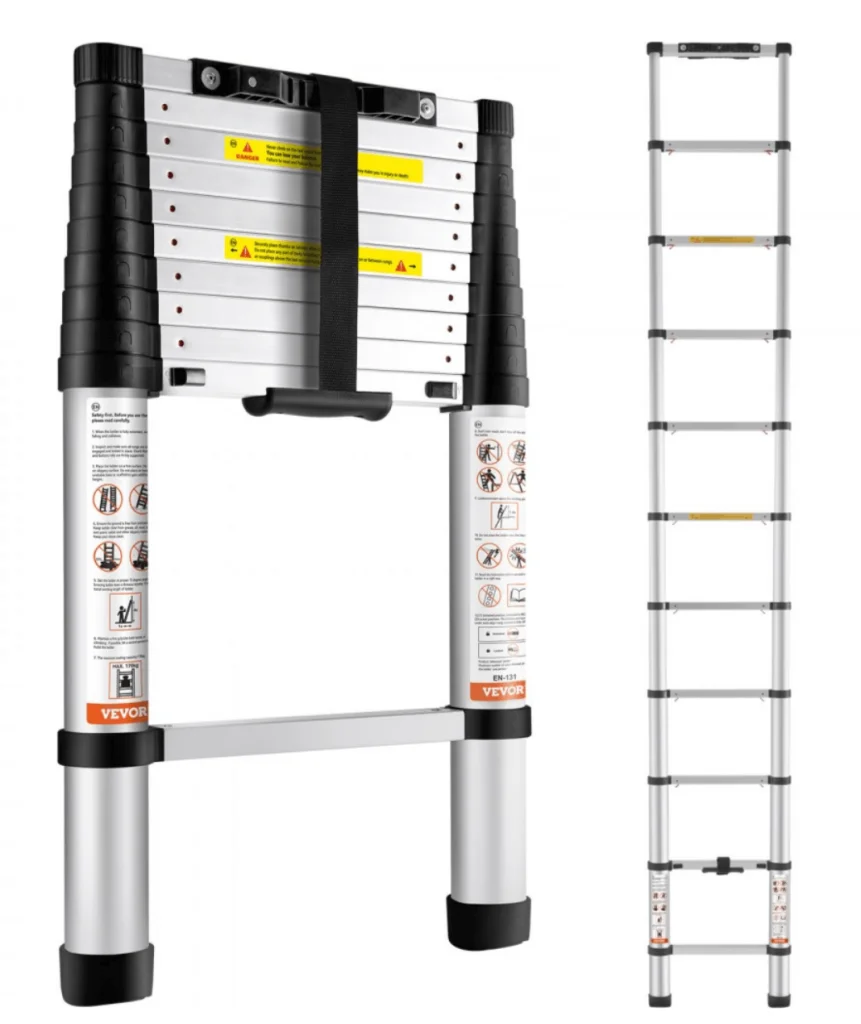
Its nonslip design and stability really help when trying to navigate potentially slippery surfaces.
For gutter maintenance, timing is the prime concern – try cleaning your gutters once the last of the leaves are gone in autumn. With a lightweight design (just 18 pounds), the VEVOR ladder can easily be moved around the perimeter of your house when cleaning gutters. During cleaning, remove all the leaves, pine needles, etcetera from your gutters that, when melted by snow, may block gutters.
Gutter guards may be installed for a long-term reduced maintenance burden. Stainless steel and PVC gutter guards basically catch debris and ensure that water flows freely without any obstacles. They will still need to be swept occasionally but will definitely reduce clearings by a major number.
How to Inspect Your Roof
Using a sturdy telescoping ladder like the VEVOR 10.5ft model (rated for 375 lbs), carefully examine your roof for any damaged shingles, looking specifically for ones that are cracked, curled, or missing entirely.

Pay special attention to areas around chimneys and vents where flashing might be compromised. The ladder’s one-button retraction feature makes it safer to position yourself at different heights for thorough inspection.
Recommended For Your Project
Gutter Maintenance Checklist
Start clearing gutters of all leaves, twigs, and debris the moment the last leaf falls. Flush gutters with water to check for proper flow; check downspouts to ensure they’re directing water away from your foundation. When placing gutter guards, be sure they’re securely fastened so snow and ice don’t carry them away. The VEVOR ladder’s lightweight design (18 lbs) makes it easier to move around your house while performing these tasks.
Tools to Consider
The VEVOR Telescoping Ladder is a safety must-have in working on roofs and gutters, featuring non-slip feet and a design stable enough to keep it from moving. Other must-haves for gutter cleaning are thick work gloves, a gutter scoop or trowel for removing debris, and a garden hose to rinse gutters clean. Safety considerations may include a ladder stabilizer and having another person assist you when working at height.
Seal Windows and Doors to Prevent Drafts
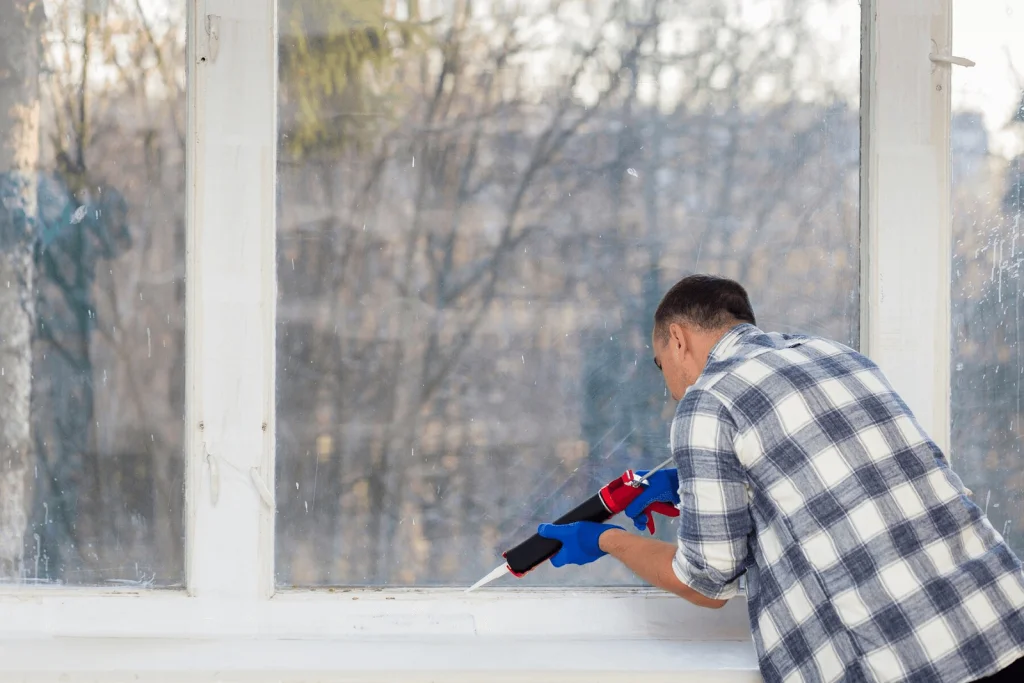
A crucial part of winterizing a house involves preventing heat loss through drafts:
How to Identify Air Leaks
Before starting your winterizing home project, knowing where to look for air leaks is crucial. Using a sturdy telescoping ladder like the VEVOR 10.5ft model can help you safely access and check these common problem areas:
- Check window frames by running your hand along the edges to feel for drafts
- Inspect door edges, particularly where weatherstripping may have worn down
- Examine electrical outlets on exterior walls, which are often overlooked sources of air leaks
Effective Ways to Seal Drafts
Once you’ve identified the leaks, here are proven methods for winterizing your home:
- Install weather stripping around windows and doors:
- Choose appropriate materials for each location
- Ensure proper fit and adhesion
- Install door sweeps at the bottom of exterior doors:
- Measure doors accurately before installation
- Choose durable materials that can withstand frequent use
- Use caulk for sealing:
- Apply to cracks and gaps around window frames
- Seal spaces around utility penetrations
- Fill any visible exterior wall gaps
Additional Tips
To complete your home winterizing process:
Apply window insulation film for added efficiency:
- Clean windows thoroughly before application
- Use a hair dryer to shrink the film for a tight seal
- Ensure complete coverage for maximum effectiveness
Insulate Your Home Effectively
Why Insulation is Essential
When winterizing your home, proper insulation is crucial for several important reasons:
- Temperature Control and Comfort
- Creates a consistent temperature throughout your home
- Eliminates cold spots and drafty areas
- Maintains comfortable living spaces in all seasons
- Significant Energy Cost Savings
- Reduces heating bills by up to 15% on average
- Decreases the workload on your HVAC system
- Provides long-term return on investment through lower utility costs
- Additional Benefits
- Improves soundproofing between rooms and from outside noise
- Helps prevent ice dams on roofs during winter
- Reduces moisture and condensation issues
- Extends the life of your heating system by reducing its workload
Focus Areas for Insulation
When planning your winterized house project, focus on these crucial areas:
Attic
- Add insulation if current levels are insufficient
- Use a quality telescoping ladder like the VEVOR 10.5ft model for safe attic access
- Check for even distribution and proper depth
Walls
- Consider blown-in insulation for existing walls
- Evaluate spray foam options for better coverage
- Address gaps around outlets and fixtures
Basement and Crawl Spaces
- Insulate to prevent heat loss through the foundation
- Pay special attention to rim joists
- Address any moisture issues before insulating
Types of Insulation Materials
For effective winterizing home preparation, choose from these common materials:
1. Fiberglass
- Forms Available: Batts, rolls, and loose-fill
- Best For: Attics, walls, and floors
- R-Value: 2.2-3.8 per inch
- Pros:
- Cost-effective
- Easy to install
- Non-flammable
- Cons:
- Can irritate skin and lungs during installation
- Loses effectiveness if compressed or wet
2. Spray Foam
- Types: Open-cell and closed-cell
- Best For: Hard-to-reach spaces, wall cavities
- R-Value: 3.5-6.5 per inch
- Pros:
- Excellent air barrier
- High insulation value
- Creates moisture barrier (closed-cell)
- Cons:
- More expensive
- Requires professional installation
- Cannot be easily removed
3. Foam Boards
- Types: EPS, XPS, and polyiso
- Best For: Exterior walls, foundations, roofs
- R-Value: 3.6-6.5 per inch
- Pros:
- High insulating value
- Moisture resistant
- Easy to cut and install
- Cons:
- More expensive than fiberglass
- Requires proper sealing at joints
- Must be covered for fire safety
4. Cellulose
- Forms Available: Loose-fill and dense-packed
- Best For: Existing walls, attic spaces
- R-Value: 3.2-3.8 per inch
- Pros:
- Made from recycled materials
- Fire resistant
- Excellent for retrofitting
- Cons:
- Can settle over time
- Must be kept dry
- Installation requires special equipment
For the best results in your winterize house project, choose materials based on:
- Your specific application
- Local climate conditions
- Budget constraints
- Installation requirements
- Long-term performance needs
When to DIY or Hire Professionals
Some house winterization tasks are DIY-friendly, while others require expertise:
DIY-Friendly Tasks:
- Installing basic fiberglass batts
- Adding foam board insulation
- Sealing small gaps and cracks
Professional Installation Needed:
- Blown-in wall insulation
- Spray foam applications
- Large-scale attic projects
- Complex crawl space work
Using proper tools like the VEVOR telescoping ladder can make DIY tasks safer and more manageable, but always know when to call in the experts for more complex insulation projects.
Prepare Your Heating System

Let’s explore how to get your heating system winter-ready.
Importance of Heating System Maintenance
Regular maintenance during your home winterizing process is crucial because it:
1. Ensures Efficiency
- Reduces energy consumption
- Lowers monthly heating bills
- Maintains consistent heating performance
- Extends system lifespan
2. Reduces Risk of Breakdowns
- Prevents unexpected failures during cold weather
- Identifies potential issues before they become major problems
- Avoids costly emergency repairs
- Provides peace of mind during winter months
Steps to Prepare Your Heating System
Follow these essential steps when winterizing a house:
Step 1: Schedule Professional Cleaning and Inspection
- Book early fall maintenance to avoid peak season delays
- Have a certified technician:
- Clean all components thoroughly
- Check electrical connections
- Inspect for wear and tear
- Test safety controls
- Lubricate moving parts
Step 2: Replace or Clean Filters Regularly
- Check filters monthly during the heating season
- Replace disposable filters every 1-3 months
- Clean reusable filters according to manufacturer guidelines
- Consider upgrading to high-efficiency filters
- Mark your calendar for regular filter maintenance
Step 3: Test Thermostats and Consider Programmable Options
- Verify current thermostat accuracy
- Consider upgrading to programmable models for:
- Automatic temperature adjustment
- Energy savings during sleeping hours
- Custom scheduling for different days
- Remote control via smartphone apps
- Enhanced comfort control
Pro Tip: When accessing high thermostats or conducting visual inspections, use a stable ladder like the VEVOR Telescoping Ladder, which offers secure positioning and easy height adjustment for indoor maintenance tasks.
Protect Plumbing from Freezing

Protecting your plumbing system is crucial when winterizing a home to avoid expensive damage.
Why Frozen Pipes Are Dangerous
During your winterize home preparation, understand that frozen pipes pose serious risks:
- Can lead to costly repairs and extensive water damage
- May cause flooding in your home
- Risk of pipe bursting under pressure
- Potential for mold growth after water damage
How to Protect Your Plumbing
Essential steps for winterizing home plumbing:
1. Insulate Exposed Pipes in Unheated Areas
- Focus on pipes in basements, crawl spaces, and attics
- Use quality pipe insulation sleeves
- Pay special attention to corners and joints
- Use a sturdy telescoping ladder like VEVOR’s 10.5ft model to safely reach high pipes
2. Drain Outdoor Hoses and Shut Off External Faucets
- Remove and store all garden hoses
- Drain exterior faucets completely
- Install insulated covers on outdoor spigots
- Turn off water supply to exterior fixtures
3. Allow Faucets to Drip Slightly in Extreme Cold
- Identify faucets on exterior walls
- Keep slight water movement during freezing temperatures
- Focus on both hot and cold water lines
- Monitor weather forecasts for extreme conditions
Extra Tips for Pipe Safety
Complete your home winterization checklist with these additional measures:
- Seal cracks and holes near plumbing to block cold air
- Keep garage doors closed if water lines are present
- Open cabinet doors to allow warm air circulation
- Maintain consistent indoor temperature
Prepare the Exterior of Your Home
When winterizing your home, don’t overlook outdoor preparation.
Steps to Protect Outdoor Equipment
Essential tasks for winterize house preparation:
- Cover or store furniture, grills, and tools
- Use weatherproof covers
- Store items in garage or shed
- Clean equipment before storage
- Drain and store garden hoses
- Remove from outdoor faucets
- Drain completely to prevent freezing
- Store in a protected area.
Winter Landscaping Tips
Key winterizing home landscape preparation:
- Trim trees and shrubs to prevent snow damage
- Remove dead branches
- Cut back overhanging limbs
- Use VEVOR telescoping ladder for safe reach
- Inspect walkways and driveways for hazards
- Fill cracks and holes
- Level uneven surfaces
- Mark edges for snow removal
Stock Up on Winter Essentials
Emergency Supplies for Your Home
Essential items for home winterizing preparation:
- Flashlights and extra batteries
- Non-perishable food items
- Bottled water
- First aid supplies
- Blankets and warm clothing
Snow Removal Tools
Winterizing a house requires proper snow management tools:
- Snow shovels of various sizes
- Ice melt and sand
- Snow blower (if needed)
- Roof rake for snow removal
Heating Supplies
A well-maintained heating system is essential for winter comfort. Your house winterization checklist should include:
Furnace Maintenance
- Schedule professional inspection
- Replace or clean filters
- Check thermostat functionality
- Clear area around heating units
- Consider upgrading to a programmable thermostat
Fireplace and Chimney Care
- Schedule a professional chimney cleaning
- Check damper operation
- Inspect for damage or deterioration
- Stock up on firewood if needed
Test Safety Devices in Your Home
Check Smoke and Carbon Monoxide Detectors
Critical house winterization checklist items:
- Replace all detector batteries
- Test each unit’s functionality
- Clean dust from sensors
- Verify proper placement
Fire Extinguishers
Essential safety checks when winterizing home:
- Ensure extinguishers are working
- Check pressure gauges
- Place in easily accessible locations
- Verify proper type for different areas
Additional Safety Checks
When learning how do you winterize your home, don’t forget emergency preparedness:
Essential Supplies
- Flashlights and batteries
- Non-perishable food
- Bottled water
- First aid supplies
- Blankets and warm clothing
Snow Removal Equipment
- Snow shovels
- Ice melt products
- Snow blower (if needed)
- Sand or kitty litter for traction
While many home winterizing tasks are DIY-friendly, consider professional help for:
- Furnace inspection and maintenance
- Chimney cleaning
- Major insulation projects
- Roof repairs
- Gutter guard installation
Conclusion
Successfully winterizing a house requires attention to detail and proper planning. By following this comprehensive checklist and using quality tools like the VEVOR telescoping ladder for maintenance tasks, you can ensure your home stays warm, safe, and energy-efficient throughout the winter months. Remember to start early and tackle tasks systematically to avoid last-minute rushes when cold weather arrives.
Don’t wait until the first frost to begin your winter preparations. Start working through this house winterization checklist in early fall to ensure your home is fully protected before severe weather arrives. With proper preparation and the right tools, you can face winter with confidence, knowing your home is ready for whatever the season brings.

