When it comes to seafood, freshness is imperative for delicate flavors and rich nutrients. However, preserving the freshness and quality of the seafood, including fish, can be a challenge, as exposure to air, moisture, and fluctuating temperatures can quickly lead to spoilage. This is where vacuum sealers come in. Vacuum-sealing fish helps not only extend its shelf life but also preserve its freshness, nutrient profile, and exquisite flavors for extended periods.
But how to vacuum seal fish?
Whether you are an avid fisherman having trouble preserving your catch or a bulk buyer worried about your fish going stale, this guide is for you. We are going to discuss all about vacuum sealing fish, from its importance,
In the sections coming up, you can expect the following topics:
Before discussing how to vacuum seal fish, let’s first explore why it is important.
Why is Vacuum Sealing Fish Crucial for Freshness?
With their delicate flesh and high moisture content, fish are particularly susceptible to spoilage. The natural processes of oxidation and bacterial growth rapidly deteriorate the quality of fish, leading to unpleasant odors, off-putting flavors, and health risks. Vacuum-sealing fish helps effectively combat these spoilage factors and preserve the freshness of fish for extended periods.
1. Extending Shelf Life
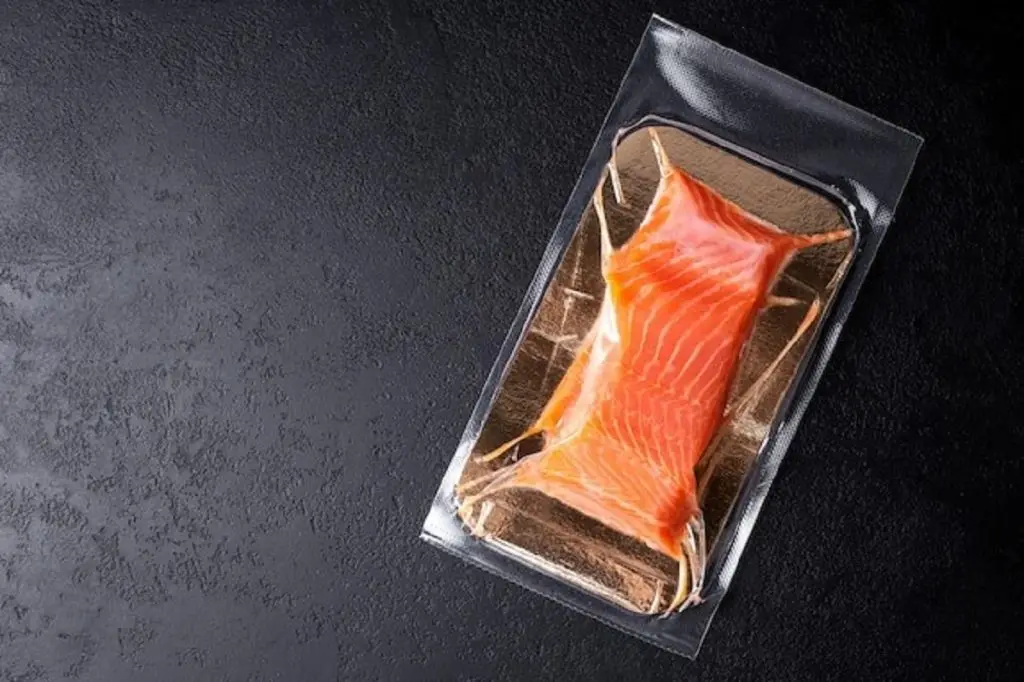
The primary goal of vacuum sealing salmon is to extend its shelf life, the period during which it remains safe and enjoyable to consume. By removing oxygen and inhibiting bacterial growth, vacuum sealing significantly slows down the spoilage process, allowing fish to be stored safely for longer periods.
2. Preserving Flavor and Texture
Air, the culprit behind oxidation, is the arch-nemesis of fish’s flavor and texture. The oxygen in the air reacts with the fats and oils in fish, leading to rancidity and a breakdown of cell walls, resulting in a mushy texture. Vacuum sealing fish prevents exposure to the air, halting the oxidation process and preserving the flavors and texture of the fish.
3. Preventing Freezer Burn
Beyond preservation, vacuum sealing fish protects against dehydration and freezer burn. Removing all air from sealed bags and ensuring that no air contacts vacuum-sealed salmon prevents moisture from evaporating from the packed food items, preventing freezer burn.
4. Enhancing Nutritional Value
Vacuum sealing fish also helps retain their nutritional value over extended periods. By preventing oxidation, a major cause of nutrient degradation, vacuum sealing keeps the nutrient profile of your fish intact for longer periods, ensuring it remains a nutrient-rich addition to your diet.
Types of Vacuum Sealers: Choosing the Right One for Fish
With an array of vacuum sealers available in the market, selecting the best vacuum sealer for fish preservation needs can be a daunting task. Understanding different types of vacuum sealers and their key features will help you choose the right one for your salmon vacuum sealing needs.
1. Chamber Vacuum Sealers
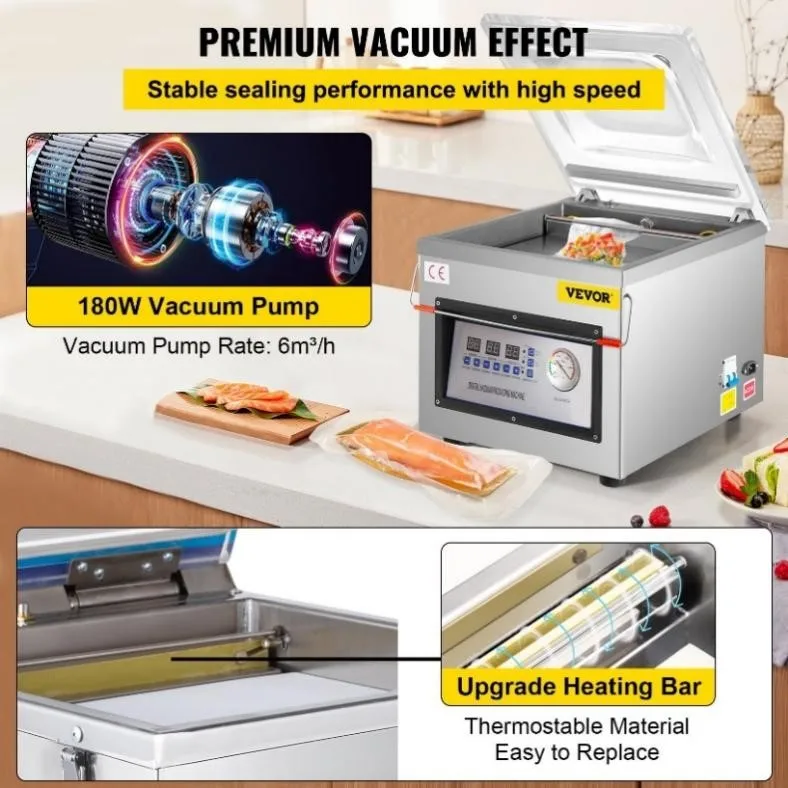
Chamber vacuum sealers provide the highest level of vacuum sealing performance, but they do come with high-end price tags. For these sealers, you put the fish in a vacuum sealer bag and place it in the sealer’s chamber, which creates a perfect vacuum by evacuating the air from the chamber. Chamber vacuum sealers that deal with larger quantities of food sealing are often found in commercial kitchens. These sealers allow for precise vacuum pressure control, making them perfect for vacuum-sealing delicate foods like fish.
Featuring a powerful 180W vacuum pump and a vacuum gauge, this DZ-260C VEVOR Chamber Vacuum Sealer offers stable and precise professional-grade vacuum sealing.
2. External Vacuum Sealers
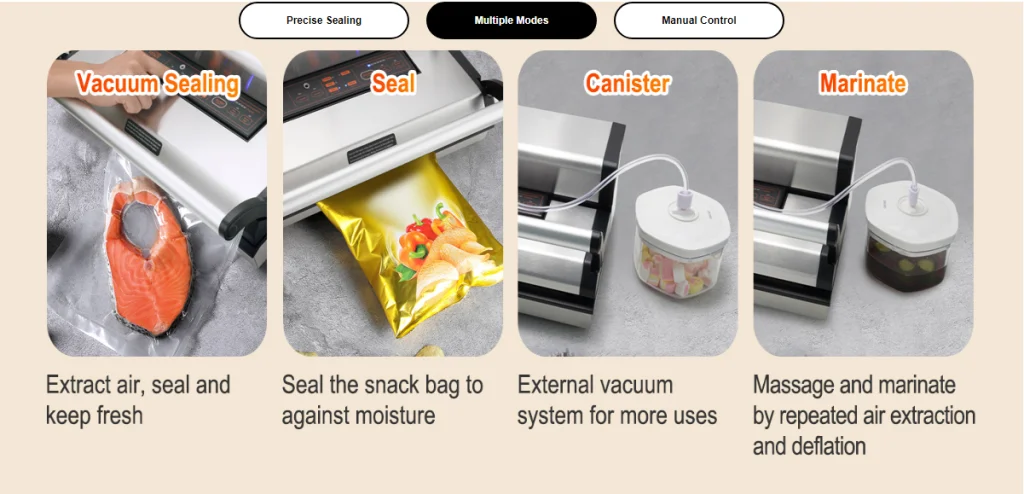
External vacuum sealers, also known as suction or clamshell sealers, offer a user-friendly and versatile option for home cooks. These sealers work by extracting air from a bag containing the food item. External vacuum sealers are generally more compact and affordable than chamber sealers, making them a popular choice for home kitchens.
This External VEVOR Vacuum Sealer Machine is a cheaper yet effective and versatile option for vacuum sealing fish for home cooks.
Features to Consider for Fish Preservation
If you are specifically looking for a vacuum sealer for vacuum sealing salmon, here are a few features to look out for:
- Moist Mode: Make sure that the vacuum sealer offers a moist mode, as fish have a high moisture content. With a moist mode, a vacuum sealer can effectively remove air from the bag without causing the bag to collapse or affecting the texture of the fish.
- Seal Strength: Look for a vacuum sealer that offers adjustable seal strength. You need to ensure that it has a tight and secure seal that preserves the vacuum and prevents leaks.
- Bag Compatibility: Some vacuum sealers are designed for specific bag brands or materials. So, before picking one, make sure that it is compatible with the vacuum sealing bags that you are planning on using for vacuum fish sealing.
- Suction Power: Stronger suction power is needed for efficient air removal, which is crucial for better preservation. So, check suction power before ordering a vacuum sealer.
Step-by-Step Guide: Vacuum Sealing Fish at Home
Vacuum sealing fish at home might seem like a difficult task, but with the right vacuum sealer, it becomes a straightforward task. Follow this step-by-step guide to salmon vacuum sealing to ensure that your salmon remains fresh, flavorful, and nutritious for extended periods:
Step 1: Prepare the Fish
- Clean and Dry the Fish: Thoroughly clean the fish under cold running water to remove any dirt, debris, or scales before patting it dry with paper towels to eliminate excess moisture.
- Portioning and Removing Bones and Skin: If desired, remove any bones and skin from the fish and cut the fish into desired portions. Skin removal and portioning are not necessary for vacuum sealing. However, if you have a big fish or would like to pack it according to your serving sizes, consider removing the skin and cutting the fish into desired portions.
Step 2: Choose the Right Packaging Material
- Vacuum Sealer Bags: For optimum sealing and preserving of fish, ensure that you use suitable vacuum sealer bags that are specifically designed to prevent moisture loss and maintain vacuum seal.
- Bag Size: Select the appropriate bag size based on the amount of fish you are sealing. Prevent overfilling the vacuum sealer bag and ensure that there is enough space around the fish to allow for proper vacuum sealing.
- Pre-Cut Bags or Rolls: Choose between pre-cut vacuum sealer bags or rolls. Pre-cut bags offer convenience, while rolls provide flexibility for customizing bag sizes. If your vacuum sealer features a built-in bag cutter, consider going for a bag roll.
Step 3: Vacuum Sealing Process
- Place the fish in the Bag: Carefully place the fish portions into the vacuum sealer bag. Avoid overfilling the bag to ensure proper sealing and prevent air pockets.
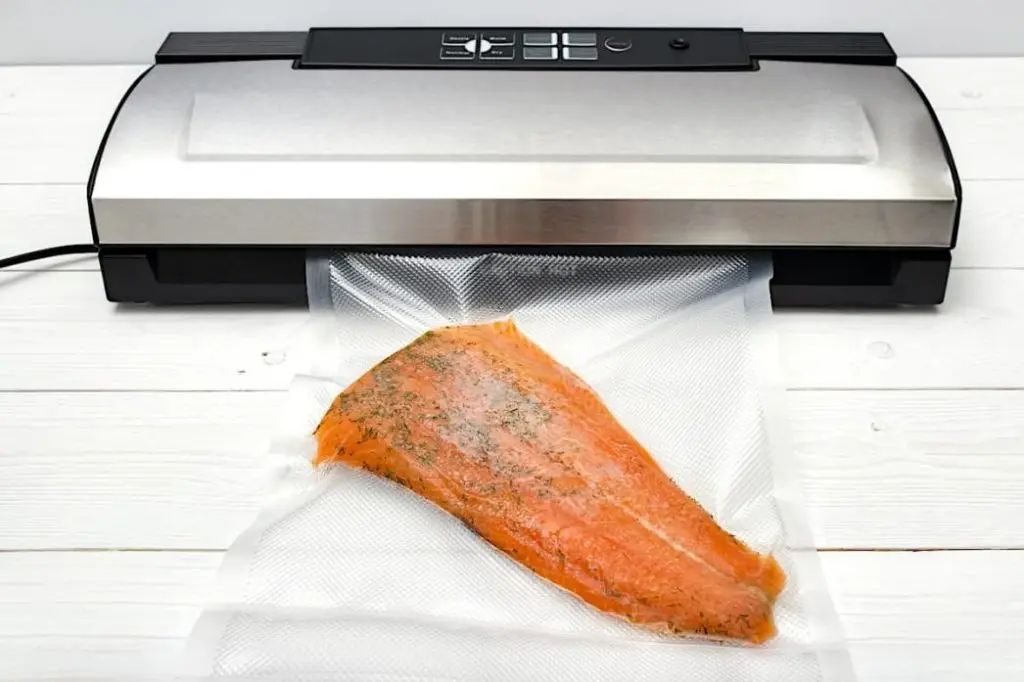
- Position the Bag in the Vacuum Sealer/Chamber: If you are using an external vacuum sealer, place the open end of the bag into the vacuum sealer, ensuring it is aligned correctly and securely held in place. In the case of a chamber vacuum sealer, simply place the bag in the chamber.
- Select the Vacuum Sealing Mode: Choose the appropriate vacuum sealing mode for fish, typically the moist mode setting. This setting will adjust the vacuuming process to prevent crushing the delicate fish.
- Initiate the Vacuum Sealing Process: Close the vacuum sealer lid and activate the vacuum sealing cycle. The sealer will remove air from the bag, creating a tight vacuum seal around the fish.
- Check for Leaks: Once the vacuum sealing cycle is complete, inspect the salmon vacuum-sealed bag for any leaks or punctures. If leaks are detected, reseal the bag or use a new bag.
Step 4: Labeling and Storage
- Label the Vacuum-Sealed Bags: Before storing the vacuum-sealed salmon, consider labeling the bags with the date of sealing and the type of fish and storage instructions if necessary.
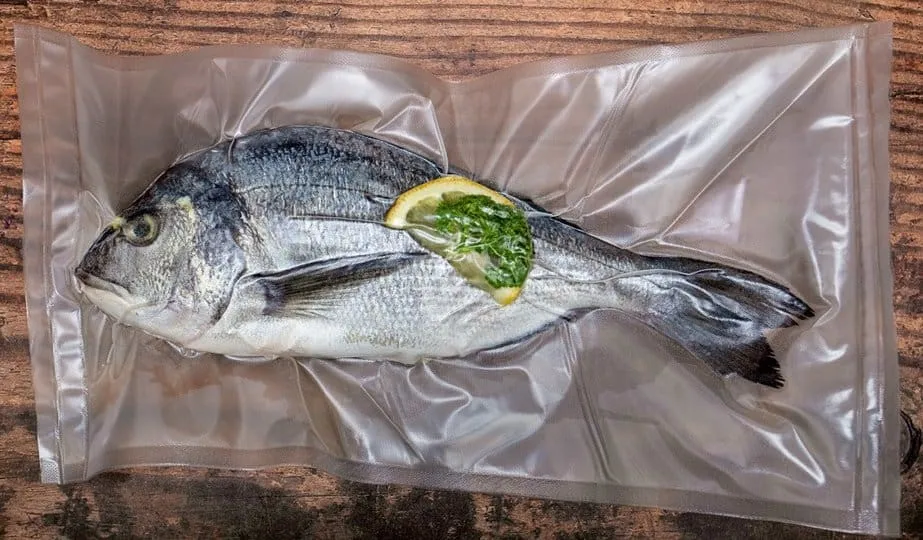
- Store the Vacuum-Sealed Fish: Depending on your desired storage time, properly store the vacuum-sealed salmon in the refrigerator or freezer. Vacuum-sealed fish can last up to two years in the freezer and up to two weeks in the refrigerator.
Tips for Vacuum Sealing Fish
While the step-by-step guide provides a comprehensive overview of the vacuum sealing process, here are some additional tips and tricks for effective vacuum sealing fish:
- Seal Fresh Fish: Vacuum sealing works best when the fish is at its peak freshness. If you’re not able to seal the fish immediately after catching or purchasing, ensure it is properly chilled until you’re ready to seal.
- Prevent Air pockets: Leave enough space around the fish to allow for proper vacuum sealing and prevent air pockets.
- Pre-Freeze for Moisture Control: If you’re vacuum sealing fish that you plan to freeze, it’s a good idea to pre-freeze it for a few hours first. This will help to remove excess moisture from the fish, which can prevent it from getting freezer burn.
- Beware of Sharp Bones: Be careful when handling fish, especially if it has sharp bones. Some fish, such as catfish, have very sharp spines that can puncture the vacuum seal bags. In such cases, consider removing bones that are sticking out of flesh before vacuum sealing.
- Moist Mode: For vacuum sealing fish, select the moist mode setting on your vacuum sealer to prevent crushing or damaging the delicate fish flesh.
- Handle the fish Gently: Minimize handling of the fish to prevent the release of natural juices that could affect the vacuum seal.
- Double Seal for Extra Protection: For added peace of mind, consider double sealing the bags, especially for longer storage periods or when there are fluids such as natural fish fluids, marinade liquid, etc.
- Use a Desiccant for Oily Fish: For oily fish, place a small food-grade desiccant packet inside the bag to absorb excess moisture and prevent the bag from bulging.
- Maintain Your Vacuum Sealer: Regularly clean and maintain your vacuum sealer according to the manufacturer’s instructions to ensure optimal performance and longevity.
FAQs About Vacuum Sealing Fish
1. Can I vacuum seal marinated fish?
Yes, you can vacuum seal marinated fish. However, be mindful of the marinade’s liquid content. If the marinade is too liquid, it may cause leaks during sealing. To prevent this, consider using a thicker vacuum sealer bag or patting down the excess marinade from the fish before sealing.
2. Is it safe to vacuum seal raw and cooked fish together?
It is generally not recommended to vacuum seal raw and cooked fish together. Raw fish can harbor bacteria that could contaminate the cooked fish.
3. How long will vacuum-sealed fish last?
The shelf life of vacuum-sealed fish depends on the storage temperature. When stored in a freezer, vacuum-sealed fish can last up to two years, but when stored in a refrigerator, it can last only a week or two.
4. Do you need to freeze fish before vacuum sealing?
No, it is not necessary to freeze fish before vacuum sealing. Vacuum sealing fish can be done on both fresh and frozen fish. However, flash-freezing fish before vacuum sealing can help prevent moisture loss and freezer burn, especially for longer storage periods. If you are planning on freezing the vacuum-sealed salmon, consider freezing it before sealing it.
Conclusion
With the knowledge and techniques you’ve gained from this comprehensive guide, you’re now well-equipped to embark on a journey of vacuum sealing fish. By carefully selecting the right vacuum sealer, following the step-by-step guide, and incorporating the insightful tips listed in the article, you can effectively vacuum seal fish and successfully extend its shelf life while preserving its tantalizing flavors and rich nutrient profile.
For effective vacuum sealing fish, it is imperative that you have the right vacuum seal. Consider exploring the VEVOR vacuum sealer collection and order the best vacuum sealer for fish at half the price.

