Our VEVOR endoscope camera is a highly advanced tool for your inspection tasks. You can take on the toughest diagnostic projects with ease. This particular endoscope will offer you clear and detailed visualization for precise detection. Any professional and DIYer who wants to detect hidden problems quickly will find it perfect.
@vevor.official Replying to @Dillon A great tool that you can use to inspect your car, boat or the pipes in your home. #vevor #vevortools #vevorttshop #blackfridaydeals #vevorauto #carrepair #pipe
♬ LOOK AT YOU NOW – Gabriela Bee
Here, we will examine the benefits of this endoscope camera, how to use it, and why it is a must-have tool for any technician.
Table of contents
Features of VEVOR Endoscope Camera
Triple Lens Technology
One of the crucial features of the VEVOR endoscope camera is its triple lens technology. This technology gives you a view angle without adjustments from the camera. You can save inspection time and get fuller details. The front camera will give you direct forward views, while the side cameras ensure that you get clear views of all the surrounding areas. Blind areas are also eliminated.
4.5-Inch IPS Screen
The VEVOR endoscope comes with a sharp and high-resolution display. This uses a 4.5-inch IPS screen. The color accuracy and clarity of the smallest crack or blockage inside a pipe get even better. Wide screens also maximize comfort during extended inspections. You will not need to use any auxiliary device.
Waterproof and Durability
This equipment is designed considering harsh environments and is waterproof with an IP67 rating. It can, therefore, inspect any damp or wet area of the irrigation system. Be it plumbing system or any industrial equipment, this gadget will check everything ensuring long-term performance.
Adjustable LED Lights
Equipped with adjustable LED lights, this endoscope ensures you get bright lighting even when the environment is dark. You can also adjust lights according to inspection requirements so that you get a good view in dimly lit areas. These include deep pipes, machinery, and underground rooms.
32GB High Quality Storage
Our camera tool has 32GB built-in storage. That means you can capture images and record videos in case of any inspection. This is fantastic, considering it can be useful for professionals who would require documentation of findings to present to a client.
Recommended For Your Project
Steps to Use Our Endoscope Camera
Step 1: Power On the Device
First, the camera of the endoscope is turned ON using the power button located at the end of the handle. The screen will now be able to light up with a clear view through the camera. Care should be taken in ascertaining that the device is fully charged or plugged for appropriate usage of inspection.
Step 2: Insert the Camera
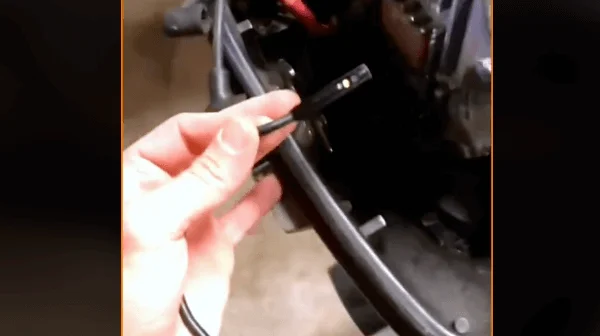
For inspecting pipes or small areas, place the camera probe inside that specific area you intend to inspect. A flexible cable lets it easily reach the most obscure bend or corners. The handle manages the movement of the camera.
Step 3: Switch Between Lenses
The biggest advantages of this camera include its ability to switch lenses between the front and the side. You will interchange the lenses by use of the handle’s button depending on what is required for your inspection. It will always give you an assessment of the area viewed for 360 degrees. You’ll never be forced to move the camera very often.
Step 4: Adjust the LED Lights
If you are inspecting a poorly lit area, switch on the onboard LED lights to light up your view. You can now view every problem in plain view, even under conditions where there is minimal light.
Step 5: Capture Photos and Videos
You can capture photos and videos during the inspection by pressing the capture button. The available 32 GB storage enables you to save important footage for later use, reviewing, or sharing with clients.
Step 6: Review of Footage
You can then play it out directly on the 4.5-inch screen or upload it to another source to further analyze. You can thus easily pinpoint specific issues and document it as a further reference.
Frequently Asked Questions
Is the VEVOR endoscope camera waterproof?
Yes, the VEVOR endoscope camera is waterproof with an IP67 rating. This makes it suitable for inspection of wet areas such as plumbing pipes and underwater equipment.
How long is the cable attached to the endoscope?
The VEVOR endoscope is equipped with a flexible 16.4 ft (5m) cable through which you are free to inspect hard-to-reach places with no hassle.
Is the camera compatible with external devices?
No, use the free USB cable included to transfer images and video from the endoscope to other devices. So, your saved inspection results will be easy to share.
What is the number of LED lights on the camera?
The VEVOR endoscope camera has 6 adjustable LED lights. Therefore, it provides excellent illumination in dark spaces. You definitely get clear and detailed inspections.
Does the camera work well on narrow pipes?
Absolutely! Thanks to the highly flexible cable and triple-lens design, the camera is perfect to use when working with small or curved pipes.
Conclusion
You can easily carry out inspections with this endoscopic camera tool. It has a very high degree of versatility, durability, and power. It is going to help you diagnose plumbing issues, check hard-to-reach areas, and inspect machinery. Focus on your work with improved visibility and clarity using our endoscope.
Equip yourself with the VEVOR endoscope today and take control of your inspection. Order yours now and experience the difference in your work!

