Are you not meeting your customer needs while making inlay jewellery when you don’t know the depth, difficulty handling materials and the possibility of inaccuracies? A one-time investment is all that is required to change your life. Whether you are inlaying gemstones or want to view your masterpiece from every angle, let’s kill two birds with one stone with the VEVOR Inlay microscope and ensure a detailed result in your final jewellery piece. Suppose you’re frustrated through a tedious process using a cheap digital microscope while attempting a Kyler Royer Style guard fit on your hidden tang knives. In that case, this product is absolutely for you.
However, due to their large budgets, they’re available within a range of few people who take advantage of this product. But VEVOR introduces an Inlay microscope widely available for ordinary consumers within their range.
This review guide will be great as it’ll solve all the difficulties you face while purchasing the product. We’ll show you the unboxing to the installation of this extraordinary VEVOR Inlay Microscope product.
Unboxing and Reviewing the VEVOR Microscope
So, let’s start unboxing our product and see what we received in a well-packed package. So the package contains:
● 1 x Micro Inlaid Mirror with Spring Bracket and bolts
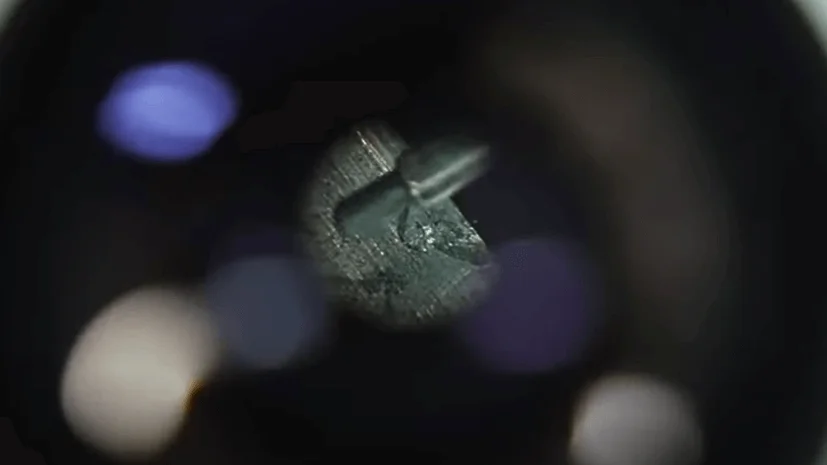
This VEVOR Inlay microscope will astonish you with its high-quality features. The image quality will improve after getting this dialled in to begin working on this guard. You’ll have a larger field of view once you dialled on the eyepieces. It’ll feel like you put the blinders on, and a higher level detail of your can be seen whatever you’re doing. You most likely encountered a problem with a cheap microscope due to vibrations and screen movements.
The VEVOR Inlay microscope is the best choice for those who wish to see the thing in depth while working, but you may still use your cheap microscope to record your work.
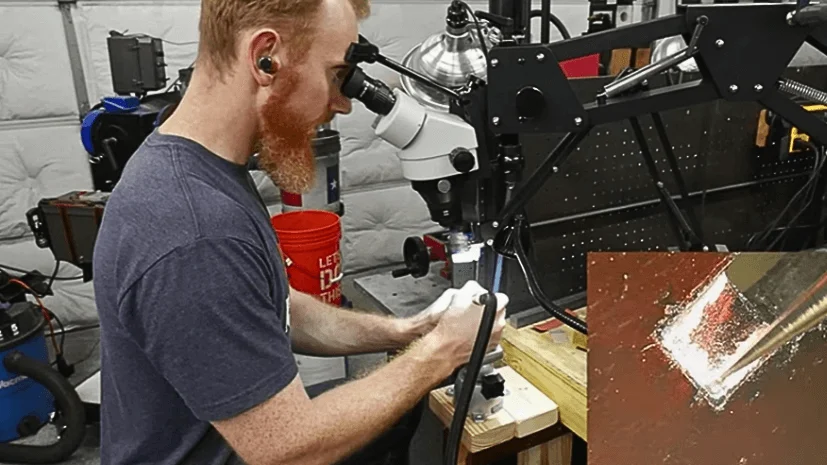
The maker of the guard should remove material from the guard so that the knife’s ricasso can be inset into the guard. However, such a tedious method it’s that the results will be beyond your expectations.
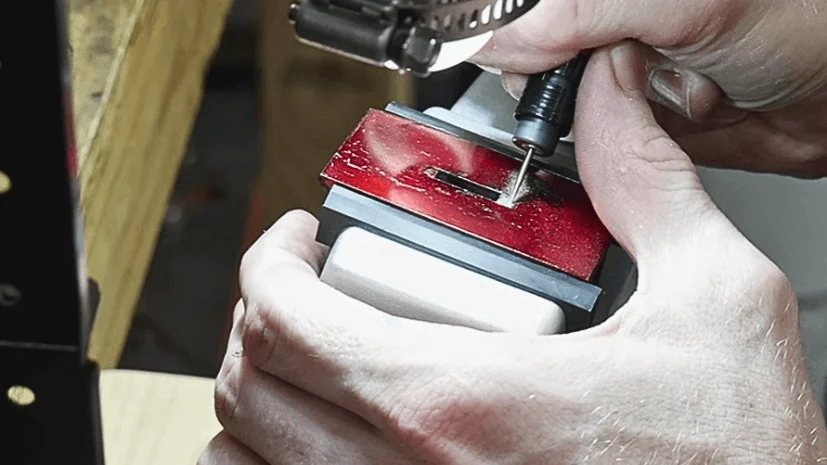
Anyways to form an indentation, you can hammer the guard onto the ricasso after it removes the material with a small carbide rotatory burr.
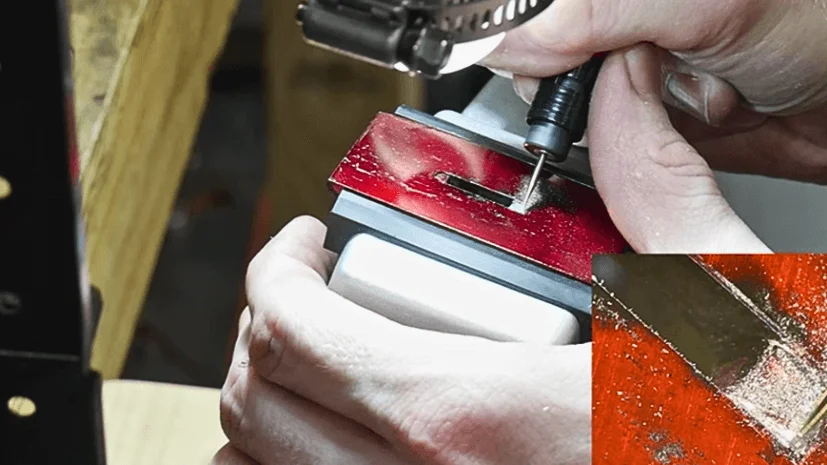
You can use a 0.5 ml round burr ball. If you follow this method, after some hours, you’ll be able to get a pretty darn good fit.

When capturing high-quality images through the Inlay microscope eyepiece, you will find it easier to manage your cellphone than a DSLR. Let’s enjoy the best shot, as your image will be impressively clear and sharp with sufficient zoom into the workspace. So all features represent the capability of the equipment.
Setting Up the VEVOR Microscope
Let’s do an installation of your microscope. It’s a bigger microscope with good in size. Stick with us… We’ll guide you step by step on how to do that.
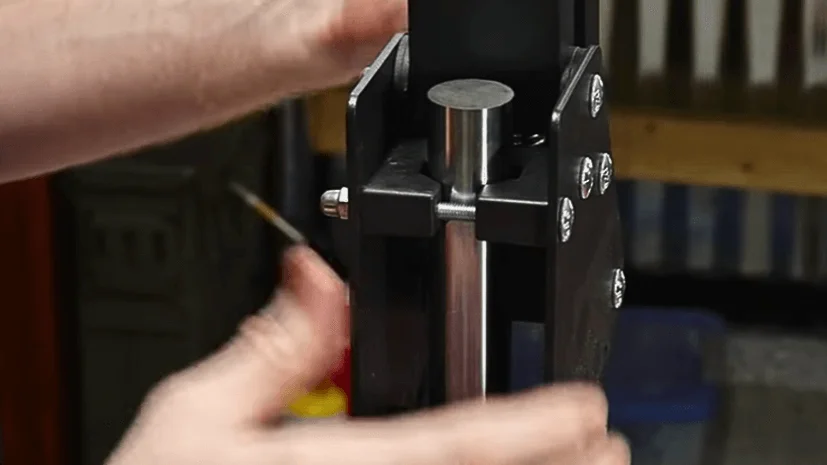
Step 1: Containing a robust arm with stiff springs will go a long way to keeping everything free of shaking and rigid when used. You can adjust the arm and extend it if needed with a range of adjustment options.
Step 2: Screws and bolts are included with the kit to fix the base plate at any workspace. You can even screw it to your wooden hand-sanding bench if you engrave it there.
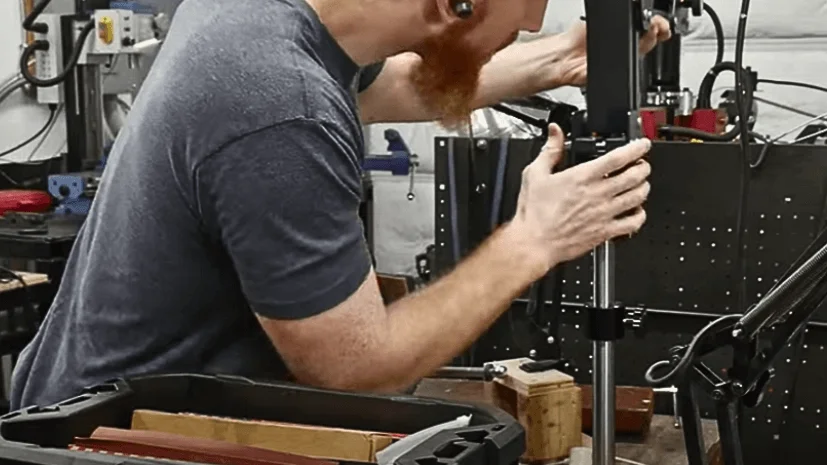
Step 3: Once you have mounted your plate, slide the arm assembled into it, and then at its maximum height location, set the slide lock.

Step 4: Then attach the bracket that holds the microscope’s arm, as it has a ball clamp on it, so you can swivel the microscope around when it gets loose. Furthermore, this can give you a good adjustment when focusing on the scope. After placing the microscope in the bracket, you can tighten the set screw to hold it in place.
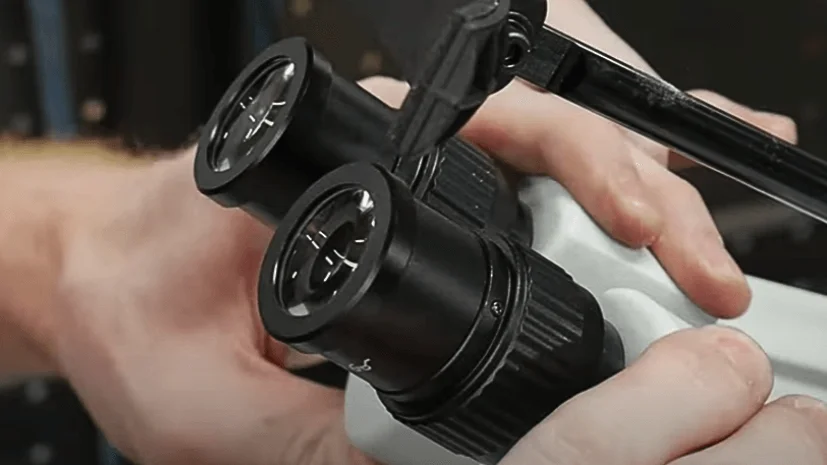
Step 5: Lastly, let’s install the eyepieces and the magnifier on the bottom scope. Magnifier is threaded; also, these eyepieces have small screws set. It is important to avoid cross-threading the magnifier during installation.
Step 6: However, the magnifier will be visible on the top once you test it.

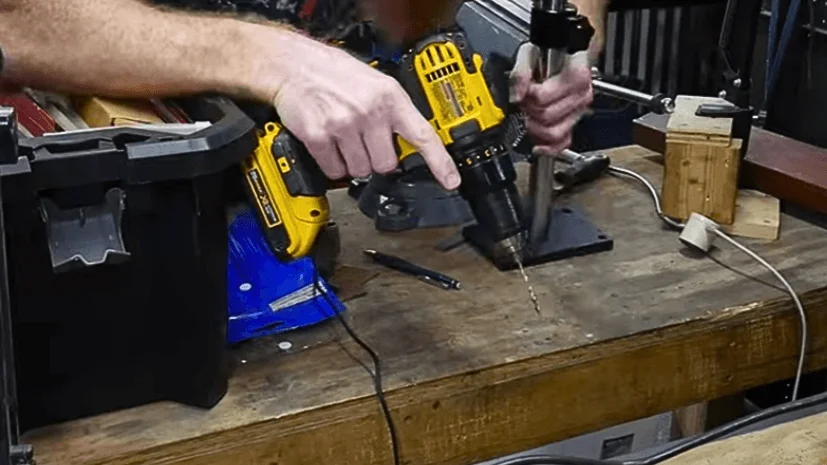
Step 7: You can purchase a modular vise and mount it to your stand-handling table for better work performance. You can move it in any direction and build it robust enough to grip any material.
Is the VEVOR Microscope Worth the Investment?
With 0.7X-4.5X, long continuous microscope lens features, strong stereoscopic sense, and a large field of view, the VEVOR microscope is the best to invest in. Wide-angle provide high -definition and, with easy operation, gives a large field view.
Furthermore, this jewellery microscope inlaid stand is built up with sturdiness aluminium alloy. It only occupies a small space with a stable chassis and is compact. Its user-friendly operating design also alleviates neck fatigue, making it worth the investment.
Final Words
What a pretty damn cool tool to recommend if anyone wants to do engraving work. Undoubtedly it does great work on precious metal Inlay. You’ll never find anyone in this quality-category microscope at a cheap price. I encourage you to browse and follow me blindly to invest in VEVOR Inlay Microscope before it is sold out.