The dents on your vehicle look really pathetic. So, you need the right tool to get rid of those dent marks. The VEVOR Stud Welder Dent Repair Kit is an excellent tool to restore your car’s body to its original condition. It has an 800W power output and five different welding modes. With this tool, you’ll save time & money. You’ll be avoiding expensive trips to the auto body shop.
Let’s explore the unique features of this dent repair kit. We have shared a 5-step guide to help you use it efficiently.
Table of contents
Product Overview
The VEVOR Stud Welder Dent Repair Kit is a powerful tool to handle a variety of dent repairs on vehicles. It has a power of 800W & five welding modes. This kit is perfect for both professionals & DIY experts.
The package includes the following:
- A Stud Welder
- A Slide Hammer
- Various Studs
- Other Accessories
You’ll receive everything you need for a successful repair job.
Features of VEVOR Stud Welder Dent Repair Kit
- High Power Output: This dent repair kit has an 800W power output. It provides strong & consistent performance. Hence, it’s suitable for all types of dent repairs.
- Five Welding Modes: The kit has five different welding modes. It allows you to adjust the settings based on the size & location of the dent.
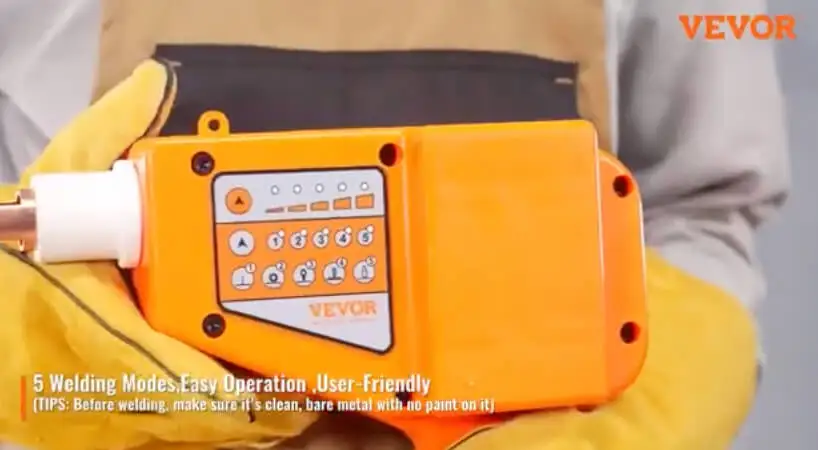
- Complete Kit: The package includes everything. For example, a variety of studs, a slide hammer & other necessary accessories. Hence, you’ll have everything you need for effective dent repair.
- User-Friendly Design: The welder is designed in a user-friendly way. It has an ergonomic handle & easy to use controls.
Step-by-Step Guide to Use VEVOR Stud Welder Dent Repair Kit
Step 1: Preparation
First of all, you have to clean the dented area thoroughly to remove any dirt, grease, or debris. This step gives you a clean surface for the welding process. The studs will adhere in a better way.
Step 2: Set Up the Welder
Now, plug in the stud welder. Select the appropriate welding mode based on the size & location of the dent. Refer to the user manual for guidance on choosing the correct setting.
Step 3: Attach the Studs
Next, you’ll place the welder’s tip on the center of the dent. Press the trigger to weld a stud onto the metal surface. Hold the trigger for a few seconds to ensure a strong bond. Repeat this process by placing studs around the dent in a circular pattern.
Step 4: Use the Slide Hammer
Now, attach the slide hammer to one of the welded studs. Pull the hammer outward with a steady & controlled motion to pull the dent out. Continue this process with each stud until the dent is removed & the surface is level.
Step 5: Remove the Studs
Once the dent is removed, use pliers to twist & remove the studs. Sand the area lightly to remove any remaining adhesive & prepare the surface for painting.
Recommended For Your Project
Frequently Asked Questions
What types of dents can the Stud Welder Dent Repair Kit fix?
Our stud welder dent repair kit can fix a variety of dents. For example, those on doors, fenders, hoods & other metal surfaces of vehicles.
Is the Stud Welder Dent Repair Kit suitable for beginners?
Yes. The kit is user-friendly & comes with detailed instructions. Hence, it’s suitable for both professionals & beginners.
Can I use the Stud Welder on aluminum surfaces?
No. This stud welder can be used only on steel surfaces. So, it’s not suitable for aluminum.
Final Thoughts
The VEVOR Stud Welder Dent Repair Kit is a powerful tool that makes dent repair easy. It doesn’t matter if you’re a professional or a DIY expert. This kit provides everything you need to restore your vehicle’s body to its original condition. It has a high power output, multiple welding modes & a complete set of accessories. So, you’ll be able to handle any dent repair job with confidence.
Visit our website today & enjoy the benefits of a professional-quality repair tool!

