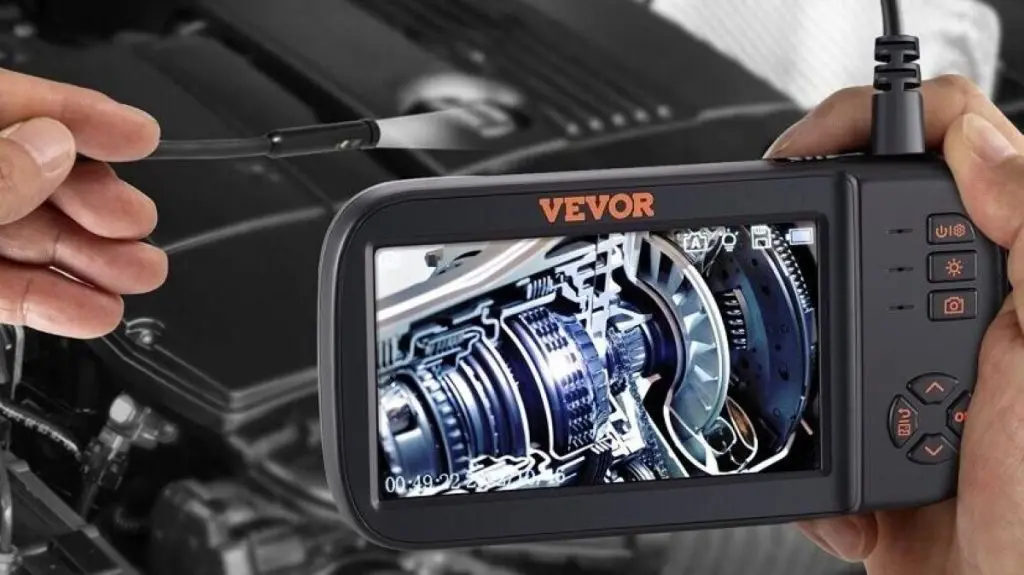
Inspections often require specialized tools to see hard-to-reach areas effectively. You might be trying to identify problems within pipes or machinery where visibility is limited. It’s a challenging task without the right equipment. But, VEVOR’s Triple Lens Endoscope Camera is the solution to all your inspection needs. Unlike regular cameras, it comes with three lenses. It allows you to explore tight spaces which are not accessible to the naked eye. So, it’s the perfect choice for plumbers, mechanics and DIY tasks at home.
@vevor_us ✈️FREE SHIPPING📦 Where curiosity meets clarity.👀 📹: @MuscleCarSolutions #vevor #tools #vevorttshop #endoscopecamera #powertools
♬ original sound – Vevor_US
Let’s explore 6 amazing features of this triple lens camera. We have also shared a 7-step guide to help you operate this tool.
Table of contents
6 Features of VEVOR Triple Lens Endoscope Camera
The VEVOR Triple Lens Endoscope Camera is the best one in the market for several reasons. Here are the main features that make this tool exceptional.
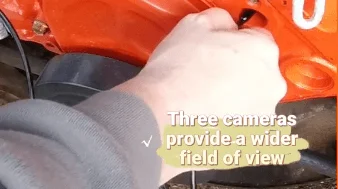
1. Three Lens Technology
The VEVOR Triple Lens Endoscope Camera has three cameras that provide a wide 180° field of view. This means you can see more areas at once. It makes it easier to spot details without moving the camera around.
This feature is especially useful for thorough inspections in tight or hard-to-reach spaces.
2. HD Display
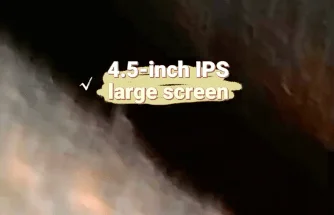
This camera comes with a 4.5-inch screen that shows images clearly and brightly. Its 1080P resolution means you can see even tiny details. In this way, inspections become much more accurate.
This high-quality display helps you catch small issues that might be missed, with lower resolution screens.
3. Waterproofing & Durability
The Triple Lens Camera is made to be waterproof with an IP67 rating. So, it works well in wet environments without getting damaged. It has a strong and durable structure. It can withstand harsh conditions and last a long time.
This makes it a reliable tool for different types of inspections in tough situations.
4. LED Lights
This camera has adjustable LED lights that brighten up dark areas. This means you can see clearly even in poor lighting conditions. This makes inspections easier & more effective.
The adjustable brightness ensures you get the right amount of light for any situation.
5. Extremely Easy Interface
Using this triple lens camera is so simple due to its easy-to-use interface. You can easily switch between camera views and adjust the settings.
You can start using it right away without spending time figuring out complicated controls. This makes inspections smoother and extra efficient.
6. Versatile Applications
This camera is perfect for many tasks like:
- Fixing pipes
- Working on cars
- Maintaining HVAC systems
- Checking homes
Its ability to handle different jobs makes it really useful for anyone who needs to inspect things regularly.
If you’re a plumber, mechanic, technician, or homeowner, this camera can be a handy tool in your collection.
7 Steps To Use Lens Endoscope Camera
Using this equipment is so simple. Follow these steps to get the most out of your inspection tool.
Step 1: Power On the Device
- Charge the Battery: First of all, you have to make sure the battery is fully charged to provide up to 4 hours of continuous operation.
- Turn On the Camera: Now, press the power button located on the device to turn it on. The 4.5-inch IPS screen will light up. It indicates that the device is operational.
Step 2: Select the Desired Camera View
- Front Camera: This view is ideal for forward-facing inspections. It provides a clear and direct view of the area.
- Side Camera: This one is perfect for inspecting side walls or around corners without moving the camera too much.
- Dual View: Use this mode for a comprehensive view. You can combine both the front and side cameras for a 180° perspective.
Step 3: Adjust LED Lights
- Locate the LED Adjustment Button: This button allows you to adjust the brightness of the LED lights that are built-in.
- Set the Brightness Level: You can adjust the LEDs to the desired brightness level. This ensures that you can clearly see in dark or poorly lit areas. Proper lighting is important for accurate inspections.
Step 4: Insert the Camera into the Inspection Area
- Prepare the Inspection Area: You have to make sure the area is ready for inspection. This way you can clear any barriers.
- Insert the Camera: Now, gently insert the camera into the space you want to inspect. The flexible 16.4-foot (5-meter) cable allows for deep insertion into pipes, ducts, or other confined spaces.
- Navigate Carefully: You’ll move the camera slowly to avoid damaging delicate components or getting the cable stuck.
Step 5: Monitor the Display
- Watch the Live Feed: The 4.5-inch IPS screen displays a clear, real-time feed of the inspection area. You will use this to navigate & inspect thoroughly.
- Use Zoom Function: If needed, you can use the zoom function, to get a closer look at specific areas or details. This helps to identify small issues that might otherwise be missed.
Step 6: Capture Images or Videos
- Capture Button: You have to press the capture button to take high-resolution photos or record videos of the inspection area.
- Document Findings: This feature allows you to document issues for further analysis. It’s because high-quality images and videos are essential for accurate diagnostics.
Step 7: Review and Save
- Review Footage: After completing the inspection, you can review the captured images and videos directly on the device.
- Save or Transfer Files: You can save the files to the device’s memory or transfer them to your computer via USB for further analysis and documentation.
3 Bonus Tips For Effective Use of Endoscope Camera
- Maintain the Camera: You have to regularly clean the lens and body of the camera. Use a soft, damp cloth to ensure clear images and prevent damage. Don’t use any harsh chemicals for this purpose.
- Optimal Conditions: You can use the camera in temperatures ranging from -10°C to 50°C for best performance. Avoid exposing the device to extreme conditions that can possibly affect its functionality.
- Storage: You should always store the camera in a safe, dry place when not in use. Proper storage will extend the life of the device and maintain its performance.
FAQs About the VEVOR Triple Lens Endoscope Camera
Is the camera compatible with all operating systems?
Yes, the camera is compatible with most operating systems, like Windows and Mac. You can easily transfer files via USB.
How long does the battery last?
The battery provides up to 4 hours of continuous, use on a full charge. This makes it suitable for extended inspections.
Can I use the endoscope in extremely hot or cold environments?
The camera is designed to operate in temperatures ranging from -10°C to 50°C. This ensures reliable performance in various conditions.
What is the maximum length of the cable?
The endoscope comes with a 16.4-foot (5-meter) cable. It allows you to reach deeper areas that are hard to access.
How do I clean the camera after use?
Use a soft and damp cloth to clean the camera. Avoid using harsh chemicals that can damage the lens or casing.
Summary
The VEVOR Triple Lens Endoscope Camera is the best tool for performing detailed inspections in difficult environments. Its advanced features make it a top choice for professionals and hobbyists. No matter if you’re fixing pipes, checking engines, or inspecting homes. This camera will provide clear images and reliable performance.
Visit our website today & upgrade your inspection capabilities!