Isn’t it empowering to have weather details at your fingertips? With an efficient weather station, you can accurately predict what to expect for the day in the comfort of your home right before you step out. But that’s not all. Proper weather station mounting is equally important to maximize the utility of your weather station and never run out of forecasts for the day.
VEVOR weather stations are the reliable choice for your weather forecasts, whether you’re an aspiring meteorologist or just someone who loves to have prior knowledge of outdoor situations at all times. This article is your window into the world of handling, maintaining, and knowing where to mount a weather station.
Let’s get right into it.
Table of contents
Understanding Weather Station Mounting
One of the first questions a new weather station owner has is how and where to mount a weather station so it can hit the ground running. Mounting a weather station basically involves strategically placing it on a stand or surface to safely and securely install it to withstand harsh weather conditions outdoors or in movements inside the home.
Correct weather station mounting is crucial for the user to gather accurate data, as a weather station’s height and surrounding environment can affect your final result. Your weather station needs to be free from physical obstructions and positioned correctly for the sensor to properly analyze these weather elements clearly.
According to experts, mounting stations must be at least 6 feet off the ground and 30 feet away from nearby obstacles for any reading to be accurate for interpretation and final usage.
There are various ways for a weather station user to mount this simple machine depending on their location, resources, and accessibility-from mounting on the roof to using a tripod or attaching the station to a wall for easy access. A weather station brings the best of weather reports to your home, and now you can see all the facts for yourself.
Best Locations for Weather Station Mounting
Procuring the right location to mount your weather station is pivotal to data collection. Wherever you choose for your station, it must be safe, accessible, and open enough for your reach in case it needs a quick fix or maintenance.
Mounting on Roofs
The roof is a great spot for mounting a weather station. It gives it unrestricted access to the sky and its elements, allowing you to get accurate data readings. It’s easy to get it higher than any nearby obstructions.
A weather station roof mount usually comes in two types—flat or pitched. While flat roofs work well with tripod stands, pitched roofs require a side mount. However, your weather station must come with straps to help secure it on the roof, as reaching it as often as you’d like for maintenance could be challenging.
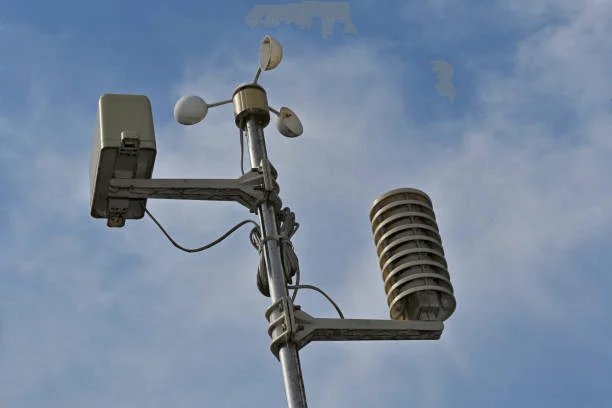
Mounting on Poles
You can mount your weather station on a pole or mast, which comes in different heights and ranges from only a few inches tall to hundreds of feet for professional use. This is a very popular choice as they provide height and are usually erected away from obstruction.
Fixed poles are great for mounting a weather station permanently while telescoping poles have adjustable features that provide easy maintenance. If you’re in a windy area, always ensure your poles or masts are put in place with guy wires or buried in concrete to ensure peak stability.
Mounting on Walls
A shaded wall can be a good idea for your weather station. It’s a great way to be prudent with space if you don’t have much, and you can also easily access it for maintenance and calibration purposes.
However, when mounting a weather station on the wall, avoid placing it near artificial heat sources like an air conditioning unit or a smoke outlet, as this can lead to inaccurate temperature results.
Factors to Consider When Choosing a Mounting Location
The following factors will make or mar the overall function of your weather station when it is time to mount them, which is why they must be strongly considered.
Elevation
One of the effective weather station mounting ideas is placing it somewhere high enough, and it’s not rocket science why this is recommended—more elevation equals better reach. Your rooftop, chimney, or even extended balcony may be the right spot for your new tool.
The World Meteorological Organization (WMO) recommends that your temperature sensors be situated about 1.25 to 2 meters above the ground. This is to prevent contact with surfaces that can absorb and radiate heat, such as concrete or asphalt.
Distance from Obstacles
Your weather station must be placed free from all blockades, which means the ideal location should be at a horizontal distance of four times the height of the nearest possible obstruction and, at best, an open area.
When mounting a weather station, always factor in the distance. Proper exposure will enable your sensors to measure weather elements accurately. Tall trees, fences, and buildings are not your ally in this scenario, and if you can’t avoid them, consider changing your mounting method to a lower but equally functional one.
Accessibility for Maintenance
Can you readily reach your weather station when you need to fix an error or adjust a feature? You must consider this when deciding where to mount a weather station.
This will usually pose an issue for people who mount their weather station on the roof. Except in unavoidable situations, we encourage you to consider the roof as your last resort if you need a mechanism in place to solve the height issue. You can consider a tripod stand, But if you’re stuck with a roof, a telescopic ladder can help with your height difficulty.
Weather Station Mounting Ideas
Still exploring where to mount a weather station besides those indicated here? You’re in luck! Try these creative and practical mounting solutions for your weather stations that are far away from the typical poles, roofs, and walls.
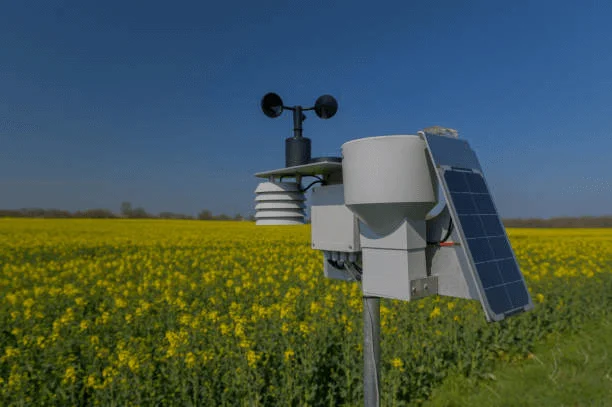
- Solar Panel
If your weather station is rechargeable, consider situating it where the solar panels are exposed to enough sunlight to make recharging batteries easier or just powering up your pack.
- Tripods
Use tripods or stake kits for portable and adjustable mounting solutions, especially if it’s a temporary installation; just ensure your tripod is securely attached to the ground and provide extra security with weight bags and anchors.
- Chimney
This is a variant of mounting a weather station on roof, but more fashionable and stable.
Your home chimney is not just for getting the smoke out, it’s also great for weather station mounting. Secure it with a chimney mounting kit to provide your station with more space for clear exposure and great height. However, make sure the chimney is not in use anymore, as the heat and smoke can tamper with your station’s reading.
- Fence Post
Your fence post can also serve as a holder for your weather station, which is a great way to save space and money on mounting materials. Simply choose a stable fence post in a clean environment, and you’re set.
- Balcony
Yes, your railing can work as a weather station mounting spot with the right supporting tools. Put those brackets to use and watch your station get to work, but make sure the railing is stable enough and does not get much attention from busy feet (vibrations).
How to Install a Weather Station
Proper installation is necessary when mounting a weather station to ensure accurate data collection and protection of your purchase—because weather stations can dip into your purse a little.
Tools and Materials Needed
The following are the tools you need for mounting a weather station.
- Drill
- Adjustable wrench
- Thermometer
- Humidity sensors
- Screwdriver set
- Bubble level
Step-by-Step Installation Guide
Stay with us for instructions on how to get your station up and running in a few steps. Ensure you pick a location free from trees, tall buildings, or other factors that can interfere with the accuracy of your station readings.
- Begin the process of weather station mounting by installing a stable and strong mounting system for your weather station, ensuring it’s tightly secured to the ground or building.
- Proceed to mount the various sensors at the recommended heights and orientations. The temperature and humidity measurement should be 1.5 to 2 meters above ground level, while the wind sensor should be higher, like 10 meters above ground level, to avoid obstruction.
- Connect your sensors to the weather station console with the cable. Refer to the user’s manual for relevant connection tips. Depending on your weather station power source, always ensure there’s a constant power supply for your station to continue functioning.
- After calibration, proceed to install important apps provided by the weather station on your cellular to help you monitor collected weather data.
While it may be a bit difficult to follow installation instructions completely, you must avoid mounting a weather station at the nearest convenient spot you can find. Doing so will cause an incorrect sensor placement issue, which will defeat the purpose and give you inaccurate readings.
Failure to maintain your station properly, inadequate covering of your sensor from weather elements, and ignoring the user’s manual guidelines are to be avoided during and after installation.
Testing and Calibration
Once you’re done mounting a weather station, you must test-run it to ensure all the sensors perform their function. To confirm the accuracy, take a step further by comparing your reading with existing data from a weather website or another weather station.
It’s also important to calibrate the temperature, humidity sensors, and anemometer according to the manufacturer’s provisions to ensure you always get accurate feedback and reliable readings.
Recommended For Your Project
Maintenance and Troubleshooting
Regular maintenance and inspection after mounting a weather station will keep it clean, ensure it stays in good working condition, and give you your money’s worth.
- Always check your cable, connections, hardware, and sensors ot quickly spot rust or corrosion, so your weather station does not fall and lose important parts.
- You can clean stiff anemometers and wind vane with a mixture of soap and water so they spin quickly. Use a damp cloth to wipe down your solar panels to remove trapped debris and loose dirt so they continue to charge your weather station well.
- If your rain gauge is acting up, you can run a quick test with a fair volume of water and wait until the gauge tips. If you don’t get any feedback, call a professional.
- When your sensor is exposed to direct contact with sunlight, the temperatures might tamper with the readings, so always check to see if the radiation shield is fully in place and manually recalibrate the sensors if the readings are inaccurate.
- Do not attempt to fix complicated issues after weather station mounting, no matter how much of a DIY enthusiast you are. If the process is not included in the user’s manual, contact the nearest professional for help.
Conclusion
Mounting a weather station in your home is an excellent, stress-free, and reliable alternative to relying on commercial weather stations that are far from your reach. However, it is very important to mount them properly for correct readings and, most importantly, purchase a high-quality and reputable one.
Consider exploring VEVOR weather stations for accurate and reliable weather data. Its fascinating features such as real-time data transmission that covers up to 150 meters and is suitable for various places, smartphone and computer monitoring, alerts and alarm clock functions, and data sharing.
The station is powered by a 7.5” large display screen to monitor weather changes at a class, and rechargeable Ni-MH solar-powered batteries give you an immersive experience. Enter the world of productive weather exploration at the tip of your finger, right outside your doorstep or above your roof, with VEVOR’s range of weather stations.